1/48 Revell AT-6 Texan

Ad: This forum contains affiliate links to products on Amazon and eBay. More information in Terms and rules

fubar57

General
32,242
18,450
Nov 22, 2009
The Jungles of Canada
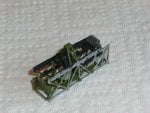
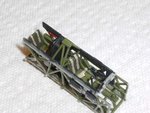
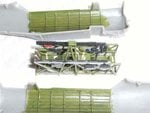
After much deliberation, this is the plastic that I chose as my attempt to start AND finish a model. I like odd schemes and whilst trolling the interwebs I found this RNFLAF Harvard.

RNLAF.jpg


"This is perfect" said several voices in my head. Why have I never heard of the RNFLAF and all these fantastic color schemes. Well...like instructions, I bypassed a disclaimer several times that said this site should not be taken seriously but this is my subject. The build will start slow as I go away to work for 5 days and then, do to a serious lack of brain cells in my companies collective heads, they are sending me to Arizona, U.S.of A. for a week to become a haul truck instructor for the new fleet of trucks they are getting. This after I told them four times in 3 days that I will probably be quitting and going to another job by the end of the year.(Resumes are already sent:shock:) For your viewing critique, I send these photos. The decals are going to be made with Paint.net to repaint over scanned roundels and won't be exactly like the picture.(They must have had more than one) Also included is a link to the RNFLAF web site. A word of warning about the name on the Spitfire and Kingfisher. It is the name of a town in Newfoundland.:deathlyobsessed:


www.vintagewings.ca/VintageNews/Sto...-Black--The-Royal-Newfoundland-Air-Force.aspx
 

Attachments

  • d1.jpg
    d1.jpg
    41.6 KB · Views: 491
  • e1.jpg
    e1.jpg
    41.6 KB · Views: 363
  • harvard3.jpg
    harvard3.jpg
    20 KB · Views: 348
Last edited by a moderator:
At a somewhat less than glacial pace, I submit these photos with hopes that more will follow a bit more quicker. The first pic show my first ever attempt to add a wiring harness made out of 24 gauge beading wire. I'll add the plug wires and finish paint touch-up and wash when I get back from work next week.(We've already had snow there last week) Pic 2 shows a test fit of the made to be lowered flaps and the fit like a dream. A quick tour of the interwebs and I could find no photos of Texans parked with flaps lowered...sigh. These will be hacked off and fitted before painting. Pic 3 has the fuselage together and for the most part everything is almost perfect. Pic 4 shows the almost part. This is my fault and the area will be bombarded with filler next week as well. I've looked a photos for the engine on the web and have seen a variety of colors for the harness. Most of them are restorations so I'm wondering if someone can set me straight
new 1.jpg
,
new 2.jpg
new 3.jpg
new 4.jpg


Many thanks, Geo
 
Last edited:
My favorite aircraft. As far as the engine, I checked with a number of websites showing photos of the R 1340 and find that your engine is close. As for the ignition harness, I would go with either a dull gray or rubber colored wiring.
 
Last edited:
A few more pictures of what just about became a Cat.5 model. Remember the flaps that fit flawlessly in the open position but pix on the interwebs showed that the flaps were up when parked. I'm sure that if I searched around some more I could find one with the flaps down. I cut the tabs off and wouldn't you know it, nothing fit. Scalpel, sand, fit, repeat. Anyhoo, on to what got accomplished.

Picture #1 shows my weapon of choice for self-inflicted gaps. Stuff sets up pretty fast and sands good using wet/dry.
DSCF11701.jpg


#2 is a 5:00am unintentional slathering of said product.
DSCF11711.jpg


#3 is my attempt, re-attempt, and re-re-attempt at trying to make stretched sprue plug wires (suckers are 3.5 mm). 2 hours later and I can barely see them. I noticed a short wire when I was resizing the photos and will sort this out later.
DSCF11771.jpg


#4 and #5 show initial sanding with 400grit and will be finalized later. Finally, the tail parts were added. I use Blu-Tac or similar poster putty to keep the parts even during the glue drying process.
DSCF11781.jpg

DSCF11791.jpg

DSCF11831.jpg


Thanx all for the comments and hopefully tomorrow I can add some more photos after I belabor the flaps into position.

P.S. Is there somewhere on this site to show me how to properly set these pages up? Everything looks good until I hit submit and then chaos sets in, a little different each time.:oops:


Geo
 
Last edited by a moderator:
Coming along nicely there.
Regarding the page set up, if you mean the order the pics are in, then select each pic as normal, and hit upload. the pics should then appear in the box at the bottom. if not in order, use the 'mouse' to drag them around as required and, when satisfied, click on 'Done'. Then click on the 'post' button as normal.
 
Thanks Airframes. This time, after I typed in the text, I added the photos and and when I hit post, they appeared before the text. First time this has happened. Also trying to figure out how to edit so that half a sentence doesn't appear at the bottom of a photo.


Geo
 
P.S. Is there somewhere on this site to show me how to properly set these pages up? Everything looks good until I hit submit and then chaos sets in, a little different each time.

I have edited your post.Is that the effect you wanted to achieve in the post #17?

BTW. A good work so far.
 

Users who are viewing this thread

Back