Avenger II, 857 Squadron, FAA, HMS Indomitable, December 1944, Group Build.

Ad: This forum contains affiliate links to products on Amazon and eBay. More information in Terms and rules

You know Terry, for some one who doesnt like Pacific area aircraft I think in the long run youve learned lots even without my help and your aircraft shows that from what Ive seen. If you do decide to do another one let me know and I would be more then happy to help out again or any other aircraft you are not familar with that you would like to learn. I know I enjoyed this and I didnt build the aircraft!!!!

I think a Wildcat would be nice.


:)
 
Doing great Terry.....you must come out into the light mate....Japanese , Russian...etc, there is some interesting stuff to model!:D

and with Paul at your back suppling the data, we may convert you sooner rather than later!

Well done in the supporting role Paul!
 
Doing great Terry.....you must come out into the light mate....Japanese , Russian...etc, there is some interesting stuff to model!:D

and with Paul at your back suppling the data, we may convert you sooner rather than later!

Well done in the supporting role Paul!

Thanks Wayne!!!
 
I agree with all, a big thank you to Paul! Brilliant work mate, and not just for my stuff either.
Sorry guys, but I just don't find the Russian or Japanese aircraft intersting or attratcive enough to build, although I've always wanted to do a 'what if?' with a Zero in Luftwaffe colours.
As for the Wildcat, you can all P**s off!!

Humm, well the additude seems to fit the wild cat. Sounds to me like he's warming up to the idea!!!!


:lol:

Well maybe not!!!!
 
Yes, I used a square block of plastic, actually one of the electrical boxes cut from the other side of the floor. When you position the seat, check that it will clear the edge of the canopy on the port side, as this angles in quite steeply. I fitted mine after the fuselage was joined, so that I could use the rear bulkhead (the one with the framed transparent top) as a guide to the canopy angle.
Have a look at your other post, I've posted something about the rear fuselage windows that might help you.
 
The first paint has now been applied.
The Avenger II was built by the Eastern Aircraft Division of General Motors, at their Trenton plant. Unlike Grumman, who used British FAA colours, Eastern used equivalent colours, substituting Sky Gray in place of the British colour, Sky, for the undersides. I mixed this to an approximation, using Humbrol enamel matt White with a touch of matt Black, adding matt Light Blue 65 until the hue looked acceptably like that seen in colour pics and profiles.
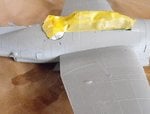
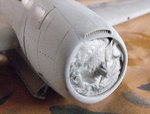
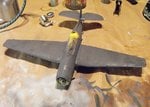
The cockpit, turret housing, bomb-bay, engine and rear fuselage windows were masked with Tamiya tape and dampened tissue, and the starboard side entrance hatch was fitted, lightly tacked in place with a drop of PVA adhesive, so that it can be easily removed later, to be fixed in the open position. PICS 1 and 2.
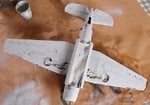
PIC 3 is a general view showing the beginings of some post-shading and fading/weathering. This was achieved by spraying a single coat of the Sky Gray, slightly darker than required, then, when dry, misting over the wings with a slightly lighter shade. When this was dry, a further thin coat was applied to the centre of some wing panels, feathering outwards towards the joins. These will later be weathered a little more before some panel lines and access hatches etc are outlined in feint pencil.
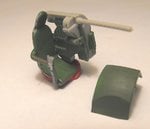
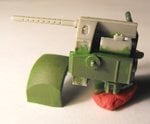
Pics 4 and 5 show the kit's turret under construction, with the gunner's seat and main frame painted Interior green. Some scratch-built details will be added here, before the ammunition feed, .50 cal gun, shell ejector chute and other fittings are painted, and the armoured glass screen and sight added. The whole assembly will then be mated to the beautifully moulded turret transparency, which has the framework correctly profiled and detailed, but will not be installed until the model is finished.
The next job is to apply the 'equivalent colours' wave-pattern camouflage of Olive Drab and Sea Gray, which will be sprayed free-hand, as the Avenger II had a soft edged demarcation between colours. So that should be an interesting exercise!
More soon, once I get that job out of the way!
 

Attachments

  • PTO Build 209.jpg
    PTO Build 209.jpg
    40.9 KB · Views: 104
  • PTO Build 210.jpg
    PTO Build 210.jpg
    50.4 KB · Views: 100
  • PTO Build 202.jpg
    PTO Build 202.jpg
    40.9 KB · Views: 99
  • PTO Build 217.jpg
    PTO Build 217.jpg
    25.3 KB · Views: 100
  • PTO Build 215.jpg
    PTO Build 215.jpg
    26 KB · Views: 102
Thanks Cory, yours is coming on apace I see.
My sleep pattern is up the spout again, so I've done the first stage of the upper-surface camouflage colours.
The demarcation between upper and lower surfaces was masked with Tamiya tape with the exception of the vertical sweeps up to the wings and tailplanes, more to give a guide line really, as the colours on Avenger II's were 'soft edged'. Tape was also applied to the underside wing to fuselage and tailplane to fuselage joints, to prevent the possibility of overspray, then the entire uppersurfaces were sprayed in 'Sea Gray', the 'equivalent colour' for FAA Dark Slate Grey. This was mixed using Humbrol Matt Grey 27, with a spot of Matt White and a touch of Matt Dark Green 30.
The colour was built up gradually, starting with a fine mist overall, and gradually getting heavier, especially on the vertical surfaces of the fuselage and fin, and those areas that would be in shadow. The rudder, with the section from the area that will be level with the tailplane, to the base, already sprayed in Sky Gray, was painted separately.
The PICS show the paint still drying, and hopefully it will eventually display a slightly uneven, patchy finish. Once the second colour has been applied, in a similar fashion, the patchy effect will be enhanced slightly, to provide the basis for a weathered and faded look, before doing the panel lines, and any post-shading that might be felt neccessary.
The model has now been set aside to dry thoroughly before the next colour is applied, and meanwhile, work will continue on detailing the turret, landing gear and bomb load.
Progress seems to be rapid, but I've estimated that approximately 75 to 80 hours have been spent so far, with a lot more time yet to be dedicated to weathering, decalling and detail work.
Thanks again for your interest, and if anyone is considering this kit, from either source, I can thoroughly reccommend it; the fine detail is possibly the best I've seen on any kit I've ever built, especially the surface detail.
 

Attachments

  • PTO Build 219.jpg
    PTO Build 219.jpg
    53.5 KB · Views: 97
  • PTO Build 225.jpg
    PTO Build 225.jpg
    41.2 KB · Views: 99

Users who are viewing this thread

Back