**** DONE: 1/48 Blackburn Roc – Sqn Ldr Clark RAF. BofB Group Build. (1 Viewer)

Ad: This forum contains affiliate links to products on Amazon and eBay. More information in Terms and rules
Thanks Wayne, Terry and Jan am almost back on track though had to have a biopsy later today which has destabilised life a little. hope to be back hard at it again tomorrow.:lol::lol::lol:
 
Thanks for the good wishes folks and glad to have you back H.

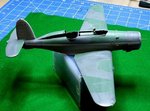
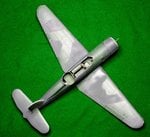
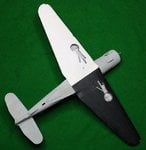
Got to the end of a few days in the spray booth today, pics following. Need to touch up a number of things and add the essentials, like wheels.....................so quite a bit more to do yet before I start on the decals.

101026-1A.jpg
101026-1C.jpg
101026-1D.jpg
101026-1E.jpg

Some of you may be thinking this is an unusual camo for a BofB machine. Though it was on RAF inventory, the aircraft came under the admiralty who were more concerned about battle ships than aircraft, consequently the FAA tended to go their own way using a two tone grey (slate and sea) with sky as the colours. Even then, individual squadrons interpreted this in their own way and even within a squadron, colours varied considerably in the earlier months of the war.
 
Thanks guys, glad you like the ugly beast kind of growing fond of it myself. :lol: :lol:

Looking good Vic. Will you be applying a flat coat once all the decals are on?

Sure will my friend, after the decals have been applied I'll give it another coat of 'One Go' and then do a spot of finishing and a little touch of weathering then on with a coat of clear silk finish.
 
Good plan. I was asking because of the apparent difference in reflectiveness of the green and gray that show up in the pics. Sounds like this should even out nicely.
 
Thanks Bill, much appreciated.

Good plan. I was asking because of the apparent difference in reflectiveness of the green and gray that show up in the pics. Sounds like this should even out nicely.

I understand your curiosity Andy and I have to say that despite spraying the thing a number of times with a light coating of 'One Go' the local equivalent to 'Future', the problem of a part shin and part dull paintjob remained. Not sure if it's something to do with the pigment in that grey paint, which by the way had been thinned down many moons ago, so it could have been effected by the thinners used or if it is something to do with the 'One Go' as this is not the first time it's happened.

I've got the decals on and given it yet another 'One Go' spray and it is still the same. I just hope that the final silk spray with microsol will sort it all out.
 
I use Testors Dullcoat as a final finash over decals and, if the product you're using is similar, I should think that would cure the issue and that you should get a nice, conistent finish.
 
Yep, should do. I've found lately that Klear/Future will not give an even, gloss finish overall, especially if covering more than one colour. A clear matt/semi-matt/satin coat will certainly even it all out and cure the problem. I normally just mix Tamiya Flat Base with the Future, to obtain the desired final finish, ie, matt, semi-matt etc.
 
Yep, should do. I've found lately that Klear/Future will not give an even, gloss finish overall, especially if covering more than one colour. A clear matt/semi-matt/satin coat will certainly even it all out and cure the problem. I normally just mix Tamiya Flat Base with the Future, to obtain the desired final finish, ie, matt, semi-matt etc.

I like that idea. I'll have to try that some time. Thanks... :)
 
At last it's done :lol: :lol:.....and here is a preview. Will take formal pics tomorrow between rain showers, IF the sun comes out.

101101-1A.jpg

101101-1B.jpg

101101-1C.jpg

101101-1D.jpg


This last picture is trying to pick out the aerial, on this one I took an idea that Terry mentioned which I believe came from Wojetk's stable, I used a stocking thread and as you can see, it's very fine.

101101-1E.jpg
 

Users who are viewing this thread

Back