**** DONE: 1/48 Focke-Wulf Fw190 A-3 8./JG2 "Black 13" - Me/ Fw Group Build

Ad: This forum contains affiliate links to products on Amazon and eBay. More information in Terms and rules

Okay Wayne - hint taken!

I'll add some more brass things.

Pic 1
Here I've added some plastic card just behind the openings for the pitot and the MGFF guns to hold and support the brass fittings.

Pic 2
For the Pitot tube, I made a replica from 0.7 mm brass tube, with the tip made from 0.5 mm brass rod. I sanded the end of the tube to allow a transition from one to the other at a gentle angle, using the original plastic one as a guide.

Pic 3
The MGFF's are a bit tricky due to the flash suppressors on the end, so I went for the 'Master' replicas which are mighty fine.

Pic 4 and 5
Okay here's all the brass ready to go. I'll dry fit them and glue them in with CA later on, after painting. I'm happy with the result, and it's a mile in front of the plastic versions.

More soon.

Cheers

Peter
 

Attachments

  • wing brass 001 resized.jpg
    wing brass 001 resized.jpg
    71.9 KB · Views: 102
  • wing brass 002 resized.jpg
    wing brass 002 resized.jpg
    75.1 KB · Views: 111
  • wing brass 003 resized.jpg
    wing brass 003 resized.jpg
    145.4 KB · Views: 98
  • wing brass 004 resized.jpg
    wing brass 004 resized.jpg
    58 KB · Views: 101
  • wing brass 005 resized.jpg
    wing brass 005 resized.jpg
    42.4 KB · Views: 117
Thanks heaps Wojtek, Gnomey, CR, Wayne, Gerry, Vic, ABW and VB.

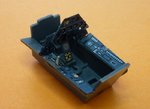
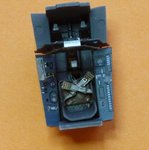
Todays update is focused on the cockpit.

Pic 1
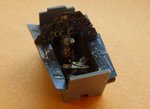
I originally had an early Eduard photo etch fret for this A3, and I've used a few bits and pieces from it, but when it came to the cockpit I decided to update to the newer coloured etch. It has better belts and instrument panels, and besides, somewhere along the line I had misplaced the instrument dial transparency for the earlier etch.

Pic 2
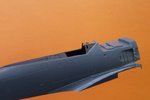
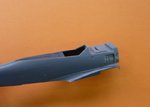
The advantage of the newer etch was a bigger instrument panel, but to get it in you must replace the cockpit coaming. Here's the plastic version in place.

Pic 3
Okay razor saw time. The coaming goes, and there is a bit if tidying up, but overall easy.

Pic 4
Once that was done I painted the cockpit RLM66 added the etch to the original plastic.

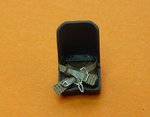
Pic 5
Pilots seat was also painted RLM66 with a leather coloured seat. Then I added the belts.

Pic 6 7
Okay, seat installed and ready for installation into the fuselage.


Cheers guys and more soon.8)
 

Attachments

  • etch 001 resized.jpg
    etch 001 resized.jpg
    60.7 KB · Views: 100
  • cockpit 003 resized.jpg
    cockpit 003 resized.jpg
    30.8 KB · Views: 104
  • cockpit 001 resized.jpg
    cockpit 001 resized.jpg
    34.4 KB · Views: 116
  • cockpit 002 resized.jpg
    cockpit 002 resized.jpg
    33.5 KB · Views: 95
  • cockpit 007 resized.jpg
    cockpit 007 resized.jpg
    62.9 KB · Views: 119
  • cockpit 004 resized.jpg
    cockpit 004 resized.jpg
    62.6 KB · Views: 95
  • cockpit 005 resized.jpg
    cockpit 005 resized.jpg
    55.4 KB · Views: 119
  • cockpit 006 resized.jpg
    cockpit 006 resized.jpg
    94 KB · Views: 91
Last edited:
Man-o-man, you are setting a real benchmark for my Fw190 for the Captured GB!
Cockpit looks like 1/32nd to me!
well done

Cheers Wayne and Bill

Mr Little is the one for setting benchmarks, I just fumble along! :oops: Your thinking ahead anyway Bill, that one doesn't start to November, in the meantime what are you going to pull out for the aces build?

Cheers

Peter
 

Users who are viewing this thread

Back