**** DONE: 1/48 ICM Spitfire Mk IX AE-B Ian Keltie of 402 SQDN RCAF Commonwealth GB

Ad: This forum contains affiliate links to products on Amazon and eBay. More information in Terms and rules

Vic, what I use is a needle in a pin vice. I use gloss white paint over the black base coat, applying a ring of white around the outer circumference of the dial, or dots where the numbers are sparse, and a dab of straight line for dials. At this stage, it looks pretty rough. I let the white set up for maybe 10 minutes, then come back and, usign the needle again, scratch away excess white to thin out the dials and numbers to look more to scale. All this under a strong magnifying glass/light fixture.
 
Thanks guys. Lotsa work on the cockpit sidewalls going on.

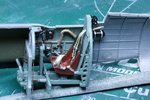
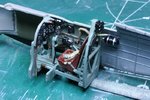
First pic is the finished right side of the cockpit. Several scratch built details are apparent. The lightbulb holder and bulbs are made from plastic card and melted stretched sprue. When held in a flame, the sprue burns into a nice little sphere. The hardest part was getting them the same size, which I didn't quite manage. Landing gear hydraulics were added from 30ga copper wire and oxygen hose was also added. Obviously the seat and control column have yet to go in.

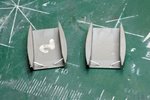
The final pic shows braces added to the the radiator flaps. I noticed these today while studying a Seafire closely at a local museum.
 

Attachments

  • 101205 Cockpit Right.jpg
    101205 Cockpit Right.jpg
    100.5 KB · Views: 121
  • 101205 rad braces.jpg
    101205 rad braces.jpg
    99.4 KB · Views: 116
Last edited:
B*gg*r, now I've got to match that lot! Bl**dy nice work Andy!
Check those Spit books I sent you mate, there is more detail on the radiators, front and back. Don't forget the de-icer pipes, and just check those braces - I think they should be joined to the rad bath itself, not on the shutter, but I'd need to check myself.
 
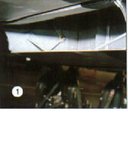
Thanks Terry. Here's a pic from your references and it's just like the Seafire 3 I was peering into this afternoon. I'll add the rad flap linkages as well I guess. The de-icing pipes will be added when I get close to putting the rad covers on as they'll be prone to breakage otherwise.
 

Attachments

  • Rad.jpg
    Rad.jpg
    16.5 KB · Views: 143
Vic, what I use is a needle in a pin vice. I use gloss white paint over the black base coat, applying a ring of white around the outer circumference of the dial, or dots where the numbers are sparse, and a dab of straight line for dials. At this stage, it looks pretty rough. I let the white set up for maybe 10 minutes, then come back and, usign the needle again, scratch away excess white to thin out the dials and numbers to look more to scale. All this under a strong magnifying glass/light fixture.

Thank for this info Andy, I'll give it a go when I next have just a basic panel to do. As for your latest pics mate, once again I see you have raised the bench marks. Good stuff.
 
Thanks Andy. I can see it now - the braces seem to run forward, attaching just to the front of the rad shutter hinge line. Maybe I should look at my own reference pics, then I'd see the actuating links!
 
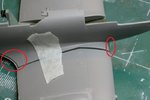
As a heads up to Terry amd Andy (Wildcat), here's something I discovered while trying to look ahead to potential fit issues. The wing root is going to present some issues with the fairing on the fuselage being significantly shorter than the wing chord at the root. I see lots of putty and sanding in my future....:cry:
 

Attachments

  • 101206 Wing Root Issues.jpg
    101206 Wing Root Issues.jpg
    56.2 KB · Views: 96
Thanks for the warning Andy! looks like any filler could be blended to represent the fillet trim, so hopefully we'll be able to get the job done without to much drama!
 
Andy, I realize I'm new at this but if you look at that photo just ahead of your tape, if you line the peak in the seam up I think the front of the wing will line up. It looks as if they cut the upper wing surface short in the curve at the rear of the wing. If I'm wrong I apologize.
 
Thanks guys. Cockpits all done now and the fuselage halves glued together at the rear half. Front has been left open for "adjustments" anticipated to be required.

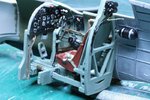
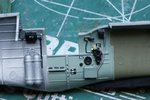
The first 3 pics are of the finished starboard side of the model. Since the last pic in this area, I've added the finished resin seat (which I know has a late war Q type harness - likely incorrect for this model) and the control column. The control column yoke has be cut and cranked to the right and firing button wires have been added from thin gauge copper wire and painted black. I had the seat nicely detailed with the rivets highlighted in silver only to find that, after gluing the seat in and spraying accelerator on it, the silver paint dissolved in the accelerator. I had to redo the rivets with the seat in place which was a bit more tricky. Behind the seat, the harness extension has been added with foil from a wine bottle and painted to match the resin belts which stopped at the slot through the armour plate. After the fuselage halves are together, I'll add the wires that pull the harness into the bowels of the fuselage. Also behind the seat, I added a couple of wires off the voltage regulator. Also, noticing that there was no headrest on this aircraft, I removed it and retouched the armour plate.

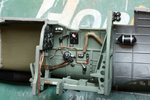
The final pic shows the port side of the cockpit. The added parts are the radio control box above and to the right of the throttle quadrant, the cockpit light above the throttle, some placards, a trim knob, camera controls, and the electrical box and wiring above the oxygen bottle.

Thanks again for checking in. Fuselage fitting fun coming up next.
 

Attachments

  • 101206 Cockpit Stbd 1.jpg
    101206 Cockpit Stbd 1.jpg
    113.1 KB · Views: 122
  • 101206 Cockpit Stbd 2.jpg
    101206 Cockpit Stbd 2.jpg
    115.5 KB · Views: 113
  • 101206 Cockpit Stbd 3.jpg
    101206 Cockpit Stbd 3.jpg
    118.2 KB · Views: 110
  • 101206 Cockpit Port.jpg
    101206 Cockpit Port.jpg
    98.7 KB · Views: 119
Great stuff Andy, and a timely reminder for me - I must remember to drill-out the seat supports! Knew I'd missed something!
Oh, BTW, the 'Q' harness was introduced in 1944 AFAIK, possibly late '43, on the MkIX on, so you should be OK. Making the same type on mine.
 

Users who are viewing this thread

Back