Vic Balshaw
Major General
I say Karl, damn posh mate.
Follow along with the video below to see how to install our site as a web app on your home screen.
Note: This feature may not be available in some browsers.
Ad: This forum contains affiliate links to products on Amazon and eBay. More information in Terms and rules
")
Being a cook, you should know that it's all in the prep!
never thought of it like that mate, very true though
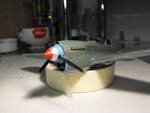
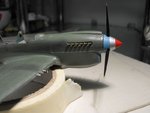
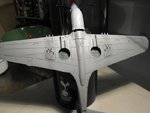
anybody have any thoughts on how weathered Hep Cat may have been, its hard to tell from the pictures i've seen !
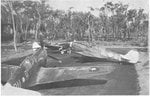
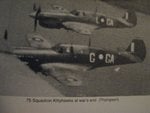
Good going Karl - As far as weathering goes you can go as far as you want I would say. It was the aircraft of the squadron CO, first Tolhurst and then Thomson. In the formation shot it appears to be either 'fresh' or to have been 'waxed' for a bit of extra speed, so it might have been kept in better nick than the other squadron aircraft. By the time they finished their stint in the islands they were all a bit worse for wear.8)
Cheers
Peter