**** DONE: 1/48 P-61A – Heavy Hitters II GB

Ad: This forum contains affiliate links to products on Amazon and eBay. More information in Terms and rules
correct night fighter nut, ETO only for the 422nd/425th and the 414 though later the Italien units changing out their mossies for P-61's but these were moved to these units so late in the war.
 
It's been awhile, but work is progressing on the 61.

Todays update.

Pic 1
I fixed up the missing pieces of the crew ladder by adding stretched sprue to the ladder. You can see the white pieces I have added. However getting the assembly off the sprue was a challenge, as the ladder was too fragile. In the end I sprung for some handy razor saws that you add to a scalpel. They did the trick and taking a lot of care.

Pic 2 3
New resin wheels. I started on the tires by first coating in mud brown and then added grey sides and black tread highlights.

Pic 4 5
Painted the crew seats, and then added the photo-etch belts. They come in plain brass and are included in the Great Wall kit. Once added I painted the belts "buff", latches aluminium and then added the stitching using a very fine felt pen. O.05 fine tip to be precise. I hope they look okay.

Cheers

Peter
 

Attachments

  • crew ladder 004 - resized.jpg
    crew ladder 004 - resized.jpg
    82.9 KB · Views: 122
  • wheels 001 - resized.jpg
    wheels 001 - resized.jpg
    68.5 KB · Views: 136
  • wheels 002 - resized.jpg
    wheels 002 - resized.jpg
    74.3 KB · Views: 128
  • seats - 005 resized.jpg
    seats - 005 resized.jpg
    71.6 KB · Views: 136
  • seats - 004 resized.jpg
    seats - 004 resized.jpg
    65.8 KB · Views: 139
Good stuff Peter, the tyres are looking the part. Me too on those saw blades - I've got various razor saws, but those blades for the Swann Morton handle will be very useful.
 
Cheers Guys!

Pic 1
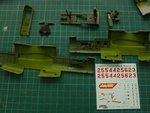
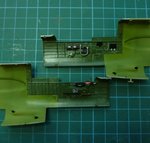
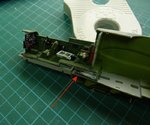
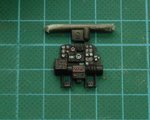
Okay - I've spent a bit of time painting the cockpit and interior areas. I did some shading and picked out the details. Lastly I gave everything a gloss coat in preparation of adding in the various placards and decals. Great Wall supply all the instruments as individual decals and a fair amount of the interior cockpit placards.

Pic 2
This pic shows the various placards in place. Instructions are straight forward but the wording on the decals is to say the least, unusual. "peoplesweetdgrot" "lookatthate" "CFJGHS" are all finely printed! Amazing. For all the work put into the detail of this kit. Still, I guess once all in place, no one will ever know.

Pic 3
Instrument panel done. One small instrument decal was a victim of Mr Setter. I covered everything over with a coat of matt and started the assembly of all the inner bits.

Pic 4
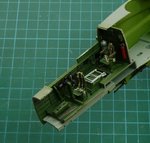
Everything's a bit tight, but it works, thank goodness!

Pic 5
Oh - forgot to say I added a black wash to the floor and parts, as well as some scuff marks to the floor.

Pic 6
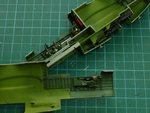
Before I close up I remembered to add some weight under the floor, and held in place with white glue. I probably will need to add some extra to the nose as well.


Cheers

Peter
 

Attachments

  • inside fuse - 009 resized.jpg
    inside fuse - 009 resized.jpg
    76.6 KB · Views: 123
  • instrument panel - resized.jpg
    instrument panel - resized.jpg
    95.9 KB · Views: 124
  • inside fuse - 002 resized.jpg
    inside fuse - 002 resized.jpg
    80.7 KB · Views: 109
  • inside fuse - 003 resized.jpg
    inside fuse - 003 resized.jpg
    84.7 KB · Views: 90
  • inside fuse - 007 resized.jpg
    inside fuse - 007 resized.jpg
    96.2 KB · Views: 131
  • inside fuse - 008 resized.jpg
    inside fuse - 008 resized.jpg
    84.2 KB · Views: 105
My goodness Pete, I clicked onto those tyres and thought they were the real thing, and looking at the rest………………marvellous!
 

Users who are viewing this thread

Back