bring on them decals...
Navigation
Install the app
How to install the app on iOS
Follow along with the video below to see how to install our site as a web app on your home screen.
Note: This feature may not be available in some browsers.
More options
You are using an out of date browser. It may not display this or other websites correctly.
You should upgrade or use an alternative browser.
You should upgrade or use an alternative browser.
**** DONE: 1/48 Spitfire MkVIII - Home Country Modern Aircraft/Spitfire Marks GB
- Thread starter Crimea_River
- Start date
Ad: This forum contains affiliate links to products on Amazon and eBay. More information in Terms and rules
More options
Who Replied?- Thread starter
- #302
Crimea_River
Marshal
Patience my friend....Before I get there, I have another question. Would the black walkway boundary leading out to the wing tip have been painted over by the white recognition band or would the stenciling have been replaced after the white was painted on? My thought is that if the white markings were added at the MU along with the Dark Earth paint, then the stenciling would have been re-applied. If at the squadron level, they would have been overpainted. Thoughts?
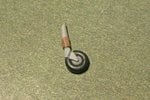
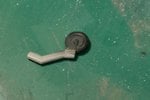
In the meantime, I decided to tackle the tail wheel so that I would not keep scuffing the paint at the back end. Pic 1 is the tail wheel as supplied with the kit, which represents the fixed tail wheel in the earlier models. With the VIII having a retractable wheel, the wheel assembly had to be modified. Pic 2 shows the modified tail wheel, which I did by simply cutting the slight crank off the strut and filing the cross section round. An oleo cuff was added with Tamiya tape and the whole thing painted and washed.
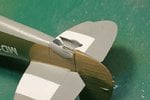
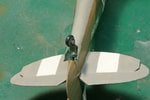
Pic 3 shows the kit supplied tail wheel doors substantially thinned by scraping and filing and the final pic reveals the finished assembly.
Thanks for looking in and I look forward to your thoughts on the stencil over the white.
Attachments
Airframes
Benevolens Magister
Nicely done Andy. It's almost certain that the white I.D. bands were applied at unit level, as they were a late introduction, therefore the walkway line and stencils would have been covered at these points.
Looking good Andy!
- Thread starter
- #306
Crimea_River
Marshal
Thanks guys. Terry, I appreciate the quick response. Makes things a bit easier as for some reason the decals ICM provided are asymmetrical and don't have the longitudinal line near the cockpit on the starboard side. Rather, the line along the wing main spar goes all the way across to the fuselage. Cutting this up for the white band will give me a stencils for this side.
well, that looks pretty good!
Vic Balshaw
Major General
Have just been catching up with this build Andy and I'm impressed with the way you worked through the markings, camo colours and your stencilling. Beautifully done and a good result.
N4521U
Plastic Pirate
Just looked back to your ser no. masks. I did something similar for the repair of the Halifax I did, mainly because the code letters were big. I used the plotter at the sign shop to cut them, but the mask material is used for lacquer based paint, and it didn't like acrylic. I did a test first tho and found if I used many very light coats it held up okay.
So it is an alternative. If you can create your stuff in Corel or Illustrator and take it to a sign shop, perhaps they can cut a mask for you. I am addressing anyone who reads this in following your build. There is a limit to size that can be successfully cut in a mask.
Your entry is coming along very nicely mate!
Airframes
Benevolens Magister
Andy, it's your choice, but I'd bin the ICM walk way decals, and mask and paint them instead. All of the fine-line similar ICM decals I've attempted to use (Spit and Bf109) have broken up into many pieces.
meatloaf109
1st Lieutenant
I had to put a coat of liquid decal film on mine.
brucejscott
Staff Sergeant
Looking very good.
- Thread starter
- #314
Crimea_River
Marshal
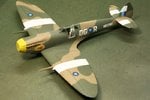
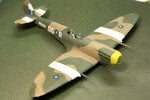
Thanks everyone. The ICM decals worked well this time. I know from experience with my Mk IX that they can be temperamental but I cut them up and applied the walk lines in sections and it went well. I brushed some Future over and around the decal to minimize the chance of silvering.
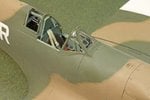
I finished the decals last night and today I applied a flat coat of Future heavily dosed with Tamiya flat base to get a nice dusty look. Here are the pics. The close up of the windscreen shows how the modification to the frame turned out. Looks pretty good I think but there's a small touch up of green needed close to where the mirror will go. Sorry about the tape I forgot to remove around the armour plate. Just noticed it when I edited the pic!
Next will be the application of some grime, oil, paint chips and scuffs but there'll be no progress now til Friday as I'm taking a few days R&R to go camping. Thanks for maintaining your interest and for your continued positive feedback. See you later in the week.
Attachments
Airframes
Benevolens Magister
That's looking the bog's dollocks Andy! Enjoy camping ... er, I mean ... not camping, but ...oh, you know what I mean!
vikingBerserker
Lieutenant General
WOW, that really made her jump out, NICE!
fubar57
General
Sweeeeeet.
Geo
Geo
- Thread starter
- #318
Crimea_River
Marshal
Cheers guys. Kinda like how it turned out myself,
Lucky13
Forum Mascot
Sweet!
Looks real good Andy 
Users who are viewing this thread
Total: 1 (members: 0, guests: 1)

