CommanderBounds
Airman 1st Class
Thanks Wayne! I need to replace my old adhesives as they're running low and they don't work as well as I'd like.
Follow along with the video below to see how to install our site as a web app on your home screen.
Note: This feature may not be available in some browsers.
Ad: This forum contains affiliate links to products on Amazon and eBay. More information in Terms and rules
Let you know more, Wayne, after my appointment with a Thoracic surgeon on the 30th.Charles
Thanks Wayne! I need to replace my old adhesives as they're running low and they don't work as well as I'd like.
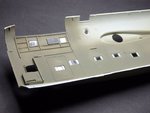
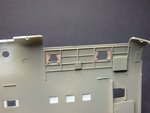
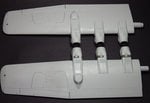
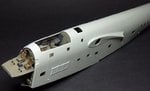
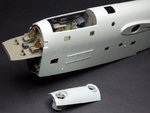
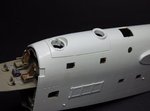
Looking sweet Wayne! Notice you didn't follow all the unusual fuselage interior colour call outs of the Revell instructions. I would say the RLM 02 would be the correct colour as well, so what d'ya reckon they based theirs on?
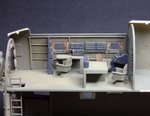
I like the curtains honeyAll is looking really good Wayne

Wayne, you are modeling it in flight?
Like every bit of it Wayne and the lighter interior should help to make some of it visible. Maybe a bit of lighting, fibre optics, plenty room in the fuselage for a battery!!