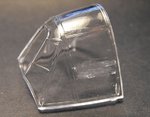
**** DONE: 1/72 Fairey Firefly AS5 - Your Favourite Aircraft of All Time GB

Ad: This forum contains affiliate links to products on Amazon and eBay. More information in Terms and rules

some further progress shots. now have the rockets attached. Still have to fix a damaged "K" on the tail, and might put the airframe Sns on the fuselage. there is a general tidy up, including fixing the propellor properly, but the modl is alsmot finished......,
 

Attachments

  • 000_0259[1].jpg
    000_0259[1].jpg
    37.6 KB · Views: 100
  • 000_0260[1].jpg
    000_0260[1].jpg
    38.8 KB · Views: 108
  • 000_0262[1].jpg
    000_0262[1].jpg
    39.3 KB · Views: 101
  • 000_0263[1].jpg
    000_0263[1].jpg
    44.5 KB · Views: 95
  • Fury final 0162[1].jpg
    Fury final 0162[1].jpg
    42.7 KB · Views: 99
Thanks guys, your comments really do help a lot. I am going a bit slow at the moment because of work comittments more than anything. There isnt much left to do, and I really want to get my Sea King kicked off, but work involves 10 hour days at the moment, whilst i am also build managing the construction of a new house....so just a little busy with other things.

I do hope to have this all finished and submitted by this weekend however.....
 
hi guys

its very, very late (past 3am), so this is just a quick message. have pretty much finished now, and undertook something i did not think I could do. One of the biggest dissapointments i had with this model was that despite a good start, i finished up marking both the front and rear canopies. I could not help but think a ruined canopy is a ruined model..... Tonite i unertook a task i did not think i could do....I tried to remove the glue stains from the canopies. Fashioned a micro sanding stick out of a cut off tooth pick with 2000 grade wet ans dry glued to the head. carefully sanded with wet and dry the affected areas of the canopies. Am very happy with the results. Not even close to perfect, but most of the ugly stains and marks are removed. It took a while, about 3 hours, but it is at least presentable now. im not going to win any prizes with this one, but i am still proud of the achievement to be honest.....this is the model that i learnt a lot of new stuff on.


I will go to sleep now.......
 
Well done Michael. If you want the canopy to now look as good as, or maybe better than new, give it a polish with 'T-Cut', or metal polish or toothpaste ( use the metal polish sparingly and lightly - toothpaste is no problem). Then wash off, and either dip the canopy in 'Future', or even give it a brushed coat of future. It should sparkle and look crystal clear.
Just to show that this works, here's a short series of pics of my 1/32nd scale Beaufighter canopy, where I had to remove some unwanted frames, then polish-out the scratches left after sanding with wet and dry. The yellowish mess on the canopy is 'T-Cut' (car body colour restorer), which was applied with a cotton bud, then polished. Once clear, and the residue cleaned off, the part was dipped in Future.
 

Attachments

  • MTO Build 002.jpg
    MTO Build 002.jpg
    41.3 KB · Views: 87
  • MTO Build 004.jpg
    MTO Build 004.jpg
    41.1 KB · Views: 89
  • MTO Build 352.jpg
    MTO Build 352.jpg
    53.2 KB · Views: 85
  • MTO Build 354.jpg
    MTO Build 354.jpg
    72.4 KB · Views: 92

Users who are viewing this thread

Back