**** DONE: 1/72 Supermarine Seagull V - Heavy Hitters II GB (1 Viewer)

Ad: This forum contains affiliate links to products on Amazon and eBay. More information in Terms and rules

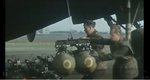
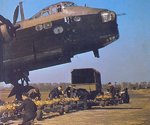
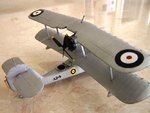
Thanks Terry, but oh blast. Ive followed the kit instructions and painted the bombs black with silver fins and white/silver nose caps. Ive now attached the bombs to the aircraft. It was a nightmare doing that. I will look at how I might repaint the ordinance on the model, and try and get a better idea of the bomb colours.....

Will post photos very soon guys
 
These are photos Ive managed to track down at short notice, one by Terry in a different Thread.

They show, as Terry says, a dirty yellow or an Olive Green finish. The yellow looks to be earlier, as terry suggests.

The problem I have now is how to apply that colour to the ordinance, as the bombs are already on the model, and I dont really want to remove them....too difficult to get them back on without damage.

I would tjhink i can replaicate the mustard yellow, with a bit of olive green added to the yellow colour. I also think i can apply the new scheme with very careful brush application.
 

Attachments

  • Bomb Colour Green.jpg
    Bomb Colour Green.jpg
    26.1 KB · Views: 104
  • Bomb Colours Yellow.jpg
    Bomb Colours Yellow.jpg
    53.1 KB · Views: 117
here are the shots i have of the model, showingthe (very) incorrect colour I have used in the bomb fit

What do you guys think I should do. this is as per the kit instructions incidentally

should i
10 paint them on the model or remove them. if i remove them there is a very high risk of damagingin the decals underneath, If i elect to paint them whilst keeping the bombs on the a/c there is a risk of getting paint on the wings and on the decals, but less risk. If I do nothing, there aee no risks, I will have completed the kit as per painting instructions, but that finish is probably wrong
 

Attachments

  • 102_2658.jpg
    102_2658.jpg
    56.5 KB · Views: 114
  • 102_2659.jpg
    102_2659.jpg
    55.6 KB · Views: 105
  • 102_2660.jpg
    102_2660.jpg
    58.6 KB · Views: 100
If I do repaint the bombs, this is what I think i would use. or rather use as a base. What needs to be done to this colour to make it correct?
 

Attachments

  • Tamiya XF-4 Yellow Green.jpg
    Tamiya XF-4 Yellow Green.jpg
    50.4 KB · Views: 117
I would say you have to add some of the yellow to the XF-4. But it looks good in general. However the old proverb says if you want to correct something it is better to start all over again. So I would let it be as it is.
 
Thoughtabout it over the weekend. The black bombs are here to stay guys.

Ive applied the clear coast over the paint work. it worked, but Im sligtly disappointed. The clear colour afected that lovely grey silver effect i worked so hard to perfect. Its still okay, but not as good. I dont know what else i could have done however....decals and paintwork needed protection, but application was not ideal.

Now all i have to do is fit the Vickers guns and the mooring lines, and she will be done.

Wil post some shots soon
 
Thanks Fubar.....that explains a lot...why my bombs have a blunted nose. i thought that was a mistake, an error in the moulding, but its actually more correct than I had given it credit for. Ive given it a silver/white nose cap. I thik that is at least arguably correct, but I think the black colour is not correct. Its what the kit says to do, but black came a generation later, such as in Korea or similar. Im going to keep the bombs as is, but Im not happy jan......
 
I agree with all - leave the bombs as they are. If you were able to remove them safely, then they would be Dark Green, with a mid grey tail unit, as per the image Geo posted. If an earlier period, they were probably yellow, but the risk of damage to the wing paintwork is too great for such a small detail.
If you think it's possible to paint almost all around each bomb, leaving the area in shadow, directly under the wing in black, then a thin coat of Dark green over the top would give the appearance of worn paint, with any black showing through looking like the metal beneath the paint. BUT! Do this only if you feel confident in not getting paint where it's not wanted!
Otherwise, leave them and live with it, filing this under "Research Fully before Building", for the next time!
 
Nice to see that the black bombs stayed on the model, it would have been a nightmare to re-paint if something went wrong,

she looks great :) can't wait to see her on the finished thread :D
 
I agree with all - leave the bombs as they are. If you were able to remove them safely, then they would be Dark Green, with a mid grey tail unit, as per the image Geo posted. If an earlier period, they were probably yellow, but the risk of damage to the wing paintwork is too great for such a small detail.
If you think it's possible to paint almost all around each bomb, leaving the area in shadow, directly under the wing in black, then a thin coat of Dark green over the top would give the appearance of worn paint, with any black showing through looking like the metal beneath the paint. BUT! Do this only if you feel confident in not getting paint where it's not wanted!
Otherwise, leave them and live with it, filing this under "Research Fully before Building", for the next time!
Excellent advice!
 

Users who are viewing this thread

Back