Navigation
Install the app
How to install the app on iOS
Follow along with the video below to see how to install our site as a web app on your home screen.
Note: This feature may not be available in some browsers.
More options
You are using an out of date browser. It may not display this or other websites correctly.
You should upgrade or use an alternative browser.
You should upgrade or use an alternative browser.
***DONE: Bf 109 G-10 W NR 491504 Group Build
- Thread starter javlin
- Start date
Ad: This forum contains affiliate links to products on Amazon and eBay. More information in Terms and rules
More options
Who Replied?looking good Kevin..... 
109ROAMING
2nd Lieutenant
Beaut progress!
- Thread starter
- #24
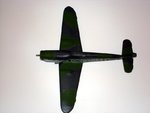
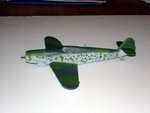
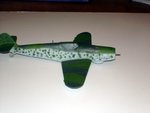
Well I got some pre-shading and paint laid.I first painted the 76 on the bottom and sides of the fuse.Then I painted the wheel wells 02 and used that for the pre-shade also.I then put the 76 back in the brush after filling the wheel wells and sprayed 76 at 10psi with a few passes till my satisfaction was appeased.I shot all these pics -flash with natural light by the window comments appreciated.Revell(L) Fujumi(R)
Attachments
-
 G10 017_edited (800 x 454).jpg34.8 KB · Views: 356
 -
 G10 019_edited (800 x 504).jpg39.8 KB · Views: 352
 -
 G10 021_edited (800 x 348).jpg25.5 KB · Views: 361
 -
 G10 024_edited (800 x 455).jpg36 KB · Views: 343
 -
 G10 027_edited (800 x 325).jpg18.9 KB · Views: 355
 -
 G10 025_edited (800 x 321).jpg19.3 KB · Views: 364
Last edited:
lesofprimus
Brigadier General
So which kit are u liking better Kevin??? The Revell seems to be lookin better....
- Thread starter
- #26
Airframes
Benevolens Magister
Looking nice Kevin. Isn't the Revell kit ex-Hasegawa?
B-17engineer
Colonel
Looking good!
I love Revell
I love Revell
- Thread starter
- #30
Well my first attempt at the mottling was not so good .I think I was thinning the paint to much,I used my standard 50/50 approximatly.I am thinking about repainting the 76 on the sides and try it again I can always postshade with chaulks.I will have too look at the decal placement and see if it might hide some of the shoddy work.
Attachments
- Thread starter
- #31
B-17engineer
Colonel
Looks pretty dammed good if you ask me!
- Thread starter
- #33
Thks Harrison.I think I am starting to get the hang of shooting this mottling in 1/48 almost everything I have done has been 1/24 or //32 with a couple of exceptions.The G-14 has a heavy motte and it's coming along good thus far.Once I get the Luft markings on the side of the G-10 then I have to paint over them with RLM 02  .Cheers Kevin
Vic Balshaw
Major General
There coming along great Kevin, you should be pleased with them


Looks good mate...if you find that you're not entirely happy with the mottling a well thinned light application of the base colour (76) carefully mottled around and lightly over the darker mottling will help blend it a little better...
- Thread starter
- #37
Looks good mate...if you find that you're not entirely happy with the mottling a well thinned light application of the base colour (76) carefully mottled around and lightly over the darker mottling will help blend it a little better...
That almost sounds like something you think is needed Wayne?I have done that in the past and only by accident did I find this method out but it did cross my mind because that 83 is so bright.Cheers Kevin
Airframes
Benevolens Magister
Looks good Kevin. As the clear coats will emphasise the dark mottling, I think Wayne's suggestion is good. Just a very light misting, from a distance, will tone it down a tad.
- Thread starter
- #39
109ROAMING
2nd Lieutenant
Looking good Kev , great advice guys
Users who are viewing this thread
Total: 1 (members: 0, guests: 1)


