coming along nicely Harrison, and your learning as well, keep working mate
Navigation
Install the app
How to install the app on iOS
Follow along with the video below to see how to install our site as a web app on your home screen.
Note: This feature may not be available in some browsers.
More options
You are using an out of date browser. It may not display this or other websites correctly.
You should upgrade or use an alternative browser.
You should upgrade or use an alternative browser.
**** DONE: Revell 1/48 P-40B RAF 112 Squadron in Egypt in 1941 MTO Group Build (1 Viewer)
- Thread starter B-17engineer
- Start date
Ad: This forum contains affiliate links to products on Amazon and eBay. More information in Terms and rules
More options
Who Replied?- Thread starter
- #402
B-17engineer
Colonel
Thanks Karl! I will do a little more work today, I have soccer.
- Thread starter
- #403
B-17engineer
Colonel
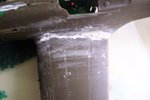
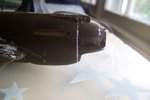
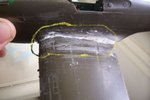
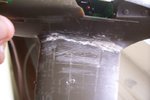
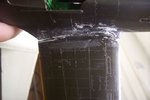
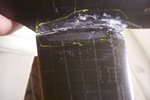
Putty went MUCH better this time. I used my crappy testors knife that I have had for a while and used that to pack it in. Since I have a new knife the Testors one can be used for putty and I much prefer Testors putty over squadron  . But I have both so I won't need putty for a while. The putty was done to fill the gap between the plane and engine, not the machine guns.
. But I have both so I won't need putty for a while. The putty was done to fill the gap between the plane and engine, not the machine guns.Attachments
Last edited:
- Thread starter
- #404
B-17engineer
Colonel
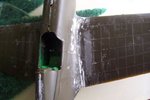
Can't wait till this baby gets primed so I don't have to see the ugly putty on the wings....
parsifal
Colonel
Its coming on famously harrison, well done
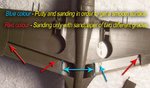
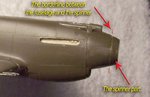
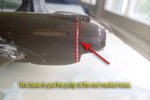
Looking good Harrison. But undoubtedly there is too much of the putty at these wing joins.Now you have to sand these areas,yuo have to do it very neatly.Because these places are seen very well with the model. YOu should sand it in that way to get seen the join lines visible only. I mean the putty has to be seen in these gaps only.
But what about the flap bays, are these ready for painting?
But what about the flap bays, are these ready for painting?
- Thread starter
- #407
B-17engineer
Colonel
How do I know if they are ready? I wasn;t clear on the directions about the putty so I didn't want to go do it.
- Thread starter
- #409
B-17engineer
Colonel
Oh okay very good! At half time of the football game I'll go that! I took some of the putty off the wings, I'm resizing the pictures.
- Thread starter
- #410
B-17engineer
Colonel
- Thread starter
- #412
B-17engineer
Colonel
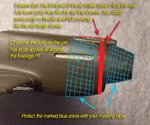
Ah so I need to put the putty there! Gotcha!
- Thread starter
- #414
B-17engineer
Colonel
Ohhhhhhh I see, my bad!
- Thread starter
- #416
B-17engineer
Colonel
- Thread starter
- #418
B-17engineer
Colonel
What filling? I added that.
- Thread starter
- #419
B-17engineer
Colonel
Users who are viewing this thread
Total: 2 (members: 0, guests: 2)