Navigation
Install the app
How to install the app on iOS
Follow along with the video below to see how to install our site as a web app on your home screen.
Note: This feature may not be available in some browsers.
More options
You are using an out of date browser. It may not display this or other websites correctly.
You should upgrade or use an alternative browser.
You should upgrade or use an alternative browser.
**** DONE: Revell 1/48 P-40B RAF 112 Squadron in Egypt in 1941 MTO Group Build
- Thread starter B-17engineer
- Start date
Ad: This forum contains affiliate links to products on Amazon and eBay. More information in Terms and rules
More options
Who Replied?- Thread starter
- #662
B-17engineer
Colonel
Hmmm I'll go back and try again.
- Thread starter
- #663
B-17engineer
Colonel
- Thread starter
- #664
B-17engineer
Colonel
Since it is my little brothers birthday, he is turning 10, he wants me to watch a tv show with him, so I can't ignore him 
Since my tests are tomorrow I should have a lot of time if your on to do my model, and then it's my Birthday thursday
Since my tests are tomorrow I should have a lot of time if your on to do my model, and then it's my Birthday thursday
- Thread starter
- #666
B-17engineer
Colonel
- Thread starter
- #668
B-17engineer
Colonel
Will go do that
- Thread starter
- #669
B-17engineer
Colonel
No mercy, you have been rushing so you have to agonize. 
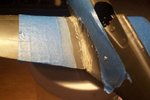
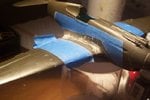
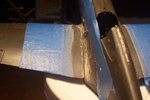
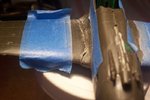
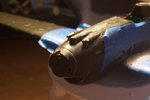
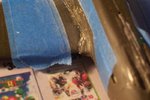
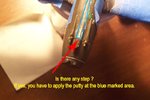
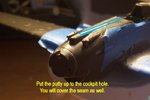
Ok. In the last pic I can see that there is still a gap at the front area of the transition. Put there some the Squadron putty. Also put some on the air intake and the fuselage seam in front of the cockpit.You have to shape the areas, especially the air intake.You will finish the sanding later when the putty will be hardened. What about the upper fuselage MGS covers? They look horrible with these gaps in front of them
Ok. In the last pic I can see that there is still a gap at the front area of the transition. Put there some the Squadron putty. Also put some on the air intake and the fuselage seam in front of the cockpit.You have to shape the areas, especially the air intake.You will finish the sanding later when the putty will be hardened. What about the upper fuselage MGS covers? They look horrible with these gaps in front of them
- Thread starter
- #671
B-17engineer
Colonel
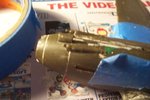
Ok, where exactly on the intake? The sides?
- Thread starter
- #673
B-17engineer
Colonel
Ok, let me go on with the putty !
- Thread starter
- #674
B-17engineer
Colonel
- Thread starter
- #676
B-17engineer
Colonel
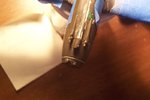
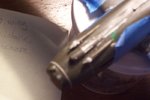
Ok so I'm not installing the pieces where the antenna goes?
- Thread starter
- #678
B-17engineer
Colonel
Ok, so I will go do that. Then I must go to dinner!
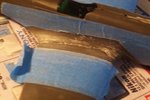
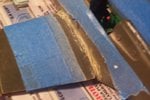
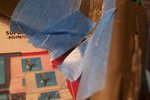
OK Harrison. Apply the putty there and put the model away for two days.We will back to this wen I get back from work on Friday. In meantime you can paint these inner surfarces of flaps and the main landing gear coveriings with the same paint like the cockpit ( if you have already removed these stamp traces from them, the pics with places where these stamp traces are you can find a few pages back)
But now Good Nioght. Sleep well. And A happy Birthday of course.
But now Good Nioght. Sleep well. And A happy Birthday of course.
Last edited:
- Thread starter
- #680
B-17engineer
Colonel
Ok very well! Will apply putty and paint! Talk to you Friday!
Users who are viewing this thread
Total: 1 (members: 0, guests: 1)