**** DONE: Revell 1/48 P-40B RAF 112 Squadron in Egypt in 1941 MTO Group Build (2 Viewers)

Ad: This forum contains affiliate links to products on Amazon and eBay. More information in Terms and rules

Thank you all of you guys. :) :oops:

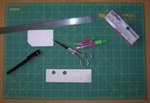
Harrison for farhter work you will need : a matal ruler ( of course you can use any you have. But the matal one is the best ), scissors , a compass, a thin drawing marker ( can be red for instance), the plastic card and a piece of carton.
 

Attachments

  • Dscn2399.jpg
    Dscn2399.jpg
    101 KB · Views: 68
Yep carton like cardboard.Scissors that you like.

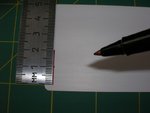
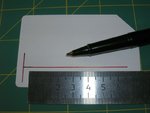
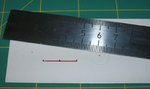
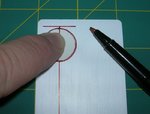
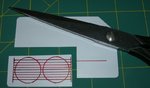
On the card draw lines with the marker and the ruler. You know how to do it , I'm sure. If don't, look at the pics bilow.
 

Attachments

  • Dscn2400.jpg
    Dscn2400.jpg
    70.6 KB · Views: 77
  • Dscn2401.jpg
    Dscn2401.jpg
    80.2 KB · Views: 65
Wait, I already drew the circles, so am I doing these circles on the reverse side of the card? Or on the carton ?>
 
No Harrison. Take an eraser and remove the drawing from the card. Then wash the card and dry.

Harrison, because I'm at work tomorrow I'm going to leave you an instruction on how to make these scratch-built parts. All the new pictures above and below of this post are for that. That's way I started from the beginning. OK.
 
OK, thanks it was quite nice day but busy for me.What about your?


Let's back to the thread.

I have noticed you had a problem with drawing on the card using the compass. I suggest another way to do it.

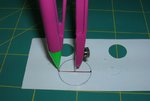
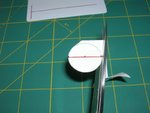
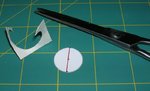
Draw the circle diameter on the piece of cardboard and mark its middle.Then with the compass pencil the circle as you can see in the pics below. Then cut the circle off using your scissors. Do it neatly because this will be a template for farther work.
 

Attachments

  • Dscn2402.jpg
    Dscn2402.jpg
    77 KB · Views: 59
  • Dscn2403.jpg
    Dscn2403.jpg
    67.6 KB · Views: 63
  • Dscn2404.jpg
    Dscn2404.jpg
    76.3 KB · Views: 62
  • Dscn2405.jpg
    Dscn2405.jpg
    77.1 KB · Views: 65
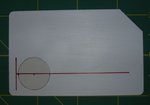
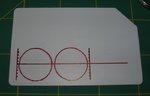
When the carton circle was cut off, put it on the plastic card as shown and draw the circle around using the marker.Do it twice and you have two circle on the card drawn.
 

Attachments

  • Dscn2409.jpg
    Dscn2409.jpg
    62.9 KB · Views: 61
  • Dscn2408.jpg
    Dscn2408.jpg
    80 KB · Views: 61
  • Dscn2407.jpg
    Dscn2407.jpg
    61.3 KB · Views: 50
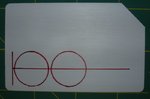
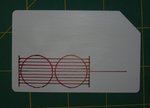
Having these circles drawn add a vertical line of diameter length on right of the last circle like in the pic below.
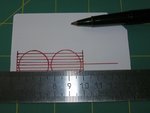
Then divide these lines into eight or nine parts including the central line as well. Connect these points with horizontal lines. Please look at these pics and all will be clear. Do it carefully too.
 

Attachments

  • Dscn2410.jpg
    Dscn2410.jpg
    62.2 KB · Views: 75
  • Dscn2411.jpg
    Dscn2411.jpg
    82 KB · Views: 86
  • Dscn2412.jpg
    Dscn2412.jpg
    69.7 KB · Views: 79
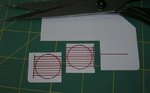
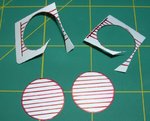
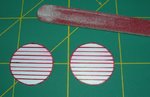
When you finished , cut off the rectangular with these circles and cut across at the middle in order to get two separated squares with circles. Finally cut these circles out.Using the red sand stick you can sand edges of the circles in order to make them more round. Cutting these disks be careful and won't erase these lines.
 

Attachments

  • Dscn2413.jpg
    Dscn2413.jpg
    76.3 KB · Views: 79
  • Dscn2414.jpg
    Dscn2414.jpg
    77.1 KB · Views: 70
  • Dscn2415.jpg
    Dscn2415.jpg
    108.1 KB · Views: 71
  • Dscn2417.jpg
    Dscn2417.jpg
    100.5 KB · Views: 73
You are welcome Mate.

Now having the carton template, check if you can put it into the wheel bay across the hole in the wing.The disk should be at horizontal position and put into the whole vertically from above..
 

Users who are viewing this thread

Back