Navigation
Install the app
How to install the app on iOS
Follow along with the video below to see how to install our site as a web app on your home screen.
Note: This feature may not be available in some browsers.
More options
You are using an out of date browser. It may not display this or other websites correctly.
You should upgrade or use an alternative browser.
You should upgrade or use an alternative browser.
**** DONE: Revell 1/48 P-40B RAF 112 Squadron in Egypt in 1941 MTO Group Build
- Thread starter B-17engineer
- Start date
Ad: This forum contains affiliate links to products on Amazon and eBay. More information in Terms and rules
More options
Who Replied?- Thread starter
- #1,362
B-17engineer
Colonel
Carton, is not super thin, but not super thick. It was the angle I took it, that you see a gap. But it fits 
That's good info. Let's go farther.
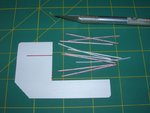
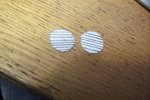
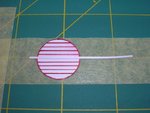
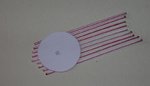
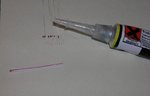
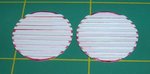
You will need a few thin plastic strips. You can use the rest of the plastic card you have when these disks are cut off. Like in the pics below for instance. You need eight or nine of these strips . It depends on haw many lines you drew on these disks.For cutting these strips you should use a scalpel. If you can't make these long thin strips you can cut shorter one but their length has to be a littler bit over the disk diameter.
A few pics.
Attachments

- Thread starter
- #1,364
B-17engineer
Colonel
OK, will these be cut in half so I have them for each wheel bay?
- Thread starter
- #1,368
B-17engineer
Colonel
Oh okay!
I could have done with this advice on my P-40 Wojtek, my wheel wells are all wrong. But i'm not changing them now.
I'll know for the next time I build one.
I saw your P-40. Of course a such thing should be made when all halves of the wing were separate parts. But Harrison glued them togeter and now we have to go along the way.I think it is a good training for him as well.
- Thread starter
- #1,370
B-17engineer
Colonel
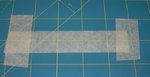
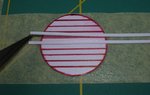
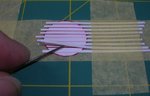
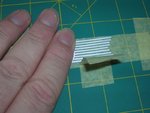
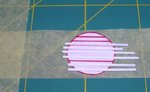
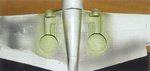
Here you are a way I set these strips with one of the disks.I set the central one as the first then added the rest of them.In order to get better setting I use scalpel to do it.When all were at correct positions I sticked their ends at the right side with a strip of masking tape.
Attachments
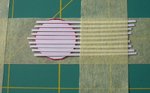
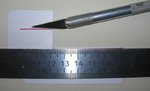
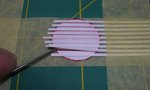
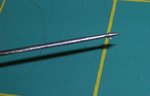
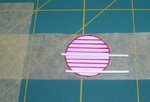
The next pictures here. Having these strips sticked I could put up their right endings to apply the CA Superglue. I took a small drop of it on a needle and applied the glue at the bottom of each strip.The needle was moving left to right.The needle top has to be cleaned everytime for each applying of the CA glue.
Attachments
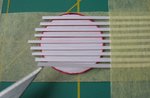
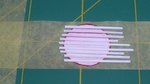
Having all strips glued I kept in place the disk with my left hand and unsticked the tape strip carefully.
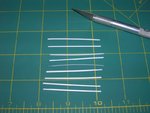
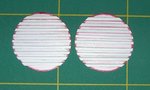
Then I detached the whole element and cut off no longer needed pieces of strips. Notice the way I cut them off.
Then I detached the whole element and cut off no longer needed pieces of strips. Notice the way I cut them off.
Attachments

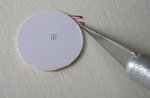
Here is another way I used for attaching strips to the second disk. Because these strips were shorter then those before I applied the CA glue on them directly holding at one ending with tweezers. Later I cut off these unwanted parts of stripes like above.
Attachments
Last edited:
vikingBerserker
Lieutenant General
Wow, the use of the tape is rather ingenious!
- Thread starter
- #1,380
B-17engineer
Colonel
 I will do this tomorrow! Many thanks Wojtek!
Users who are viewing this thread
Total: 1 (members: 0, guests: 1)