great job Glenn
Navigation
Install the app
How to install the app on iOS
Follow along with the video below to see how to install our site as a web app on your home screen.
Note: This feature may not be available in some browsers.
More options
You are using an out of date browser. It may not display this or other websites correctly.
You should upgrade or use an alternative browser.
You should upgrade or use an alternative browser.
**** DONE: Spitfire Mk. I P9306 ZP H of No 74 Squadron Battle of Britain Group Build
- Thread starter T Bolt
- Start date
Ad: This forum contains affiliate links to products on Amazon and eBay. More information in Terms and rules
More options
Who Replied?- Thread starter
- #182
T Bolt
Colonel
I got a little bit done this afternoon Did some work on the landing gear parts, and sprayed the yellow on the prop tips after gray primer. Also sprayed the Spit with Future. I'll give it a couple of days to cure before I start the decal which brings up another problem. I have to make the decals for the serial numbers and my inkjet printer is currently broken, but I have a laser printer. Has anyone used inkjet decal paper on a laser printer? Does it work? Will it eff-up my printer. I can get laser jet decal paper, but it would be through the mail and I didn't want to wait. I need to get the inkjet fixed, but that will take time too.


Last edited:
Airframes
Benevolens Magister
Looking good Glenn. I don't think the inkjet paper will mess up the printer, but a laser printer will mess up inkjet paper!
Rather than wait, why not take the paper to a local 'copy shop', along with the artwork on a CD, and ask them to print it for you? Should only cost a few Cents, maybe a Dollar or two at most. (that's given they have an inkjet printer of course !).
Rather than wait, why not take the paper to a local 'copy shop', along with the artwork on a CD, and ask them to print it for you? Should only cost a few Cents, maybe a Dollar or two at most. (that's given they have an inkjet printer of course !).
Vic Balshaw
Major General
Like the soft camo lines Glenn. As for the printer problem, I'd be inclined to take Terry's advice.
ozhawk40
Master Sergeant
I have to make the decals for the serial numbers and my inkjet printer is currently broken, but I have a laser printer. Has anyone used inkjet decal paper on a laser printer? Does it work? Will it eff-up my printer. I can get laser jet decal paper, but it would be through the mail and I didn't want to wait. I need to get the inkjet fixed, but that will take time too.
I know from experience that laser jet paper will not work in an inkjet, and would hesitate to put the inkjet paper in the laser. The fuser will melt the carrier film and jam the printer. T has some very sound advice!
Cheers
Peter
looks great Glenn
- Thread starter
- #187
T Bolt
Colonel
I wasn't completely satisfied with the Future finish I had sprayed on. It looked a little rough, so I brushed on another coat and it is thoroughly shiny now. I think I'm going to switch to brushing on Future. It worked out great with the wide brush pictured and the whole thing took about 5 minutes.
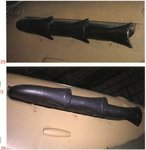
I also finished painting and assembly of the prop. It doesn't show up too well in the lighting, but it's 2 shades of Model Master black enamel. Flat Black on the prop blades, and Aircraft Black on the spinner.
I'll start in on the landing gear wile I give the Future a couple of days to cure and then maybe decals this weekend. I plan to use a friends ink jet printer for the serials. Thanks everyone for your comments on that. It may have saved my laser printer from an unhappy fate!
Last edited:
N4521U
Plastic Pirate
Wow, that finish is fantastic......
It's because of the builds I can follow on this forum that my building has improved...
and esssspeshiallly the T Bolt magic trick with masking the camo!!!!!!!
It's because of the builds I can follow on this forum that my building has improved...
and esssspeshiallly the T Bolt magic trick with masking the camo!!!!!!!
Like it so far Glenn....!
Crimea_River
Marshal
Brilliant Glenn. I've been noticing that about sprayed Future as well and am amazed how nice your brushed finish turned out. Nice touch on the prop as well.
looks great Glenn
Airframes
Benevolens Magister
very nice Glenn ! I agree about the Future - I noticed with the last (current) bottle of the original formula, that it could go patchy and rough when sprayed, so now I always brush it on. Just got to ensure that any excess collecting at, for example, wing trailing edges, is wicked away with the edge of a piece of tissue. It also saves a lot of clean-up time with the airbrush, as the Future can really clog it, especially the nozzle, if not thoroughly cleaned immediately.
Vic Balshaw
Major General
That brush work looks great Glenn, nice and shiny now for the decals.
- Thread starter
- #194
T Bolt
Colonel
Thanks guys! Decals this weekend if the boss lets me have the time! 
Airframes
Benevolens Magister
That's true about the exhausts, but remember, they weren't introduced until the MkV, and then retro fitted to earlier Marks. During the BoB, they were the 'straight' type. Some earlier Marks also had the 'ejector' exhausts fitted later in their life btw, depending on requirements of use.
Lucky13
Forum Mascot
Saweet!
- Thread starter
- #200
T Bolt
Colonel
Just finished an ugly 3 hour session of decaling. The first couple of roundels on the fuselage went on fine, then I must have used too much setting solution on the one on the top right wing because it started to shrivel up something awful. I managed to rinse it off and straighten it out pretty well with a Q-tip, but a piece tore off over the blister and will need some touch-up paint.
Things then went pretty good until I came to the roundels on the underside of the wings and realized that the Tamiya kit came with 2 options. One with no underside roundels, and one with one black wing with two different types of roundels, so I had only one roundel that was the type I needed. After a few minutes of panic wondering where I was going to come up with the roundels of the correct type and size I remembered that I had built this kit a few years ago using the option with no roundels, so I searched through my spairs and still had the sheet with the single roundels, so between the two sheets I had a matching pair.
The stencils started off bad with the ones over the wheel bulge being stubborn about wanting to fit the curve. After that they were just tedious.
I still have to do a little touch-up painting here and there, most notable on leading edge of the fin flash, but all the decals and stencils are done except the serial numbers which I have to make when I can lay hands on a working ink jet printer.
Last edited:
Users who are viewing this thread
Total: 1 (members: 0, guests: 1)