New Airfix 1/48 Hurricane

Ad: This forum contains affiliate links to products on Amazon and eBay. More information in Terms and rules

dneid

Staff Sergeant
1,378
293
Oct 31, 2012
Austin, TX
Good Afternoon, All,
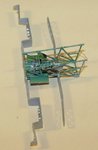
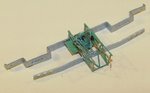
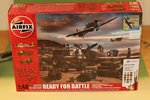
Well, my work schedule just steps all over my time to the point where group builds do not work for me and that is my loss. However, I want to attempt to stay more active on the site so I am going to open a start to finish thread on Airfix's new 1/48 Hurricane kit. Please note that the kit contains several ground servicing kits. I will not be doing any of those yet, just the plane.

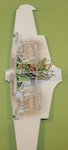
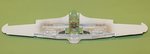
I will be doing this as mostly OOB. I will add some eduard seatbelts and that is about it. I will scratch build a little, but no serious aftermarket items will be used.
 

Attachments

  • Airfix Hurricane.jpg
    Airfix Hurricane.jpg
    79.9 KB · Views: 180
  • Initial Cockpit - Spar Assembly.jpg
    Initial Cockpit - Spar Assembly.jpg
    43.9 KB · Views: 170
Ok, some more progress on the cockpit. I added a couple of scratched up "panels" and some wiring. So, here are a couple of pictures. I have not figured out exactly how to terminate the back side wiring yet. I need to trail fit the cockpit and determine if I do have problem. I very well may not and things can go in as they are now. Thoughts?
 

Attachments

  • Cockpit Details 1.jpg
    Cockpit Details 1.jpg
    27.7 KB · Views: 169
  • Cockpit Details 2.jpg
    Cockpit Details 2.jpg
    40.2 KB · Views: 173
With Geo. Take th wiring inboard of the frames and they'll not interfere with the fit and the ends will not be seen. If you're going for true accuracy. there would also be some wire X-bracing behind the seat.

IMG_6632 Posted.jpg
RDB_6094 Reduced.jpg
 
Ok, I discovered that I do not have any seatbelts in my stash. I did find an old resin seat for a Hurricane in my parts bin. I pulled that out and cleaned it up and painted it up. I have it mounted on the rear bulkhead and a trail fit leads me to believe it will work. I should have it mounted in the cockpit and then on to the IP panel and the decal in the kit. I will post a few updated pictures tomorrow morning.
 
Ok, picture updates....
One thing on this kit, pay attention to the sequence of steps and assembly. I did and I am damned glad I did. Otherwise you will have a mess to disassemble and re-assemble things. But, if you follow the sequence, it is a lovely kit so far. I am working on one gun bay right now. I will be curious as to how the top wings fit onto the lower assembly. Initial dry fit indicates I will need to be very careful.
 

Attachments

  • Cockpit - Lower Wing Rear.jpg
    Cockpit - Lower Wing Rear.jpg
    25.1 KB · Views: 184
  • Cockpit - Lower Wing Left Side.jpg
    Cockpit - Lower Wing Left Side.jpg
    24.6 KB · Views: 174
  • Cockpit - Lower Wing Front.jpg
    Cockpit - Lower Wing Front.jpg
    26.2 KB · Views: 191
Ok, I have the gun bay done on the right wing. Nice detail, good fit. However, does anyone have any pictures of a gun bay I can use to attempt to detail the bay a bit.

Picture follows:
Rgt Gun Bay.JPG
 
Last edited:

Users who are viewing this thread

Back