The Fw 190A-9 of Siegfried Baer, 5.Staffel, II./JG301, in Detail....

Ad: This forum contains affiliate links to products on Amazon and eBay. More information in Terms and rules

Hey Erich..moving a bit slowly just at the moment, I am working on something else in parallel as well....

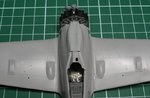
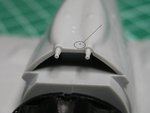
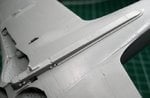
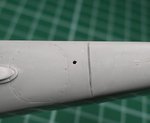
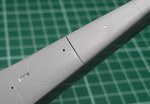
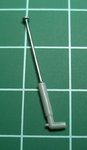
Have added the wing cannon covers, the cowl exhausts, assembled the tail wheel assembly, working on the undercarriage legs, preparing the drop tank and rack components...
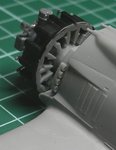
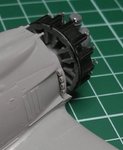
The cowl exhausts required a little bit of trimming and sanding work to position correctly so that they sat correctly and evenly when the cowl was dry fitted to check alignment, really didn't think this would require some extra work....but it did.

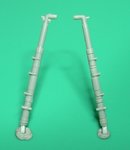
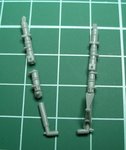
U/C legs one improved one not done yet to show difference.

couple of pics...
 

Attachments

  • Wing_Gun Covers  Exhausts_1093.JPG
    Wing_Gun Covers Exhausts_1093.JPG
    37 KB · Views: 173
  • Exhaust_Port_1095.JPG
    Exhaust_Port_1095.JPG
    23.2 KB · Views: 173
  • Exhaust_Stbd_1096.JPG
    Exhaust_Stbd_1096.JPG
    24.9 KB · Views: 168
  • Undercarriage legs_0994.JPG
    Undercarriage legs_0994.JPG
    36.4 KB · Views: 176
Not sure Matt? It is visible on drawing's of the A-8 and also have one good upper shot of the gun cowl from the Imperial War Museum A-8 that shows it clearly.....will have to do some research.....
 
Since my last up date, been working on tidying up the upper wing to fuselage seam this is a tricky area....have also filled and sanded the wing to fuselage gap on the underside as well as install the main components of the ETC501 Bomb/Drop tank rack....
 

Attachments

  • Drop tank Rack_1442.JPG
    Drop tank Rack_1442.JPG
    31.6 KB · Views: 131
  • Wing to fuselage gap filled_1439.JPG
    Wing to fuselage gap filled_1439.JPG
    26 KB · Views: 130
  • Wing to fuselage gap_0843.JPG
    Wing to fuselage gap_0843.JPG
    24.4 KB · Views: 128
Wow its very precise!


Do you mask off before you fill the area?

Also I take it you have scribe out the line after it has been filled?

Cheers :)

No, in this case I used superglue, applied carefully with the end of a paperclip along the gap.
It is then sanded smooth, I brush paint along the join to check it is filled correctly, which it wasn't, more glue applied and resanded and the panel line rescribed.The panel line is near invisible from the camera angle but it is there.
 
and here is something i don't recommend....breaking the other undercarriage leg..:evil: 'cause then you have to fix the bl**dy thing!
 

Attachments

  • Broken undercarriage_1267.JPG
    Broken undercarriage_1267.JPG
    54.8 KB · Views: 147
  • Repair_1270.JPG
    Repair_1270.JPG
    43.2 KB · Views: 149
It certainly does happen! What is it with me and undercarriage legs?
A couple of weeks ago I told you about the leg in the P38 kit being broken on receipt; no problem, pinned it and it was fine. Now, doing the finishing touches to the 1/48th Marauder, having placed one of the main wheels onto the axle at the right angle, I applied just a spot of poly cement to hold it in place. When dry,puts model on undercart to check 'flat' of tyre is right and.... f*****g axle decided to melt off!!
So now it's 'Superglued'... hope the joint holds!
Then, just doing some repairs to a 1/32nd Tornado F3 conversion...main leg on port side snaps clean in the middlle!!
I know my hands are knackered with arthritis, but this is b****y ridiculous!
Maybe I should try gliders, with skids, not wheels!!!!
 
Jeez Terry!....you are having a rough trot!

However they say things happen in three's and...well you have had your 1, 2, 3 disasters.....things should be looking up now!:D
 

Users who are viewing this thread

Back