1/72 Ju 87B Stuka – Winter War / Eastern Front WWII

Ad: This forum contains affiliate links to products on Amazon and eBay. More information in Terms and rules

imalko

Chief Master Sergeant
3,777
298
Mar 2, 2009
Vojvodina, Serbia
Username: imalko
First name: Igor
Category: Category 2/Intermediate
Scale: 1:72
Manufacturer: Airfix
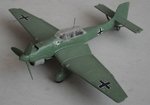
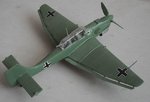
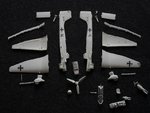
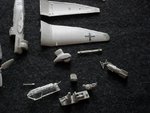
Model Type: Junkers Ju 87B-2 Stuka
Decals: spares from Italeri kit for an aircraft from 7./StG 77
 
Last edited by a moderator:
Here's my first and hopefully not the only entry into this Group Build. This little project won't be a usual new build, but rather a makeover of an old kit. Actually, this was a first model of Stuka I've build a long time ago when I was just a small lad. It was just glued together and decals placed on bare plastic. Later on I painted it around the decals with whatever paint I had at hand and in such a state she spent years (dare I say more then two decades) on the shelve. Now I decided to give it a makeover. The plan is to remove the paint, disassemble the model, sand off raised details, re scribe new panel lines and then put it back together. I have yet to decide if I'm gonna do any scratch building in the cockpit as this is quite basic in layout with just floor, seats and pilot figures. We'll see.

For start here are two "before" pictures…
 

Attachments

  • 23_01.JPG
    23_01.JPG
    66.7 KB · Views: 177
  • 23_02.JPG
    23_02.JPG
    68.7 KB · Views: 184
First progress shots... For removing old enamel paint I used Mr Muscle oven cleaner. I noticed it also reacts with old glue making it easier to take the model apart without damaging it. Indeed only casualty in this case was main bomb holder crutch which broke off, but it's quite repairable so I'm okay with it. Now I need to remove remnants of the glue in order to clean the parts and then some scribing and sanding.
I find it interesting though that the decals mostly remained in place after all this. Originally they were placed directly on the plastic, then partly over painted, but never sealed or protected with varnish. And still after more than 20 years on the shelve and now after the oven cleaner treatment they hold in place.
 

Attachments

  • 23_03.JPG
    23_03.JPG
    111.1 KB · Views: 138
  • 23_04.JPG
    23_04.JPG
    124.6 KB · Views: 142
Thats an amazing dis-assembly job. Did you soak the kit in Mr Muscle, or just paint it on and then scrape and prize? How did the decals survive?
 

Users who are viewing this thread

Back