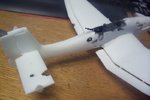
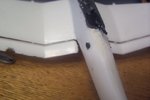
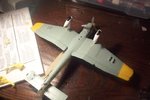
What I did H was heat up the tip of an old exacto knife blade and touch it the hole edges, lightly touching and pulling away... Melts the plastic slightly and gives that "jagged" look...
Yep, that sounds like the way to go. Read a similar technique many years ago on Shephard Paine's B-17 diorama notes - you should see the results!
Shame you joined the fueslage halves already too, would have been more effective to thin the fueslage interior first.
Great attempt so far H. For the future, do any damage before you do the build - it's easier to thin from the the inside.
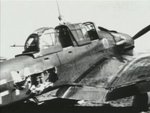
Where an explosive bullet or cannon shell has entered, the hole will be large, uneven and pushed inwards, any exit hole will be jagged, pushed outwards. Where a ball round (solid shot, rifle calibre bullet, or up to .50 cal/13mm non explosive bullet) has hit, the shock wave precedeeing the bullet causes an indentation about four to six times the diameter of the bullet, depending on angle of attack. This 'dishes' the soft aluminium. with the hole more or less in the middle if straight on, and at the forward edge if from the rear, the latter more of an elongated hole, lie a tear shaped slash. The paint in and around this depression is knocked off, leaving a bright 'ring' of bare metal.
Holes in the perspex canopies or windows either blow out most of the perspex, leaving a few jagged remains, or cause holes with a 'spiders web' effect of cracks around it.
Hope this helps a bit, and great work so far.
Dont you also have Revell's B-17?? When I built mine I found a manual about building dioramas that included simulating battle damage. Try looking at that, it should be pretty helpful.
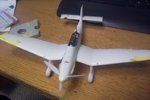
Putty tac between the dive breaks and wings ....went to peel it out... and now the paint on the wings is uneven and there are bits of tack there......will try to fix.