- Thread starter
- #81
Navigation
Install the app
How to install the app on iOS
Follow along with the video below to see how to install our site as a web app on your home screen.
Note: This feature may not be available in some browsers.
More options
You are using an out of date browser. It may not display this or other websites correctly.
You should upgrade or use an alternative browser.
You should upgrade or use an alternative browser.
**** DONE: 1/32 Grumman Wildcat F4F-3 Early – Carrier Aircraft GB
- Thread starter Vaughan
- Start date
Ad: This forum contains affiliate links to products on Amazon and eBay. More information in Terms and rules
More options
Who Replied?- Thread starter
- #82
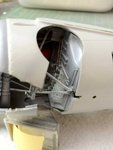
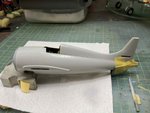
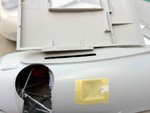
I got the fuselage together this morning a little work will be required on the seams, I'm not 100% happy with the fit of the wheel well bulkhead but it will have to do, a little filler will be required, Once the undercarriage is in situ and the wings are on it's not going to be overly obvious. The tail wheel is well protected as I don't have a very good track record when it comes to breaking them.
Vaughan
Vaughan
Attachments
Crimea_River
Marshal
Nice!
R Leonard
Staff Sergeant
Coming along fine. I like the wear on the bulkhead, a nice touch.
meatloaf109
1st Lieutenant
When she's sitting on the legs, that will not be seen easily.
- Thread starter
- #87
My thoughts exactly Paul.When she's sitting on the legs, that will not be seen easily.
Vaughan
Last edited:
Nice work so far!
Airframes
Benevolens Magister
I agree, looking good so far.
nice job
Yep...me too!
Vic Balshaw
Major General
Doing good Vaughan, looking forward to more.
ccheese
Member In Perpetuity
Coming along very nicely...
Charles
Charles
New day....here anyways....progress time!
meatloaf109
1st Lieutenant
Yeah! Nice weekend for it, looking forward to more!
Good picture, I like the personal touch that it brings.
Good picture, I like the personal touch that it brings.
al49
Tech Sergeant
Very nice job so far!
Alberto
Alberto
- Thread starter
- #99
Hi All
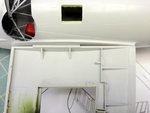
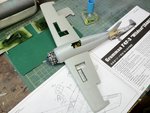
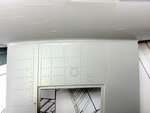
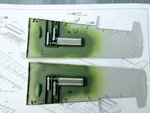
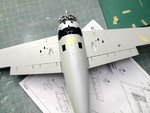
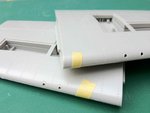
And thanks for the comments. Here's my progress over the last 6 day I've started to motor on this one as the end of November doesn't seem that far away. Now that the fuselage is together the wings are the next stage. A dry run with the wing halves has shown that the tabs( that are only on the upper halves) are very short making attaching them very tricky due to the profile of the fuselage. So what I opted to do was to glue the top halves first thus getting a good joint. I used Mr Cement S which because of it's capillary action secured the wing half ensuring there was no glue lines. On the lower halves I have added the machine guns and their corresponding feed belts, I'm not sure at the moment wether I will have the inspection covers open will decide at a later stage. I then offered up the lower halves thus creating a near perfect join. Just a small amount of filler will be required on the leading edge.
Vaughan
Attachments

Last edited:
N4521U
Plastic Pirate
Now if I can replicate all that in 1/48th!!!!!!!!!!
Keepem cummin, it's lookin great.
Keepem cummin, it's lookin great.
Users who are viewing this thread
Total: 1 (members: 0, guests: 1)