top notch Dogsbody
Navigation
Install the app
How to install the app on iOS
Follow along with the video below to see how to install our site as a web app on your home screen.
Note: This feature may not be available in some browsers.
More options
You are using an out of date browser. It may not display this or other websites correctly.
You should upgrade or use an alternative browser.
You should upgrade or use an alternative browser.
****DONE: 1/32nd scale Beaufighter VIF, 46 Sqn RAF, Egypt 1943 Group Build
- Thread starter Airframes
- Start date
Ad: This forum contains affiliate links to products on Amazon and eBay. More information in Terms and rules
More options
Who Replied?- Thread starter
- #362
Airframes
Benevolens Magister
Thanks very much all, your comments are very much appreciated, as always.
- Thread starter
- #363
Airframes
Benevolens Magister
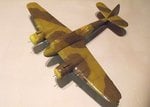
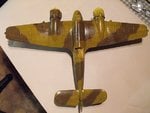
The second stage of the weathering has been done, and the model given its first coat of gloss varnish. A second coat will be applied, and when dry, it'll be time for the decals and the third stage of weathering and paint scuffing etc.
PICS 1 and 2 are how the model looks so far. Note how the clear gloss darkens the colours, which was allowed for when mixing the paints initially. When the matt clear coat is applied, the diffusion effect will make the colours look slightly lighter.
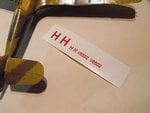
PIC 3 is the decals for the code letters and serial numbers, printed out onto clear decal film and sprayed with Johnson's Klear (Future). The large letters are the simple, single letter codes, one for each side of the fuselage, whilst the smaller letters are for the underside of the nose, one of them being a spare. The serial numbers, V8502, go on the rear fuselage, under each tailplane.
That's it so far, more soon with a bit of luck!
Attachments
109ROAMING
2nd Lieutenant
Sweet!
vikingBerserker
Lieutenant General
DAM!
B-17engineer
Colonel
Lookin' nice!
Heinz
Captain
Great stuff Terry!
Vic Balshaw
Major General
Nice


Damn fine work Terry!
lesofprimus
Brigadier General
Looks great so far Terry, the colors definatly came up some....
looking even better Terry
- Thread starter
- #372
Airframes
Benevolens Magister
Thanks very much guys. Got a slight problem though - about an hour or so after spraying the decals, the darned things 'spread', with the colour bleeding at the edges and the letters distorting. It might be that they don't like 'Klear', or I might have given too heavy a coat. Going to have to make some more, and try a light coat of an acrylic clear spray. I'm just glad I hadn't done Jan's B25 nose art on the same sheet!!
- Thread starter
- #374
Airframes
Benevolens Magister
Thanks Keith. I've made some more decals, and given them two light coats, with a lot of drying time in between. So far, they look settled, but I'll have to see what happens when they hit the water! Hope they work, as I fouind out how to add very small fonts to my PC, with the correct typeface, and made some stencils for the Emergency Exit signs too!
Keeping my fingers crossed, as I'm going to start doing the decals tonight!
Keeping my fingers crossed, as I'm going to start doing the decals tonight!
- Thread starter
- #375
Airframes
Benevolens Magister
Well I had mixed results with the home-made decals. The ink didn't spread this time, although I think a true acrylic varnish will be better than 'Klear' for sealing before use. However, whether it's a lack of density due to low ink on my printer, or the fact that I printed the code letters as they should be, in Dull Red, but they didn't show very well when applied. They did go on without poblems though, although I noticed that the more they were handled, the more the ink wanted to come off. Again, I think this is a combination of using 'Klear' instead of a proper acrylic varnish, and low density ink on a black background. I re-printed the code letters in a normal, bright red, and applied them and, with the black paint showing through, they look as they should - Dull Red!
I'll have a go at re-printing the serial numbers after renewing my colour ink cartridge. Also, the tiny 'Emergency Exit' stencil for the Observer's hatch cover started to fade out when being positioned, although this was probably due to my clumsy fingers causing it to crease when trying to place it in a very awkward position under the hatch locking bar!
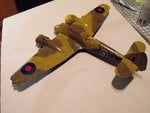
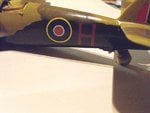
PICS1 and 2 show the decals in place so far, with a combination of the kit decals, some from the spares files and the home made code letters. Note that the fin flash is from a Spitfire decal sheet, and will need to have the top forward corner painted in. The flash in the kit was the early style, with equal width colours, where it should be the flash with the narrow white central stripe for this aircraft.
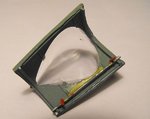
PIC 3 shows the Observer's hatch cover with the interior painted, and the 'Emergency Exit' decal in place on the yellow panel - although it can't be seen from this angle! The hatch cover was difficult to photograph from any other angle, but hopefully the details will be visible when it's fitted to the fuselage! The yellow panel has yet to be retouched to straighten the edges.
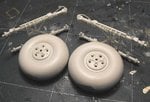
PIC 4. during a break whilst waiting for the first decals to set, I got on with cleaning up the landing gear main legs, and adding brake lines from stretched sprue. The outer part of the depressions in the 'spokes' of the main wheels were also drilled out, as per the real aircraft, and the 'tyres' filed around the joints, and 'flats' sanded onto them. A small depression was also set into each wheel rim, to represent the hole for the tyre valve.
After the remaining decals are applied and the model has been cleaned, a little more weathering, exhaust staining and paint wear will be added, and then the matt clear coat apllied. Then it'll be time to paint, assemble and fit the landing gear, along with some of the other small parts, before moving on to the final detailing jobs.
Thanks again for your interest and kind comments, and I'll get some more pics up soon.
Attachments
Vic Balshaw
Major General
It's looking good Terry


109ROAMING
2nd Lieutenant
It looks bloody GREAT mate! 8) well done on the decals
Love it and I can't wait for more pics
You gonna make a base for this one?
Love it and I can't wait for more pics
You gonna make a base for this one?
lesofprimus
Brigadier General
Very nice, shame about the decals Terry, but I think theyll pass the muster...
- Thread starter
- #379
Airframes
Benevolens Magister
Thanks guys, and yes, I think it'll look reasonable when it's all done. Yes Daniel, I'll be making a plain 'desert' base when the model is finished. Might add an 'Erk' and a step ladder, as the cowling will be off the starboard engine.
Thanks guys, and yes, I think it'll look reasonable when it's all done. Yes Daniel, I'll be making a plain 'desert' base when the model is finished. Might add an 'Erk' and a step ladder, as the cowling will be off the starboard engine.
Glad to hear you're using this: I plan to keep it much more aggressively up-to-date than has been the case in the past, but don't hesitate to let me know if you find errors or need clarifications.
Users who are viewing this thread
Total: 1 (members: 0, guests: 1)

