**** DONE: 1/48 Hurricane Mk1 V6555 S/L RR Stanford Tuck BoB GB

Ad: This forum contains affiliate links to products on Amazon and eBay. More information in Terms and rules

Thanks guys and Vic, I have only started the cockpit detail, more to come in this update. :D

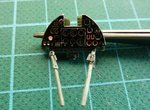
Pic 1,2,3

Constructed the photo etch instrument panel. This Eduard colour etch look the biz, and it's easy to get a good result. A few more smaller pieces of etch will complete the panel from here.

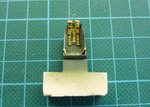
Pic 4,5

The tops of the rudder pedals are leather straps and you need to cut off the top loop and replace with etch straps. I also cut away the chain pulley from the control column as this gets replaced also.

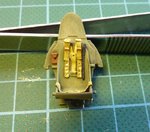
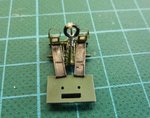
Pic 6,7

The interior gets a thin coat of Humbrol 78 interior green. Hard to see in the photo, but the edges and creases look a little bit darker as the base coat shows through. I then picked out various equipment in black according to interior photos I have, a light wash followed, and then a dry-brush with interior green lightened 50/50 with white.

More later.

Cheers
 

Attachments

  • instrument panel 003 resized.jpg
    instrument panel 003 resized.jpg
    96.9 KB · Views: 423
  • instrument panel 001 resized.jpg
    instrument panel 001 resized.jpg
    98.8 KB · Views: 276
  • instrument panel 004 resized.jpg
    instrument panel 004 resized.jpg
    99.4 KB · Views: 261
  • control column 000- resized.jpg
    control column 000- resized.jpg
    70.5 KB · Views: 267
  • control column 001- resized.jpg
    control column 001- resized.jpg
    71.6 KB · Views: 271
  • interior 008 resized.jpg
    interior 008 resized.jpg
    51.9 KB · Views: 288
  • interior 004 resized.jpg
    interior 004 resized.jpg
    68.6 KB · Views: 283
Okay more today

Pic 1, 2
The seat was painted and belts were highlighted with brass buckles. Oxygen tube was painted semi-gloss black.
The whole seat and armour plate joined and dry-brushed with a lighted green.

Pic 3
Painted cockpit floor and control column. Added Etch. Made a bit of a mess with the super glue on the right hand side pedal run. Maybe it will pass for collected 'dirt'. Gun button painted brass.

Pic 4
Tyres were painted a special mix of colours that I now forget, but it's a blackish, brown colour. Centers are silver and they both now await a wash to highlight detail and reflect some use.

Pic 5,6,7
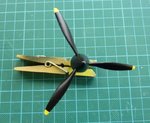
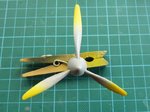
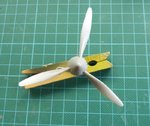
Painted the prop. Start with white, then yellow for the tips, and then with semi gloss black. Will probably reduce the shine a little with future later on.

Pic 8,9,10
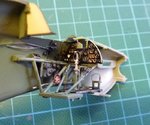
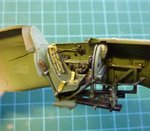
Got the cockpit together, and this is how it's looking now.


End of update.8)

Cheers

Peter
 

Attachments

  • seat 003 resized.jpg
    seat 003 resized.jpg
    104.2 KB · Views: 328
  • seat 001 resized.jpg
    seat 001 resized.jpg
    96.1 KB · Views: 293
  • control column 002- resized.jpg
    control column 002- resized.jpg
    100.5 KB · Views: 251
  • wheels 001 - resized.jpg
    wheels 001 - resized.jpg
    59.4 KB · Views: 276
  • Prop black - resized.jpg
    Prop black - resized.jpg
    96 KB · Views: 270
  • Prop yellow - resized.jpg
    Prop yellow - resized.jpg
    73.7 KB · Views: 278
  • Prop white - resized.jpg
    Prop white - resized.jpg
    90.1 KB · Views: 253
  • interior 005 resized.jpg
    interior 005 resized.jpg
    75.6 KB · Views: 465
  • interior 009 resized.jpg
    interior 009 resized.jpg
    70.5 KB · Views: 381
  • interior 010 resized.jpg
    interior 010 resized.jpg
    66.8 KB · Views: 258
Beaut work Peter, the cockpit looks the biz. The 'corrugated' oxygen hose was normally a dark green colour, but I think I've also seen some in black, so no problem.
I've just ordered the Airfix Hurricane, so a lot of scratch-building of the cockpit for me, and mould a new canopy! Might do the Revell 1.32nd scale kit too, with a new prop and wheels, if I can fit it in.
 
Thanks guys!

Beaut work Peter, the cockpit looks the biz. The 'corrugated' oxygen hose was normally a dark green colour, but I think I've also seen some in black, so no problem.
I've just ordered the Airfix Hurricane, so a lot of scratch-building of the cockpit for me, and mould a new canopy! Might do the Revell 1.32nd scale kit too, with a new prop and wheels, if I can fit it in.

Yes, I have also seen them in black rubber material, I'll see if I can find a pic for the next update. Molding a new canopy would be good to see T. I managed to get hold of a Vac version for this Hurricane, so I can display the cockpit open, but I have a couple of old LTD Boomerang kits in the stash that the canopy has turned yellow on. I need a fix and I'm not talking crack.:lol: One day I'll get around to them. A Revell 1.32 Hurri? Excellent!

Cheers

Peter
 
Thanks CR and Vic.

Todays update follows

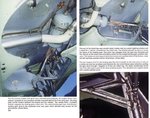
Pic 1
This is a reference from the Squadron Walkaround number 14 showing the alighting gear bays.

Pic 2, 3
I used the reference photos to paint the interior of the wheel bays silver, with a bluish grey colour for the compressed air cylinder. This was used to store air for the pneumatically fired guns. I finished with a light wash to highlight some of the detail. V6555 had a shortish service life with 257 squadron of about 3 months tops as near as I can figure - how much dirt and weathering? Not sure, but any small oil leak would make a big mess, so I may revisit this area later.

Pic 4, 5
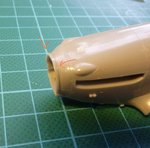
The Hasegawa Hurricane has molded detail for the access hatches for the 12 gun version. Since is the Mk1, the raised detail must be removed.

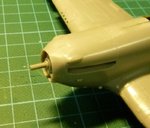
Pic 6,7,8, 9
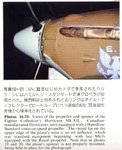
Hasegawa mold on a rather thick oil deflector ring just behind the prop. This Mk1 would not have had the ring, as it used a deHavilland prop. If it did use the Rotol, I would be tempted to remove it and replace it anyway. During the removal process I had the fuselage joined and wings added. Final result and reference info from the Aero Detail No12 on the Hurricane.

Thanks for looking.

Peter
 

Attachments

  • wing 005 resized.jpg
    wing 005 resized.jpg
    32.9 KB · Views: 294
  • wing 004 resized.jpg
    wing 004 resized.jpg
    37.2 KB · Views: 277
  • wing 003 resized.jpg
    wing 003 resized.jpg
    61.2 KB · Views: 285
  • wheels bay 001 - resized.jpg
    wheels bay 001 - resized.jpg
    56.3 KB · Views: 277
  • undercarriage.jpg
    undercarriage.jpg
    112.1 KB · Views: 297
  • oil deflector 001 - resized.jpg
    oil deflector 001 - resized.jpg
    76.2 KB · Views: 278
  • oil deflector 002 - resized.jpg
    oil deflector 002 - resized.jpg
    48.8 KB · Views: 281
  • oil deflector 003 - resized.jpg
    oil deflector 003 - resized.jpg
    67.7 KB · Views: 265
  • oil deflector - rotol prop.jpg
    oil deflector - rotol prop.jpg
    115.4 KB · Views: 271

Users who are viewing this thread

Back