Navigation
Install the app
How to install the app on iOS
Follow along with the video below to see how to install our site as a web app on your home screen.
Note: This feature may not be available in some browsers.
More options
You are using an out of date browser. It may not display this or other websites correctly.
You should upgrade or use an alternative browser.
You should upgrade or use an alternative browser.
**** DONE: 1/72 BV222 Wiking Seaplanes / Floatplanes of WW II
- Thread starter Wayne Little
- Start date
Ad: This forum contains affiliate links to products on Amazon and eBay. More information in Terms and rules
More options
Who Replied?- Thread starter
- #122
Thanks swergio.
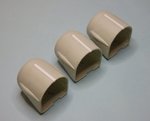
Drilled out the other 2 exhausts now, you can see each has an ugly seam line running around the centre which needs to be removed and also assembled the other 2 Starboard nacelles...dry fit done...looks ok...
Drilled out the other 2 exhausts now, you can see each has an ugly seam line running around the centre which needs to be removed and also assembled the other 2 Starboard nacelles...dry fit done...looks ok...
Attachments
mikewint
Captain
Nice Wayne. I really like that model if only it were available in 1/48
fubar57
General
Nice Wayne. I really like that model if only it were available in 1/48
Hear ya go Mr. Wint. I'll send you the dump truck full of glue you'll need to complete it.
parsifal
Colonel
Nice work wayne
Vic Balshaw
Major General
Nice work Wayne.
Good find George…………………………………so come-on Mike, YOU can slip this one in before builds end

Good find George…………………………………so come-on Mike, YOU can slip this one in before builds end
mikewint
Captain
Checked out the site, even talked by phone to the guy. This is the vaccuformed kit I looked at earlier in the build, fuselage, wings, tail, everything else has to be scratch built. Even bulkheads stringers for the kit to hold its shape AND it takes him 8 weeks to put the kit together. WAY, WAY beyond my skill level
Great work so far Wayne!
ccheese
Member In Perpetuity
Very nice work, Wayne. I see another museum piece coming.
Charles
Charles
vikingBerserker
Lieutenant General
Very nice!
N4521U
Plastic Pirate
Checked out the site, even talked by phone to the guy. This is the vaccuformed kit I looked at earlier in the build, fuselage, wings, tail, everything else has to be scratch built. Even bulkheads stringers for the kit to hold its shape AND it takes him 8 weeks to put the kit together. WAY, WAY beyond my skill level
Nothing ventured,
nothing gained Mike.
- Thread starter
- #134
Thanks Guys....more soon..
mikewint
Captain
Bill, Yea, that's what the guy said about raping a female grizzly bear
Vic Balshaw
Major General
Thanks Guys....more soon..
Looking forward to it old buddy.
- Thread starter
- #137
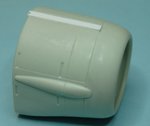
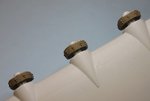
Been a bit busy last few days , but been plugging away, have now added the new plasticard strips to replace the broken missing pieces on the front cowl section,mentioned previously.
These new plasticard 'inserts' have been raised slightly so i can use the edges as a guide to rescribe the panel lines on each side, then i will sand them flush.
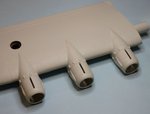
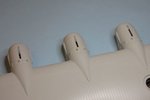
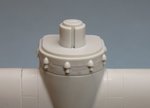
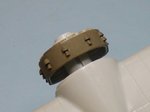
Next item on the agenda was to fill the gaps all around the 2 piece exhaust outlet sections, superglue was carefully added to each section, cured and filing and sanding commenced, 9 per cowl, 27 sections in all, this took a bit of time over the past 3 days so as not to mess up the raised exhaust outlets, final shot shows some paint over the seams to check all is as it should be...a few spots needed extra attention but all good now!
Attachments
Crimea_River
Marshal
Great work Wayne.
mikewint
Captain
As always Wayne excellent work
Users who are viewing this thread
Total: 1 (members: 0, guests: 1)

