fubar57
General
Okey dokey Bill. Though it's hard to tell from the box art, it looks like there are decals for the inside tail markings as well.
Geo
Geo
Follow along with the video below to see how to install our site as a web app on your home screen.
Note: This feature may not be available in some browsers.
Ad: This forum contains affiliate links to products on Amazon and eBay. More information in Terms and rules
Nicely done Mr. Hatter!
Have you checked that there will be clearance for the landing gear diagonal struts and retraction jacks? Just a thought.
")
There are two rivets you forgot Bill...
I might make it out to Nanton next weekend and if so, I'll crawl up into a wheel well for you and snap some pics.
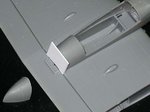
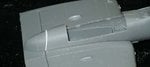
Scratch built wheel spats?This is the Non-retracting version.