Navigation
Install the app
How to install the app on iOS
Follow along with the video below to see how to install our site as a web app on your home screen.
Note: This feature may not be available in some browsers.
More options
You are using an out of date browser. It may not display this or other websites correctly.
You should upgrade or use an alternative browser.
You should upgrade or use an alternative browser.
DONE: Finished Kittyhawk IV -Curtiss P-40N RAAF 76 Sqn G-SV A29-1140 Group Build
- Thread starter ozhawk40
- Start date
Ad: This forum contains affiliate links to products on Amazon and eBay. More information in Terms and rules
More options
Who Replied?Airframes
Benevolens Magister
Looking very neat peter, great work. As for the PSP, it was a right b*****d getting it on and off the roof of my old Land Rover everytime I went on an off-road trip, guaranteed to get a bruise or cut somewhere, but too heavy to leave in place all the time.
- Thread starter
- #164
ozhawk40
Master Sergeant
Thanks guys.
I used a Eduard mask for the canopy, which makes this job a whole lot easier, but there is still a fit problem with one of the pieces which I will need to adjust. Masking canopies is one of my least favorite parts of a build, but I appreciate a good job. Lets hope all goes well for me, Muller. Fingers crossed. Least it's not 1/144! 8)
I used a Eduard mask for the canopy, which makes this job a whole lot easier, but there is still a fit problem with one of the pieces which I will need to adjust. Masking canopies is one of my least favorite parts of a build, but I appreciate a good job. Lets hope all goes well for me, Muller. Fingers crossed. Least it's not 1/144! 8)
Thank god for masks!
Airframes
Benevolens Magister
Isn't that what Jan's last girlfriend said?
nice work so far ozhawk
- Thread starter
- #168
ozhawk40
Master Sergeant
Airframes
Benevolens Magister
Nice- almost like a prototype camouflage scheme!
- Thread starter
- #170
ozhawk40
Master Sergeant
Okay
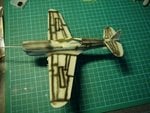
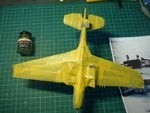
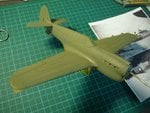
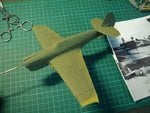
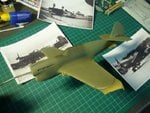
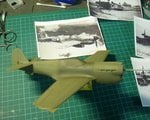
Painting is moving along. Done the underside in Neutral Grey, sprayed the "interior" colour of the canopy and then masked off.
Tamiya masking tape is great stuff isn't it? Used Heaps as you can see.
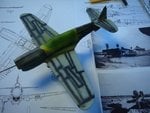
Olive drabbed the outside in Model Master "faded olive drab". Pre-shade is just showing through, so I'm happy about that Phew, it worked!
Next is some darker shading and medium green splotching.
Cheers
Attachments
lesofprimus
Brigadier General
Looks tits man... The pre-shade looks great...
If u would, please explain how u apllied the olive over the wing.... Did u start by dusting it or did u attempt to spray around the panel lines in a mottle sort of way???
If u would, please explain how u apllied the olive over the wing.... Did u start by dusting it or did u attempt to spray around the panel lines in a mottle sort of way???
- Thread starter
- #172
ozhawk40
Master Sergeant
Hi
Yes, just start by dusting with a light coat and kept going until I was happy with the amount of pre-shade showing through. If you start too heavy, it will be gone, gone, gone! I've just finished the darker shading, pics up soon.
Cheers
Peter
Yes, just start by dusting with a light coat and kept going until I was happy with the amount of pre-shade showing through. If you start too heavy, it will be gone, gone, gone! I've just finished the darker shading, pics up soon.
Cheers
Peter
- Thread starter
- #173
ozhawk40
Master Sergeant
Howdy
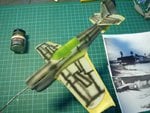
Just finished the darker shading. Little hard to get a good photo as it was still a little damp, but here you go.
I used the photos to judge where to apply the Model Master "Olive Drab" ie not faded. Came out well, I think.
Areas applied are around the canopy, for reason previously discussed, under the exhaust stacks, and underneath the horizontal stabilizers.
Next I'll do the splotching and then some moderate exhaust staining, should complete the paint job. Ahh decals. The really fun part! 8)
Cheers
Attachments
Doin' a great job there Peter! ...looks good mate...
Catch22
Major
Looks great!
Airframes
Benevolens Magister
looking exceptionally nice Peter. Little tip to save you using lots of relatively expensive Tamiya masking tape - use the tape around the edges on, for example, the wings, and cover the inner, large areas with tissue or 'cling film' (shrink wrap?). It saves a lot of tape, and a lot of work, especially the tricky removal of the tape when finished.
Lucky13
Forum Mascot
Top hole old boy, top hole!
- Thread starter
- #178
ozhawk40
Master Sergeant
Hmmm... someone remind me the difference between E and N models. Oh Yes. Different exhaust manifolds and cowls. Doh!  Spotted after thinking about exhaust stains. Easy fix.
No one spotted that - you all fail your P-40 recognition tests!
No one spotted that - you all fail your P-40 recognition tests!
Users who are viewing this thread
Total: 1 (members: 0, guests: 1)

