**** DONE: MiG-3 White 5 Alexander Pokryshkin Winter 1941/42 VVS/Eastern Front GB

Ad: This forum contains affiliate links to products on Amazon and eBay. More information in Terms and rules

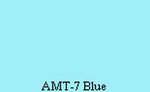
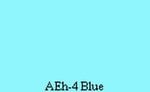
For the undersides the light blue colour should be used. The paint was named AII Goluboj . The FS number is 25466. Its sample is below. The paint might have been of a little bit greenish tonality as well. And it seems that the RLM65 would be closer one. RLM 78 seems to be more greyish though.
 

Attachments

  • FS25466.jpg
    FS25466.jpg
    3.2 KB · Views: 140
  • AII Blue.jpg
    AII Blue.jpg
    3.9 KB · Views: 120
  • AMT7 Blue.jpg
    AMT7 Blue.jpg
    4.4 KB · Views: 135
  • AEh4 Blue.jpg
    AEh4 Blue.jpg
    4.2 KB · Views: 111
Last edited:
*Great job mate.
I had never seen them MM Russian colors before. Went to my LHS, and bubkiss!
I will just have to make a mix to get close for my P-40.

*Your color panels help a lot.
 
Last edited:
That one at top one looks closest to what I used Wojtek.

Bill that paint is Testors T52123 Underside Blue (Russian). I know it's available at Squadron.com as well as a lot of other Russian colors.
 
Therefore the paint looks so different in your pictures. Once it looks like the light blue colour then like the grey one depending on coming light.
 
That's a nice neat looking finish you have there Glenn, shouldn't have any problems with the decaling.
 
Neat! And do I spy a little Heinkel in the background?

Yes Terry. That's a 1/72nd Revell He 70 a started a few years ago and never finished. I pulled it out to see what I needed to do to finish it and saw the ugly wing/fuselage joint that caused me to loose interest. I might tackle it anyway.
 
!!DECAL NIGHTMARE!!

I have never had so much trouble with putting decals on!

I started with the white fives and they went on Ok. Not great but Ok, than as they began to dry I could see that they were beginning to silver so I slapped on some Future to seal them before it became too bad and it seemed to work.

Now to the first red star. I put the Future on a little quicker and all the clear decal film around the star turned white so I cut it and scraped it off with a sharp blade and wiped the sticky mess down with Windex. (picture 2 after another seal coat of Future)

Now I cut away the clear film from all the stars before hand and every single of them broke up!!!!

I put a seal coat on all the decals and they looked better, but I'll still have a lot of touch-up to do.

P4164702.JPG
P4164704.JPG
P4164703.JPG
P4164708.JPG
P4164707.JPG
P4164705.JPG
 
Last edited:
Yikes Glenn, had me flipping back to see who's kit you were using, how old is it, do you know. Have you any spare red stars to lay over the top of these ones. Hope you can get it sorted mate as you have put a lot of work into this.
 
I've had the kit in my stash for at least 10 years so the decals were getting up there, but I've used ones that are older with out this problem. They were unbelievably thin and delicate. I'm going to try to do some touch up with paint that will hopefully work. I'm just thankful that the 'fives' worked out Ok. With all that carrier film it would have been muck harder to fix.
More pics after I get it sorted out.
 

Users who are viewing this thread

Back