109ROAMING
2nd Lieutenant
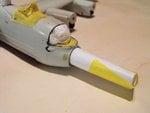
Looking sh!t hot mate
Make airfix's Lanc seem like a load of crap
Make airfix's Lanc seem like a load of crap
Follow along with the video below to see how to install our site as a web app on your home screen.
Note: This feature may not be available in some browsers.
Ad: This forum contains affiliate links to products on Amazon and eBay. More information in Terms and rules

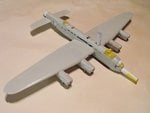
Thanks H. I was going to do a 1/48th RAF Mitchell III, and still might, if I have time. (want to get on with some other stuff.)
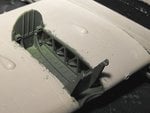
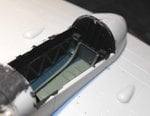
The interior on this was brush painted, as is normal for me. Sometimes I airbrush, depending how I feel, how big it is etc.
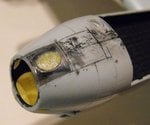
Camouflage I often use a paint brush for too, using the airbrush for mottles, large areas etc. Although, since I got the fine-line airbrush, I've tended to use it more for a lot of things. I draw the line at airbrushing something like a small I.D. line or similar, when a paint brush is just as good, and quicker and easier, with less preparation, masking, cleaning etc etc.