**** DONE: Revell 1/72nd scale Lancaster BIII, 'Oozlum Bird', 625 Sqn, RAF, GB.

Ad: This forum contains affiliate links to products on Amazon and eBay. More information in Terms and rules

It was a bit! Bl**dy camera nearly dragged me out of the front cockpit when we were rolling and twisting, trying to keep the other kites in the frame!
So, I've made a start on the Lanc.
The first thing to be be done was check-over the whole kit, to see what might be required, and I was very pleasantly surprised. Although I'd seen pictures of the sprues, and read some excellent reviews, I'd also heard some pretty negative snippets about this kit, mainly concerning the wing dihedral and the wheels.
The wheels are plain, but they look like the early pattern sometimes, though not often seen, mainly on the MkII. They're not a problem though, as I have a set from an Airfix Lanc which, I presume, must have got wrecked over twenty years ago. As for the dihedral, so far, it looks OK to me, with the correct angle. Of course, things might be different once assembled, but from photos of built models, it looks acceptable, and I don't think I'll bother doing the simple correction which might be required. The level of detail in the kit, especially for 1/72nd scale, is superb and, overall, it's accurate and beautifully moulded, and I reckon must be the best Lanc kit in this scale, and pushing towards any scale, unless the updates to the Tamiya 1/48th kit are exceptional.
There are a couple of inaccuracies though, but nothing major, and I've already taken care of these, which are mentioned in the photo captions. I might find more minor points but, so far, I haven't noticed anything glaring.
Anyway, on with the build and the pics.
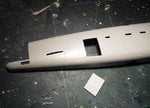
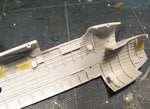
PIC 1. Although this will be mainly 'Out of the Box', I wanted to display the model on its dispersal bay, with the crew entry door open. This was the first minor inaccuracy noticed, as the moulded lines for the door are too long on the vertical, although only by about 1.5 to 2mm. This would be very noticeable with the door cut open, so I scribed a new door sill, slightly higher than the engraved line, and cut through and removed the panel, using the trusty razor saw.
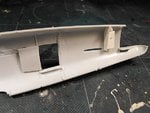
PIC 2. Stretched sprue was cemented to either side of the door jamb, to epresent the frame, and a step added from thin plastic strip. This would be over the starboard ammunition tracks, but as these can't be seen from the outside, i didn't bother to make any. The door panel was removed cleanly and, after a little sanding, was glued in place inside, in the open position. The rear bulkhead and armoured doors to the turret access well were also added, from plastic card, although they'll only be seen as shadowy shapes.
PIC 3. Moving forward on the starboard side, the small windows for the bomb aimer, navigator and radio operator were cemented in place and masked, and a representation of the Flight engineer's folded jump seat added from scrap plastic and stretched sprue. the hand rails leading to the bomb aimer's compartment were also added, again from stretched sprue. All the other windowas were fitted, and will be painted over, internally and externally.
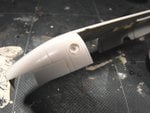
PIC 4. The aperture for the F24 strike camera is moulded into the port nose underside, and thios was drilled out, reamed, and a short piece of plastic tube glued inside, to simulate the lens barrel of the camera. This will be painted and glazed when the model is at the finishing stage.
PIC 5. Inside the port nose area, the tube 'lens' was boxed in, and will line-up with the camera magazine moulded onto the forward bomb bay bulkhead. A compass was also added to the cockpit side wall, again using plastic tube.
PIC 6. Another slight inaccuracy, presumably for convenience of moulding, is the floor for the pilot's seat. The moulded part reaches right back to the Nav table, and the neatly moulded H2S reciever/display attaches to this. There should be a space between the front end of the Nav table and the rear of the pilot's seat which, on aircraft not equipped with H2S, would have allowed access to the port canopy observation blister. When H2S was fitted, the blister was normally removed (but not always), or the airframe, if new, assembled with a 'plain' side window, as the mounts, wiring and other gear associated with the mapping radar occupied the space, preventing access to the window. A quick test-fit of the raised floor section showed wher it needed to be marked for cutting, and the part was removed, and the required area sawn off, and the hole boxed in.
PIC 7. Shows the modified floor section fitted in place, and the joint with the plastic card will be covered by support framing and an oxygen bottle. The two small 'pillars' are the mounts for the navigator's and radio op's seats, with the centre section and wing spars behind, to the left. The actual area inbetween the front and rear main spars is moulded solid, and I'd considered opening this area, and building the rest bunk and other bits and pieces. however, as nothing can really be seen down in the shadows here, I didn't bother!
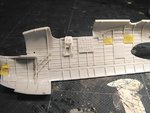
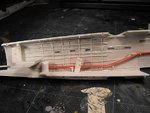
PIC 8. The main fuselage section is left bare, which is understandable, as nothing can be seen down here. However, as the door has been opened, some structure and a hint of detail was needed. Ribs and stringers were added from stretched sprue, with the walkway from plastic card. The flare chute was roughly fabricated from scrap plastic sheet and strip, as was the rearmost bulkhead frame and doors, and the 'Elsan' chemical toilet added, made from plastic tube and a punched - out piece of thin plastic sheet for the lid and seat. The angled red plastic strip represents the ammunition tracks for the rear turret. Although everything looks a bit rough at the moment, once the pencil marks are erased, and the glue dries, the area will be cleaned up and sprayed in Cockpit Grey Green, with some other colours where needed, and as the door opening is only about 13 x 10 mm, the effect should be more than acceptable, and certainly better than leaving just an empty shell. Next step is the basic internal paintwotk and the front-end detail.
So, that's it for now, and sorry for the rather long post - I didn't expect to get as much done, and there's a possibility that this will be a relatively 'quick build' - a bit different to the larger scale stuff I normally work with, so there's a chance I might get the 1/48th scale Mitchell III into the GB too!
 

Attachments

  • Avro, Bomber GB 001.jpg
    Avro, Bomber GB 001.jpg
    55.1 KB · Views: 161
  • Avro, Bomber GB 008.jpg
    Avro, Bomber GB 008.jpg
    55.8 KB · Views: 158
  • Avro, Bomber GB 009.jpg
    Avro, Bomber GB 009.jpg
    48.3 KB · Views: 147
  • Avro, Bomber GB 014.jpg
    Avro, Bomber GB 014.jpg
    34.3 KB · Views: 148
  • Avro, Bomber GB 016.jpg
    Avro, Bomber GB 016.jpg
    54.1 KB · Views: 151
  • Avro, Bomber GB 011.jpg
    Avro, Bomber GB 011.jpg
    56.3 KB · Views: 138
  • Avro, Bomber GB 007.jpg
    Avro, Bomber GB 007.jpg
    39 KB · Views: 124
  • Avro, Bomber GB 004.jpg
    Avro, Bomber GB 004.jpg
    38.5 KB · Views: 153
The bl**dy pain, this time in my hands, stopped me from getting to sleep. So I gave uo, got up, and nearly finished the interior work on the Lanc.
I was tempted to add more detail, but in this scale, not much is seen inside, so I restricted any additions to those things which would be noticed if absent. Some of the paintwork is a bit rough - thank you hands- but again, most of this won't be noticeable. The instrument panel and engineers panel are nicely detailed, and there are also decals to apply. Having already painted and gloss coated these items, I then double checked the decals, to see if they'd conform well. B*gg*r ! They don't match the moulded parts, in layout or design! So, I simplay cut them out, and glued them to the panels!
I've attempted to add throttle and pitch levers to the central pedestal, but again my hands betrayed me!
Anyway, here's the pics so far.
PIC 1. The port rear fuselage painted, showing the 'Elsan' toilet, flare chute and ammo tracks.
PIC 2. Port front section painted, and with a bomb-aimers couch added from plastic scrap.
PIC 3. Starboard front, showing the engineers panel, electruical services panel, and the stetched sprue hand rails to the nose compartment.
PIC 4. Side view of the radio op and nav stations. Note the repositioned H2s unit is unfinished, and needs painting and more mounting brackets added, and the stretched sprue vertical stanchions are yet to be painted.
PIC 5. A general view of the front end, and this time the radios were painted, as the decals would never conform, and were the wrong colours anyway.
PIC 6. The same area looking aft, with some brackets added to the first half of the H2s equipment.
That's it folks - I'm off to try and get some sleep!
 

Attachments

  • Avro, Bomber GB 025.jpg
    Avro, Bomber GB 025.jpg
    34.3 KB · Views: 159
  • Avro, Bomber GB 027.jpg
    Avro, Bomber GB 027.jpg
    37 KB · Views: 162
  • Avro, Bomber GB 029.jpg
    Avro, Bomber GB 029.jpg
    37.8 KB · Views: 128
  • Avro, Bomber GB 017.jpg
    Avro, Bomber GB 017.jpg
    33.1 KB · Views: 156
  • Avro, Bomber GB 023.jpg
    Avro, Bomber GB 023.jpg
    36 KB · Views: 123
  • Avro, Bomber GB 024.jpg
    Avro, Bomber GB 024.jpg
    33.7 KB · Views: 152

Users who are viewing this thread

Back