**** DONE: Revell P-61A 1/48 scale, Nocturnal Nemesis, Night Fighter GB.

Ad: This forum contains affiliate links to products on Amazon and eBay. More information in Terms and rules

You're welcome Bill. BTW, let me know when the CD arrives - some mail seems to be moving slowly !

I would like to express my deep appreciation for the CD you sent Terry. It just arrived in today's post and yes, it is intact. There is a lot of great information on there and I just can't thank you enough. :)
 
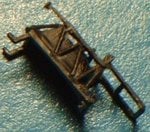
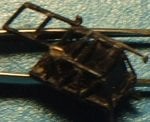
Now that I know what this back area looks like, I finally did some modification to my ladder assembly. Granted it's not perfect but I was able to reasonably replicate most of what I have found in photographs.

To start with I tried to make the supporting structure between the wheel well and the ladder assembly. Then I cut off the lower part of the ladder and made a new section with longer sides so that there would be a little overlap between the two ladder halves. I made the half cog or sprocket by first stretching sprue and cutting it in a thin area. Afterwards, I heated up the stretched end and flattened it against a cold metal ruler to get the circle part. This circle was cut in half and removed from the stretched sprue and glued on the upper end of the lower ladder. I then heated and flattened the other part of the stretched sprue so make the push rod for raising the lower ladder extention and glued it on the one side with the half cog. The handles used for pulling the folded ladder up were glued in at the top of the tub and on the back. The handle on the back has a fastening spring clip on one side, where the cog is, to hold the folded part of the ladder in place. I then made locking handles that would lock this door assembly in place once the ladder was in the fully up position. Opposite the cog I added a small metal piece for the hinge assembly for that side. It will be more easily discernable after I paint it. :)
 

Attachments

  • home 007.jpg
    home 007.jpg
    23.7 KB · Views: 166
  • home 008.jpg
    home 008.jpg
    20 KB · Views: 163
  • home 010.jpg
    home 010.jpg
    16.8 KB · Views: 158
Thanks guys... Now back to work. I currently working on the forward compartment, right side. My goal is to finish this section today and hopefully be able to put the two halves together by this weekend... barring any interuptions. A couple of my kids decided they wanted to visit me for Christmas.

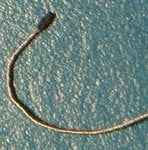
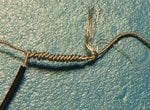
The first picture shows the addition of what I belive is part of the heating system... that long ribbed conduit that snakes along the floor next to the wall. Some of the photos I've collected seem to bear this out as the tube goes up mid-way then continues on the heating cylinder to the back right of the gunner's chair.

The second picture shows the air tubing with connector on the end. I made this by twisting a few wires very tightly like rope. This way seems to closest resemble the tubing I've seen.

Third picture shows how I made the ribbed conduit out of twisted wires. I first twisted two sets of wires very tightly. Then I twisted one set around the other tightly. The result was the conduit you see in the first picture.

Last picture shows most of the tubing added along with a few more boxes and control units. I scraped out the rear air tubing and added the twisted tubing on top of it to give it a more 3D appeal. :)
 

Attachments

  • cockpit 001.jpg
    cockpit 001.jpg
    38.7 KB · Views: 136
  • cockpit 002.jpg
    cockpit 002.jpg
    15.8 KB · Views: 133
  • cockpit 004.jpg
    cockpit 004.jpg
    38.1 KB · Views: 139
  • cockpit 005.jpg
    cockpit 005.jpg
    40.7 KB · Views: 147
Now those are some better pics Bill and can see the work clearly and I have to agree with others :thumbleft: Cheers
 
Very authentic looking, well done Bill and good pics as well. May I suggest though that you try a background that's not so shiny, it takes your eye away from the detail.
 
I was able to get a bit more done on the right side this morning. I added much of the wiring and the rest of the heater hose. I also added a couple of decals. In back of a couple of flat gauges I added a small section of wire insulation. This was from some of the wiring I stripped earlier. I thought it came out nicely. For one they are already round and it has a hole in the back that a strand of wire can be glued into making it a very convincing round instrument housing. :)
 

Attachments

  • cockpit.jpg
    cockpit.jpg
    34.8 KB · Views: 128
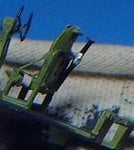
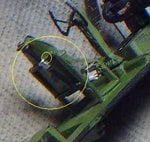
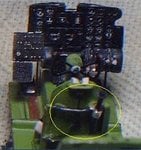
Thanks... moving on I've made the emergency seat release. Based on what I've learned from Mr. Stine and a lucky photograph, I have been able to successfully put it together.

First I made a couple of cross pieces for the back of the pilot's seat. The top one is where the push rod attaches to the seat via a flat bracket just right of center. I circled this (smaller circle) in the second photo. The lower cross piece is thinner and is likely a wire that pulls springloaded support pins out of the hinges supporting the back of the pilot's seat thus allowing it to fall backward and the pilot to go over it in an emergency. The main push rod I made from stretched sprue, flattening it on one end for the cap. Just above the spot where it attaches to the flat bracket, there are a couple of collers and a spring in between them making the push rod spring loaded as well. I simulated this with aluminum tape. Sorry but my feable skills don't allow me to make springs that small. I did give it a try though. :) I hope you like the effect. :)
 

Attachments

  • cockpit 007.jpg
    cockpit 007.jpg
    10.5 KB · Views: 151
  • cockpit 008.jpg
    cockpit 008.jpg
    15.7 KB · Views: 160
  • cockpit 009.jpg
    cockpit 009.jpg
    16.6 KB · Views: 158

Users who are viewing this thread

Back