Navigation
Install the app
How to install the app on iOS
Follow along with the video below to see how to install our site as a web app on your home screen.
Note: This feature may not be available in some browsers.
More options
You are using an out of date browser. It may not display this or other websites correctly.
You should upgrade or use an alternative browser.
You should upgrade or use an alternative browser.
**** DONE: Revell P-61A 1/48 scale, Nocturnal Nemesis, Night Fighter GB.
- Thread starter Night Fighter Nut
- Start date
Ad: This forum contains affiliate links to products on Amazon and eBay. More information in Terms and rules
More options
Who Replied?- Thread starter
- #103
Night Fighter Nut
Master Sergeant
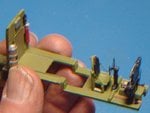
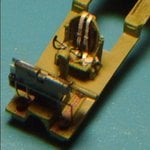
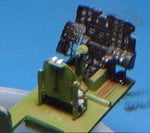
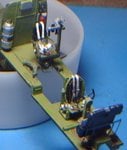
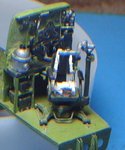
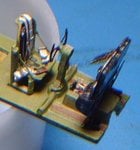
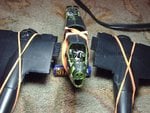
Ok... Here are some of what I've been able to do this weekend in between the honey do lists. First I added the control panel and yoke along with a bracket behind the pilot's seat. A back seat cushion was added that I made from a slice of rubber. I have seen this cushion in too many photos to believe it's just a fluke so I added it. Then I added seat belts to all three seats. I was quite surprised and happy with the way they turned out. I'll weather all this stuff later just before I close up the fuselage. I set the seats in their respective spots just to see how they would look and to see if there would be any problems when I dry fit everything. All the usual gaps were in place that I expected. The wing roots and along the wings where the nacelles attach. I know that some folks wanted to see how the two nacelles looked after I did some part swapping so I included a side by side picture of those.
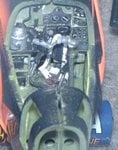
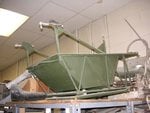
Finally I have a big question I'm trying to solve. This has to do with the door mechanism. I've been in contact with a museum to find out how it actually worked and they said they would get back with me but I must not show any pictures that they send me. Sorry guys. I will, however, incorporate them into this model. The last picture I pulled off the web to show my predicament.
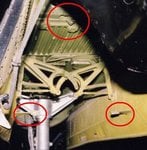
This door is pretty interesting. From other photos I've seen there is some kind of push rod affair just behind and to the right, as you face the front of the plane, of the pilot's seat. There is also a push rod that is stepped on in order to raise the lower part of the ladder on the left side as you face the front of the plane. This last push rod ties in with the half gear that is seen on the lower left of this door at the hinge of the ladder. As I understand it, this rod, when stepped on, pushes on the gear and swings the lower part of the ladder up at which point someone pulls it the rest of the way up. I'm thinking then that there are two rods and the one that I see to the right of the pilots seat is a release mechanism for the door. If anyone can help me with this I would greatly appreciate it as I await more information from the museum.
Attachments
-
 P61A 017.jpg25.5 KB · Views: 154
 -
 P61A 018.jpg51.6 KB · Views: 145
 -
 P61A 020.jpg32.9 KB · Views: 155
 -
 P61A 021.jpg35.6 KB · Views: 161
 -
 P61A 026.jpg42.1 KB · Views: 153
 -
 P61A 025.jpg52.3 KB · Views: 153
 -
 P61A 024.jpg35.1 KB · Views: 148
 -
 P61A 023.jpg33 KB · Views: 148
 -
 P61A 022.jpg29.9 KB · Views: 145
 -
 P61A 028.jpg73.7 KB · Views: 159
 -
 P61A 027.jpg60.6 KB · Views: 154
 -
 P61A 029.jpg29.2 KB · Views: 147
Last edited:
Aaron Brooks Wolters
Brigadier General

Airframes
Benevolens Magister
Nice work Bill !
very nice
Vic Balshaw
Major General
Some nice work going on here and hope you get you answers Bill
Some super work doing on there. Great to see it.
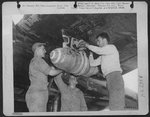
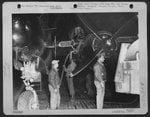
Found these images on the 'net. Some nice detailing.
Not sure how many of you guys have found the Footnote website
Footnote.com - The place for original historical documents online
Sign in for free and many images are download free.
Flexi
Found these images on the 'net. Some nice detailing.
Not sure how many of you guys have found the Footnote website
Footnote.com - The place for original historical documents online
Sign in for free and many images are download free.
Flexi
Attachments
Matt308
Glock Perfection
Now those are cool pics. 
Agreed Matt....damn cool!!
- Thread starter
- #113
Night Fighter Nut
Master Sergeant
That second one is real helpful. Just need to blow up the ladder area. Thanks...

- Thread starter
- #114
Night Fighter Nut
Master Sergeant
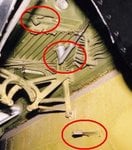
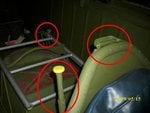
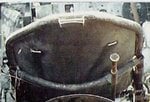
Ok... here are some of the details I've been able to find around the web. That push rod behind the pilot seat may operate that hook latch seen in pictures two and three. In picture one you can see the half cog and just a bare glimpse of the push rod that causes the lower part of the ladder to swing up.
Attachments
Last edited:
- Thread starter
- #115
Night Fighter Nut
Master Sergeant
Just an update... I recieved an answer from Russ Stine on how the ladder works and have identified what I was seeing in the picture. Here is what he sent to me.
"Regarding the entrance ladder.
A linear gear is attached to the rod. A circular gear is attached to the lower folding portion of the ladder. When in the aircraft, pushing on the knob of the rod retracts the lower half of the ladder into spring clips which keeps it folded.
The ladder assembly is then raided manually by two handles, one at the top and one located midway in the folded assembly. The up-lock is a simple cam affair which turns 90 degrees. Now, there is a spring loaded rod/handle assembly on the right side of the pilot's seat which, I think, you are referring to in your email. This has nothing to do with the ladder. It is used to fold down the pilot's seat back so the pilot can exit in flight, otherwise he cannot get over the seat back with the top hatch closed.
The bathtub (space for the retracted nose wheel) is of course attached to the ladder assembly. This whole thing can be jettisoned prior to crew bail out.
Russ"
In that first picture above, the push rod with the yellow top is a seat release. The green bowed handle is one of the handles for pulling it closed. The picture of the tub I posted earlier in post# 103, the last photo, shows the other handle and on the bottom left corner of that other picture, you can see the rod he's refering to as the one that causes the ladder to fold up when stepped on.
Vic Balshaw
Major General
Oh my, that's some good technical information. Guess this puts you on the right track Bill.
- Thread starter
- #117
Night Fighter Nut
Master Sergeant
As I was explaining to someone else, the area just behind the pilot's seat and just before the gunner's seat has been a black hole. There are just not any photos easily found for this area. With this information I just received, I now know exactly what it looks like and how if functions. Now my plane will be more accurate.  I've already started to scratch build this area so that other folks will see what it's suppose to look like. Putting light onto a black hole so to speak.
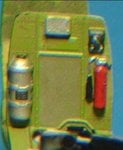
  Oh and here is a little picture that may also help.
Attachments
Last edited:
Airframes
Benevolens Magister
Great info. Always wondered how the crew could bail out - now I know!
N4521U
Plastic Pirate
You've got some great stuff going there NFN....
well done.
well done.
Looking forward to more !!
Users who are viewing this thread
Total: 1 (members: 0, guests: 1)


