- Thread starter
- #361
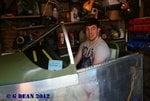
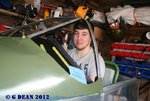
As its been quite a decent day....mid winter and all that !... I've spent 7 hours out in the Shangar working on my '51 today.
I really didn't want to start to do what had to be done, but you know how it is, once you've started, it isn't that bad....really")
Decided it was high time to strip the upper panels off, dismantle the windshield structure and reprofile it all (drop the rear hoop by 2 inches in height.)

That really hurt as she didn't look like a '51 an more with all the stuff piled high on the work bench


I was not a happy teddy !!!

However, got Mr Miller and his cohorts, blasting out on the junkbox so it was out with the jigsaw...and then time to start putting it all back together again. And do you know what ?....."What" you all say in unison....I is well pleased how she's turned out.


With the correct angle of dangle on the windshield front glass, she doesn't look like a DH Chipmunk any more, looks a whole lot more rakish and sinister and business like. Incidentally, while I was taking it all apart and re-assembling, I took the opportunity to remove the paint from the hoop and front supports (these weren't normally painted, I have since discovered) and also marked a line along the painted section. I now have to remove the paint from below this line as yet again, I've found out, that the colored area didn't normally follow the fuselage skins as a demarcation line.
No worries. Gives me something to look forward to...probably tomorrow ?... stripping off the paint, then I can re-attach the top skins properly and she's back together again.
I'll also be fitting the left hand cockpit lamp and switch I recently got from a mate who's rebuilding a Dak cockpit...and yes, he has joined this forum and is working on starting a thread here (his Dak is quite simply bl**dy awesome !!) and I'll also be installing the correct dimmer switch box / panel for the gunsight that Tony brought back from the States for me.
And I apologise for the quality of the pics, they were taken with and old cell phone on account of my daughter has jammed my CF card for the camera into the computers card slot and I've got to dismantle the whole ruddy thing to get it out...and I havent done that yet....
I really didn't want to start to do what had to be done, but you know how it is, once you've started, it isn't that bad....really
Decided it was high time to strip the upper panels off, dismantle the windshield structure and reprofile it all (drop the rear hoop by 2 inches in height.)
That really hurt as she didn't look like a '51 an more with all the stuff piled high on the work bench
I was not a happy teddy !!!
However, got Mr Miller and his cohorts, blasting out on the junkbox so it was out with the jigsaw...and then time to start putting it all back together again. And do you know what ?....."What" you all say in unison....I is well pleased how she's turned out.
With the correct angle of dangle on the windshield front glass, she doesn't look like a DH Chipmunk any more, looks a whole lot more rakish and sinister and business like. Incidentally, while I was taking it all apart and re-assembling, I took the opportunity to remove the paint from the hoop and front supports (these weren't normally painted, I have since discovered) and also marked a line along the painted section. I now have to remove the paint from below this line as yet again, I've found out, that the colored area didn't normally follow the fuselage skins as a demarcation line.
No worries. Gives me something to look forward to...probably tomorrow ?... stripping off the paint, then I can re-attach the top skins properly and she's back together again.
I'll also be fitting the left hand cockpit lamp and switch I recently got from a mate who's rebuilding a Dak cockpit...and yes, he has joined this forum and is working on starting a thread here (his Dak is quite simply bl**dy awesome !!) and I'll also be installing the correct dimmer switch box / panel for the gunsight that Tony brought back from the States for me.
And I apologise for the quality of the pics, they were taken with and old cell phone on account of my daughter has jammed my CF card for the camera into the computers card slot and I've got to dismantle the whole ruddy thing to get it out...and I havent done that yet....
Last edited: