Geedee's P-51D Cockpit Project

Ad: This forum contains affiliate links to products on Amazon and eBay. More information in Terms and rules

Tops mate.....*^*ing tops!!!

Cheers Darryl...looong waaay to go before she's ready for me to sit in, fire up and go for a sortie :cry: On the plus side I have installed a small hydraulic ram into the control column torque tube so that I can at least now move the stick backwards and forwards and now the throttle quadrant is ....oooops, that another thing I've got planned but wont go into details just yet :)

Wow, Gary, that's really looking fantastic! Great job

Thanks Eric, much appreciated. Like I've said, wouldn't have got this far without your support.

Jesus gary....that is truely excellent work man...

Wayne, compared to what you do with an OOB model, it pales into insignificance. Your skill set is waay above mine....I can just about get away with some things full size...but in the scale you work to...not a hope in h*ll

When you get the twist grip are you doing to try to make it actually change the range on the gun sight?

Glenn, I would certainly like to. I also want to get the gunsight operational as well, but as she's 24V, not sure if I can replace the bulbs with 12V jobbies and hope they still work Ok. Time will tell mate !

Man, you been busy! Looks excellent to me Gary. Great work on the throttle and your trim wheel is innovative.

Thanks Andy. Still a huge load to do on the throttle and making the trim wheel was 'fun', but as it sits down out of the way, hopefully no-one will tell me that the lettering is the wrong font (the size is spot on tho' !!)

Bl**dy Brilliant Gary! It looks tops mate, and I'm really annoyed I can't get there to see it in person

Cheers Terry. Don't worry mate, you will get to see her...and hopefully a bit more advanced than she is at the moment...sometime during the year. If the forum meet 'takes off' then I might be see about bringing her along ?. Just depends on finances and trailer availability at the time. and yes, you'll be first in the driving seat :)
 
STU-FREAKIN-PENDOUS!!!!!:shock: She looks amazing Gary! I just thought of something though. Would a sheet of half inch thick plastic work for the armor? Just a thought. You could spray it in green and no one would ever be the wiser.
 
! I just thought of something though. Would a sheet of half inch thick plastic work for the armor? Just a thought. You could spray it in green and no one would ever be the wiser.

Now that, me 'ol mate, is something I hadn't thought of. Not sure about the strength quality of plastic where the public is concerned....I just know that they will put their hand on armor plate instead of the seat back plate to help climb in and out... but if I was only going to let myself sit inside, it would certainly do the job. However !....you have given me abrilliant idea....I can get some and fix it to the armor plate I've installed. This will make it look far better and nearer to the original without adding umpteen pounds in weight to the whole setup. sprayed up in the same colour as the backrest, it'll look A OK. cheers dude, great idea ! :thumbleft:

Gary...just bloody fantastic mate..!!!!!!
You know I get sooo pumped with you guys support...its a good job I don't have buttons on my works T-shirt....I'd be forever popping them off with enlarged chest syndrome :)

Amazing! The work you are putting in to all of this is really top notch, mate!
. Eric, when you get the chance to cross the pond for Flying Legends, it'd be great if I could arrange for you to see her properly. It's about time you got some '51 time :D

Excellent work Gary! She really is going to look the business when done.
Many thanks mate. I just hope I can keep the momentum running as its getting to the point where some of the temporary stuff I've installed, would require a pretty much full-on strip down of the whole 'tub to get access. I've been a victim of press-on-itis and hate having to think that I've got to gut her to change one little thing. However, knowing that you guys are interested makes all the difference :)
 
Just thinking about the gun sight Gary. What's the problem about getting it working? If it's due to being 24 Volt, then car bulbs are available in 24, and the bulb holder could be maybe be adapted if required. It could be run of a 12 v battery, via a 'redcuer', as used on car stereos when the system is 24 v, or dual system, like my old Landcruiser was. Just a thought.
 
Just thinking about the gun sight Gary. What's the problem about getting it working? If it's due to being 24 Volt, then car bulbs are available in 24, and the bulb holder could be maybe be adapted if required. It could be run of a 12 v battery, via a 'redcuer', as used on car stereos when the system is 24 v, or dual system, like my old Landcruiser was. Just a thought
.

Terry, the only problem I have with getting the gunsight working is the wiring !. Give me one red and one black wire and I can just about find my way about....compound that with 12 V batteries wired in series / paralell ?....and I'm right out of my comfort zone !. It's smoething I will have to get to grips before much longer, so I'll keep you guys posted. Need to get some pics looking through the gunsight with her all lit up !!

Just an idea that popped into me noggin. Hope it works.

Aaron , its on the back burner at the moment but will incorporated very shortly. Heck, you should start on your own one now and then you can make a spare for me !! :thumbleft:

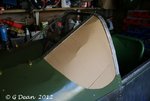
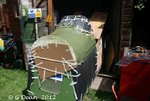
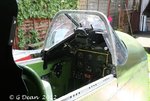
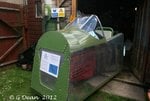
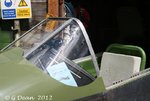
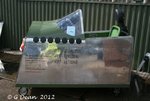
Okeydokey chaps, been a bit busy this last week...actually, cos of the frigging awfull weather, I've managed less than 6 hours work on her this whole past week, not impressed I can tell you. What I've managed to cobble together is a set of side-screen / quarter-lights...whatever you call 'em !... out of some perspex. While both sides are in on the windshield area, I'm not happy with them because the only perpex I could get is quite thin and so fragile you wouldn't believe (I made 4 screens for the left hand side before I could get one installed without cracking and breaking. I've been using a hair dryer to try and warm the perspex so it'd go inside the compund curves....but that wasn't very good.

Then I upgraded to a paint stripper heat gun... and promptly melted one screen. You can see on the left hand side screen at the top, I started to melt the 5th one as well, but as I was soo bl**dy annoyed at that time, and I really didn'y want to make a 6th one for the very first side, I've left it in. If you look closely (please dont !) you'll see where the perspex doesn't quite fit in some places, but if I do any more to the screens, they'll just throw Teddy right out of the cot and break into loads of shards. Heck, I'm even scared of closing the Shangar door too loud incase they get scared and crack even more !!

I'm sure they never had this hassle back in the last Big One !!

End result at the moment, is that the screens are in, but are only temporary until I can get some decent perspex to replace them (they'll do for Cockpitfest this weekend). I also took the opportunity to give her a respray as the top decking paint was getting tatty.

And I hope to have some exciting news regarding her, in the next few weeks, but I wont say anything at the moment :D

Right, here's the pics....
 

Attachments

  • mp23.jpg
    mp23.jpg
    62.2 KB · Views: 199
  • mp24.jpg
    mp24.jpg
    92.2 KB · Views: 196
  • mp25.jpg
    mp25.jpg
    82.9 KB · Views: 218
  • mp26.jpg
    mp26.jpg
    94.2 KB · Views: 212
  • mp27.jpg
    mp27.jpg
    80.7 KB · Views: 204
  • mp28.jpg
    mp28.jpg
    74.8 KB · Views: 200
That's looking the bumble's b*ll*cks Gary! With those compound curves, it's going to be a tad tricky getting any Perspex to mould to the right shape. But here's a couple of ideas which may work, although not perfect.
1) Try using two sheets for each 'pane', as a sandwich, possibly with cellophane film or perhaps 'clingfilm' as the core. This should help prevent stress cracks, the two sheets providing rigidity, and the clear 'core' adding strength.
Pre-shape these as near as possible, before fitting, by immersing in hot water and, wearing protective gloves, bend the sheets whilst submerged. Then commence fitting, using the hair drier to maintain some heat whilst installing. You will probably need help from someone to operate the hair drier whilst you 'manipulate the sheets!
2) Try using a thicker gauge of acrylic or acetate sheet, maybe up to 1/16th inch, using the hot water technique as above. These materials should heat-form easier than 'Perspex'.
Theoretically, both of the above should work, but of course it's a case of trial and error.
 
Gotta agree there. The only other thin I was thinking was whether it's possible to shape a mold out of a large block of wood and then heat the perspex to sufficiently to drape over the mold. Kinda like Terry made is Mosquito cockpit hood.
 
That's looking the bumble's b*ll*cks Gary! With those compound curves, it's going to be a tad tricky getting any Perspex to mould to the right shape.

Cheers Terry. Well, apart from getting soaked and cold at cockpitfest and a few other things I'm really pleased with :D, I was advised to get hold of some Lexan which is infinately more pliable than the stuff I've been using, even in thicker sheets !. Needless to say, I'm scouring the web for suppliers at the moment. And many thanks for your suggestion regarding hot water and stuff....hadn't even thought about that side of things !. Just goes to show what a huge amount of knowledge and support there is available on this forum....I wouldn't have have gotten anywhere near where I am at the moment if it hadn't been for you guys !:oops:

Looks awesome Gary!
Gotta agree there.
Absolutely awesome gary!

Cheers guys, I mean what I say in my last sentence above :thumbup:

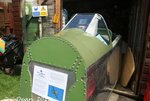
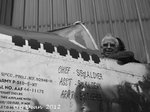
Here's two pics from this weekends Cockpitfest.

You will see, I've been adding some stuff to the outside.
The kill stickers are one for each year of the build to date. I started way back in 2005 with a blank instrument panel, however, it's taking me soo long I reckon she'll either be covered in black crosses before I finish or would it just be far simpler to paint black !!!.

The names of my crew are:-

My Crew Chief is Tony ...AKA Rocketeer. It's all his fault :lol: I started on this project and you couldn't ask for a more friendlier, helpfull, knowledgable, eager and willing Wingman to help on a project.

My Assistant is my dad, who passed away a number years ago. He was a guy who I greatly respect and miss and I thought it a fitting tribute to have his name on my '51. If it wasn't for him, I wouldn't be typing this !

My Armourer is Tom...pictured sat in the '51 yesterday...who is going to be doing my Nose-Art. He was an RAF Fighter Controller and he started out as a cadet working on Mk22 Spitfires !. But his overall alltime fave 'plane is the '51. We had a good long discussion on the Nose-art and having seen some of Tom's previous work, it's going to be bl**dy brilliant. Tom is also stoked that his name is now on the side of a '51 !
 

Attachments

  • mp29.jpg
    mp29.jpg
    78.5 KB · Views: 203
  • mp31.jpg
    mp31.jpg
    79.1 KB · Views: 179

Users who are viewing this thread

Back