Gomix Flymodel Lancaster Bomber

Ad: This forum contains affiliate links to products on Amazon and eBay. More information in Terms and rules

Ahoy

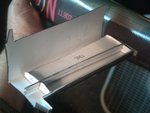
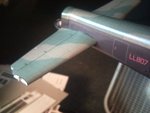
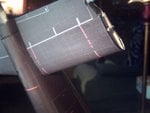
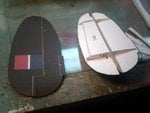
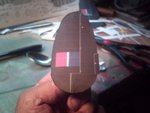
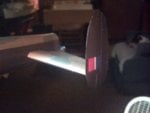
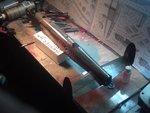
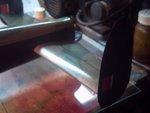
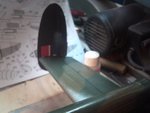
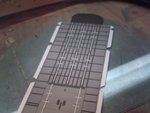
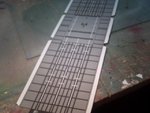
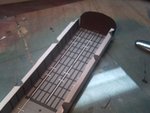
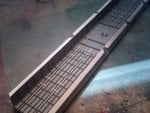
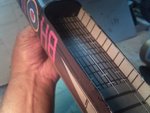
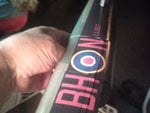
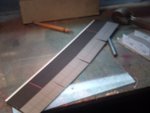
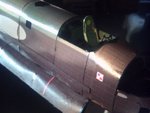
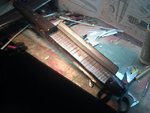
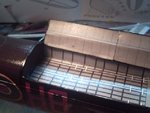
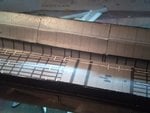
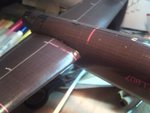
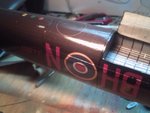
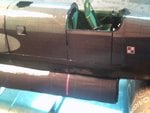
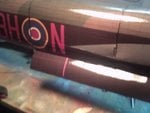
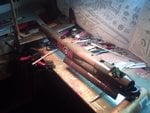
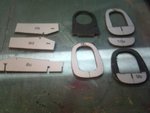
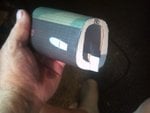
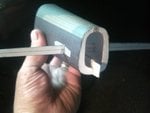
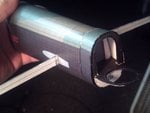
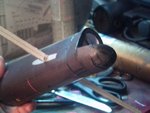
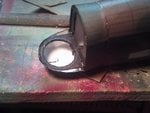
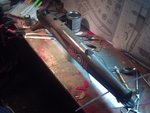
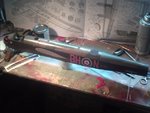
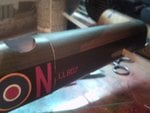
Here is the update for the night more tomorrow, The fuselage structure as skins go is all done, Next I will construct the stabilizer and rudder assembly and next will be the bomb bay. As to the construction of the fuselage last skin part 8 and 9 went together very good good fitting weas acheived on the assembly a great kit the earlier Lancaster kit were hand drwan and it presented a lot bad fit issues at one point you feel like throwing it away in the trash formers were oversized and the skins were to small alot bad issues. now glomix flymodel has re- issued a better kit this klit I am building now is re- issued and drawn by another designer. As of now I am doing more burnishing I will make all of the seams dissappear here is the update for now more tomorrow thanks all you fellas for your views and replies I love this website and forum.

Boats:D:D:D:D:D
 

Attachments

  • PICT0001.JPG
    PICT0001.JPG
    40.7 KB · Views: 111
  • PICT0002.JPG
    PICT0002.JPG
    36.2 KB · Views: 108
  • PICT0003.JPG
    PICT0003.JPG
    36.4 KB · Views: 106
  • PICT0004.JPG
    PICT0004.JPG
    41.5 KB · Views: 111
  • PICT0005.JPG
    PICT0005.JPG
    43.2 KB · Views: 115
  • PICT0006.JPG
    PICT0006.JPG
    51 KB · Views: 120
  • PICT0007.JPG
    PICT0007.JPG
    56 KB · Views: 117
  • PICT0008.JPG
    PICT0008.JPG
    52.2 KB · Views: 114
  • PICT0009.JPG
    PICT0009.JPG
    39.2 KB · Views: 117
Doing very good, You have probably said this before but who can you order these kits here in America from. And what kind of glue and tools are needed to put one of these kits together.
 
Ahoy wojtek
I use colored pencils, or magic markers by bic, there is a time I mix up water based Polly S paint in the military selections but black is the best Wojtek it gives thye seams the effect of panel lines, after the glue and the marker or paint has eried aroma free. I spray on a coat of Krylon clear and burnish in the seams and it blends it in with the skins. The rule of thuimb in edging the parer is to use the color of the printing, In the case of the Lancaster I used black, Dark Earth and Dark green when done gle together and burnish.

Boats

Hello my friend,

Thank you for the replay. Although these acrylic paints are really nice for colouring these edges I would use inks of proper colours. Anyway a very nice work so far. :thumbright:
 
Doing very good, You have probably said this before but who can you order these kits here in America from. And what kind of glue and tools are needed to put one of these kits together.


Ahoy
The only place I know in USA that sell carrd models is the paper model store Paper Model Store BUttttttttttttttttttt they dont sell the hard to find kits like my Lancaster bomber . I use Aleens Tacky type glue There are other types of glue UHM glue stick and tacky glue can be bought at the office max or Micheals craft store as of tools No. 11 exacto blades are hioghly reccemended, straight edge metal rulers, colored markers for edgeing also you will need a good burnishing tool for burnishing out the seams a tea spoon would do.

Boats
 
Hello my friend,

Thank you for the replay. Although these acrylic paints are really nice for colouring these edges I would use inks of proper colours. Anyway a very nice work so far. :thumbright:

Ahoy Wojtek
I agree getting colored inks that match the printing are hard to find here in the USA for camo jobs I usae model master or Polly S water based paints they seem to be closer to work with the color of the printing. The Lancaster is starting to grow in to a bomber. Thanks wojtek your the greatist.

boats
 
Ahoy
Here is the update for the night letting her dry over night, As of todays update build report I constructed and installed the stabilizer and rudders. Useing the kits spar and ribs and reinforcement plate gives additional strength for the stabilizer. cutting out the stabilizer and pre creasding the leading edge to fold over the spars and ribs were done. once all of the spars have been glued in place now its time to add the stabilizer skins the rudders were done the same way. been doping some additional burnishing was done to smooth out the seams. tomorrow I will fill in the bomb bay and assemble the bomb doors. then next I will move on to the turrets.

Boats:D:D:D:D
 

Attachments

  • PICT0010.JPG
    PICT0010.JPG
    43.3 KB · Views: 104
  • PICT0011.JPG
    PICT0011.JPG
    39.1 KB · Views: 101
  • PICT0012.JPG
    PICT0012.JPG
    42.5 KB · Views: 102
  • PICT0013.JPG
    PICT0013.JPG
    42.9 KB · Views: 106
  • PICT0014.JPG
    PICT0014.JPG
    37.8 KB · Views: 97
  • PICT0015.JPG
    PICT0015.JPG
    39.5 KB · Views: 103
  • PICT0016.JPG
    PICT0016.JPG
    45.2 KB · Views: 95
  • PICT0017.JPG
    PICT0017.JPG
    56.5 KB · Views: 98
  • PICT0018.JPG
    PICT0018.JPG
    34.6 KB · Views: 114
  • PICT0019.JPG
    PICT0019.JPG
    35.4 KB · Views: 106
Matt, it was standard on twin-finned RAF aircraft - probably for visibility from various angles.
 
Ahoy
Thanks fellas again for your replies as you can see the Lanc is taking form Matt Terry is right the fin flashes are common with all RAF Bombers alike even the old Hudson bombers had them they were standard on twin tail aircraft. Okay as to the build I am now working on the bomb bay assmebly. So far I have cutted out and installed the false bomb bnay flooring to the bottom of the fuselage now it has additional strength not flimsy anymore, Once the flooring has been installed I cutted out and installed the printed bomb bay intereir to the false flooring next I cutted out and installed the right bomb bay door there were 8 parts to the right bomb bay door the same applies to the bomb door assembly. tonite I should have the other bomb bay door assembled and installed next I will add the linkages and the bombs and get them oput of the way after that its finishing up the fuselage bu completeing the canopy all of vthe turrets and other sundries, then the massive wings. here is the update build report I will post another one later tonite.

Boats:D:D:D:D
 

Attachments

  • PICT0001.JPG
    PICT0001.JPG
    30.5 KB · Views: 94
  • PICT0002.JPG
    PICT0002.JPG
    39.9 KB · Views: 95
  • PICT0003.JPG
    PICT0003.JPG
    43.9 KB · Views: 100
  • PICT0004.JPG
    PICT0004.JPG
    45.7 KB · Views: 100
  • PICT0005.JPG
    PICT0005.JPG
    48.4 KB · Views: 97
  • PICT0006.JPG
    PICT0006.JPG
    45.7 KB · Views: 101
  • PICT0007.JPG
    PICT0007.JPG
    47.3 KB · Views: 93
  • PICT0008.JPG
    PICT0008.JPG
    33.6 KB · Views: 101
  • PICT0009.JPG
    PICT0009.JPG
    37.1 KB · Views: 98
  • PICT0010.JPG
    PICT0010.JPG
    46.3 KB · Views: 93
  • PICT0011.JPG
    PICT0011.JPG
    53.7 KB · Views: 91
  • PICT0012.JPG
    PICT0012.JPG
    52.6 KB · Views: 92
  • PICT0013.JPG
    PICT0013.JPG
    46.9 KB · Views: 90
  • PICT0014.JPG
    PICT0014.JPG
    42.2 KB · Views: 96
  • PICT0015.JPG
    PICT0015.JPG
    45.3 KB · Views: 95
  • PICT0016.JPG
    PICT0016.JPG
    45 KB · Views: 99
  • PICT0017.JPG
    PICT0017.JPG
    39.9 KB · Views: 91
  • PICT0018.JPG
    PICT0018.JPG
    53.1 KB · Views: 96
Knowing the way British 'officialdom' works, especially back then, it was probably a case of sticking rigidly to the rules. "The 'book' says there should be a National Marking on each side of the fin - oh look, there are two fins! OK, a flash on each side of both then!"
Of course, it probably also had something to do with identification from the early war period, with early 'imports' from the USA, such as the Hudson, and possible confusion with the Do17, which continued as other types came into service.
 
Great looking build of one of my all time favourite aircraft. I never realised card kits were so sophisticated. You're doing a really nice job on it.

I have been collecting the 1/32 balsa and metal skinned Lancaster partwork from Hachette and now have the complete collection, apart from the glazing for the rear turret which has arrived broken on three occasions! So far, I've only completed a couple of test sections but if enough people are interested, will post a thread of the build when I properly start. It's likely to be a long term project though, as I can't see myself making the type of rapid progress you're making on this one.
 

Users who are viewing this thread

Back