Hobbycraft Dornier Do-17Z 5K+EA BoB GB

Ad: This forum contains affiliate links to products on Amazon and eBay. More information in Terms and rules

Sorry Wojtek, not sure what you mean?
I see Harry. Look at these images and the diagram. Sorry I used these for Fw-190 but no time for looking for Do-17 ones. Anyway, I'm sure you know now.
 

Attachments

  • stery.jpg
    stery.jpg
    77.6 KB · Views: 63
  • FW190-A1-3s.jpg
    FW190-A1-3s.jpg
    53.2 KB · Views: 68
  • FW190-A3-4s.jpg
    FW190-A3-4s.jpg
    54.7 KB · Views: 70
  • Fw190D-9 Blue12.jpg
    Fw190D-9 Blue12.jpg
    31 KB · Views: 65
Looking good Harry,seams are my weak point at the moment but it looks like you have those well in hand.
 
Harrison, there was a time when you would not have spent the time perfecting the seams like you are now doing. Great stuff! Keep it up and this one will be your best yet.
 
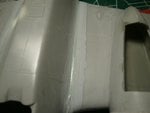
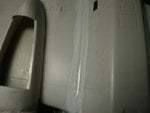
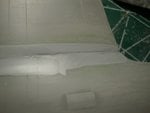
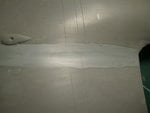
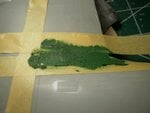
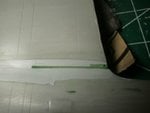
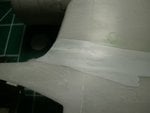
Squeezed some work in. The troublesome area was in picture number two I think?

I know some will ask why so much putty, well I couldn't find my dental probe which I use so I used my finger (Almighty model gods it will never happen again)

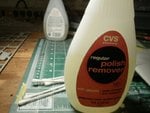
Using the Nail polish and Q-Tip method I got the putty into the area I wanted. Last picture is the troublesome area which I'm gonna tackle next.
 

Attachments

  • P2240101.JPG
    P2240101.JPG
    52.1 KB · Views: 91
  • P2240100.JPG
    P2240100.JPG
    37.9 KB · Views: 93
  • P2240099.JPG
    P2240099.JPG
    35.4 KB · Views: 101
  • P2240098.JPG
    P2240098.JPG
    33.3 KB · Views: 95
  • P2240097.JPG
    P2240097.JPG
    32.3 KB · Views: 98
  • P2240102.JPG
    P2240102.JPG
    56.8 KB · Views: 93
  • P2240103.JPG
    P2240103.JPG
    58.7 KB · Views: 92
  • P2240104.JPG
    P2240104.JPG
    36.7 KB · Views: 97
  • P2240105.JPG
    P2240105.JPG
    37.1 KB · Views: 95
Doing good Harrison keep up the momentum it will all be worth it in the end
 
Harrison, it's looking excellent man. If I may though, I will let you in on a little sanding trick. Just let the paper do the work. In other words, use just enough pressure on the paper to keep it in your grip. This will let the paper work better without clogging up and in some cases it will actually sand faster. If you use to much pressure you tend to pull to much material and you have less control. Hope this helps. I'm not trying to be bossy, but I can see some indications that a little to much pressure has been used in some of your photos. If I've overstepped my bounds just let me know. :thumbright: :cool:
 
Hey Aaron appreciate the comment. Any and all criticism is always welcome! I just started out a bit sloppy on this one and wanted to get any glue off but I realized I should of done what you mentioned above and went lighter on the sandpaper. Thanks again!
 
Any one know what color the spinners are on the props? If not any suggested colors?
 

Attachments

  • Can Jan 343.jpg
    Can Jan 343.jpg
    28.4 KB · Views: 70
I'll TRY to get pics up but I'm gonna have a somewhat busy week so it'll be a long shot

I'm trying to get motivated to get back so I tried white walling the Do's rear landing wheel. I am trying to finish paint/constructing both main landing gear legs, filling the gaps, and trying to keep patient with this one

I think my form of motivation will come in 2 weeks at WW2 weekend in Pennsylvania so just hang on.
 
Nice work there Harrison!

Aaron, cheers for that sanding tip!
Another one (in case anyone dosen't know it) is to sand in circles, not back and forth in a line as I used to do. Works wonders.
 

Users who are viewing this thread

Back