Italeri 1/72 scale JU-52 Minesweeper from Minensuch-Gruppe; France 1943

Ad: This forum contains affiliate links to products on Amazon and eBay. More information in Terms and rules

I see your problem re the corrugations. I think the simplest solution would be as follows:-
Wait until the model is painted and decalled. Then, part fill the lamp apeture with either Micro Kristal Kleer, or ordinary PVA (white glue). Let this set, when it will 'sink' into the hole. Paint the area silver and, when dry, apply more PVA/Kristal Kleer and let it set. This will dry clear, and give the appearance of a glass lens. If it is still 'depressed', then repeat until satisfied.
Voila - one lamp!
I rarely use the kit parts for this type of lamp, prefering the above method, given that the dimensions aren't too large, which, in this scale, they won't be.

That's ingenious! I never thought about using 2 coats (1 silvered and one clear).
 
I see your problem re the corrugations. I think the simplest solution would be as follows:-
Wait until the model is painted and decalled. Then, part fill the lamp apeture with either Micro Kristal Kleer, or ordinary PVA (white glue). Let this set, when it will 'sink' into the hole. Paint the area silver and, when dry, apply more PVA/Kristal Kleer and let it set. This will dry clear, and give the appearance of a glass lens. If it is still 'depressed', then repeat until satisfied.
Voila - one lamp!
I rarely use the kit parts for this type of lamp, prefering the above method, given that the dimensions aren't too large, which, in this scale, they won't be.

Is Micro Kristal thick enough to bridge the opening without just falling into the opening? I would think it would be both expensive and messy to have the entire wing full of glue. :p
 
I'm guessing the opening is only about 3 to 5mm in diameter, so the Micro will form a membrane across this, if you apply it with a cocktail stick or an old paintbrush. Let the first application set, and you might find that it hasn't completely filled the aperture. However, a second application, over any gap, will fill it. You only need to create a 'bridge', not stuff the entire hole. At the most, you'll need three, four at the outside, applications, so we're only talking about a very small amount. I do this in 1/48th and 1/32nd scales, so it shouldn't be a problem in 1/72nd scale, even though the JU52 is relatively large.
I agree that Micro Kristal Kleer is fairly expensive - so I mainly use a PVA , which is basically the same thing!
If in doubt, buy a PVA which sets clear - this should be shown on the bottle or container.
The alternative would be to insert a piece of scrap sprue into the hole, cementing this to the inside of the wing top surface, in order to create a backing, then part fill the hole with your prefered filler or putty, then apply the Kristal Kleer/PVA. But to be honest, I don't think you'll need to.
 
practice on a scrap piece of simlar thickness plastic first, drill a matching size hole and away you go, as per Terry's instructions, will give you an idea what happens before you try it on your wing!:D
 
I was ready to continue moving forward with this but today while picking up some RLM paints for the upcoming HS 129 project I ran across this book by Squadron and its given me some motivation to pull back the reins and add some more detail before closing up the fuselage.

SQUA-01186.jpg


Till next time...
 
doing up a Ju 52/3mg6e(MS) correct ?

white theater band code in white-single capital and shown under the right/left wing in black outside of the wing cross. two tone splinter camo on the uppers. have 3-4 b/w pics, but I bet and am hoping your new copy of that squadron signla book will show more... ?

and for your data file(s) on your model you cannot go without this...........

http://www.ww2.dk/air/seefl/msgr1.html
 
Last edited:
doing up a Ju 52/3mg6e(MS) correct ?

white theater band code in white-single capital and shown under the right/left wing in black outside of the wing cross. two tone splinter camo on the uppers. have 3-4 b/w pics, but I bet and am hoping your new copy of that squadron signla book will show more... ?

and for your data file(s) on your model you cannot go without this...........

Minensuchgruppe 1

Erich

Please, post the pictures.You can never have enough pictures
 
Dirk

I wish I could no scanning equipment available but will seek out.

am going to also try another German web-site dealing with the Kriegsmarine but does have an associated Luftwaffe forum albeit quite small there are some pretty intelligent and well versed guys there with a truck load of photo's
 
Matt

I like your idea because its simple, but the problem I see would be the filling and sanding after the piece is back in place. If it were a normal flat wing I think it would be golden, but the coragation will make it difficult.

What would you use to cut it out? I have a razor saw but how would I cut something like that without going in from an edge?

Draw your cut lines. Slowly run your razor saw back and forth along the line using the 90 degree corner of the saw. The corners of the cut panel will have to be finished with a thin knife (Xacto knife). With the razor saw blade so thin, you can probably use white glue (maybe with a little bit of talcum powder) to fill the seams. White glue will shrink and I'm sure you wouldn't need to putty and sand.

I like Airframe's idea, but am assuming the lens hole is too large. If not, his idea would look as good or better and with less sweat equity.
 
Dang I found some hot Slop for you Dirk, not pics but some tech details and maybe some missions reports via a German book I have covering the very rare war over the oceans by the LW

lets see what I can muster soon this week
 
Inter-service awards certainly did occur. I have a nice group (courtesy of Herr. Saez ) to a LW Observer serving in Minensuchgruppe 1 who was awarded the KM Minesweeper's Badge in addition to the LW Observer's Badge. I will be posting pictures of it soon.

There is also in the same group an official letter indicating that LW personnel serving in the Minensuchgruppe WERE entitled to receive the NAVAL COMBAT CLASP/Marine-Frontspange (contra Angolia in For Fuhrer and Fatherland) if their actions warranted it. Very interesting...

this from a LW badge collector friend, see if I can get permission to submit the crews pic, I must saying very interesting indeed and also something else I will pop up here in a moment for you me and others interested in the crate
 
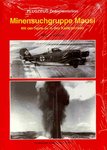
though this is abit earlier time frame it indeed is the book for you as it is the base for the Minensuchegrp.

this work is still obtainable in German in rare/not so rare book shops and on several different amazons too which might be easier. I will look into this and behold the all important ISBN # which is worth a nice bottle of cold Deutsche Bier 8)

ISBN # 3-927132-26-8

will have to look into this myself

more later ................ as we dive into this
 

Attachments

  • ga4731.jpg
    ga4731.jpg
    51.6 KB · Views: 120
going to post two pics one from my collection which is the Minenabzeichen badge usually decorated to KM personell but in this special case also to specific LW crews as you will see

9028a.gif


now a happy crew from one of the staffels on the Minensuchegruppe 1, from the Rick W. collection

lw-km02.jpg


E ~
 

Users who are viewing this thread

Back