"Kanonvogel" Ju 87 G-2

Ad: This forum contains affiliate links to products on Amazon and eBay. More information in Terms and rules

marek

Senior Airman
663
0
Feb 2, 2009
Helsinki Finland
Hellow everyone!
I decided to show you my first model build after 13 years breack. Decided that my first project Ju 87 G-2 in 1/24 scale will be to complicated for me after so meny years of breack. Then I´v got a info that Trumpetir will produce Ju 87 D/G in that scale samwere in next years so is no use to get myself throw the pain of major scrach building wen soon will be ready modell to buy.
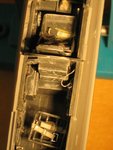
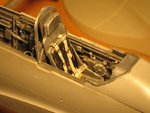
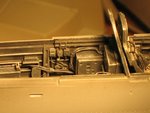
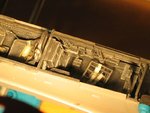
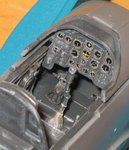
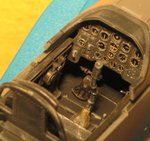
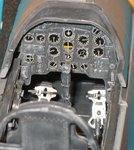
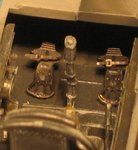
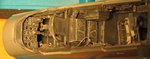
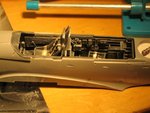
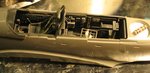
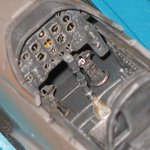
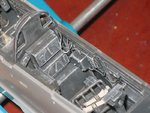
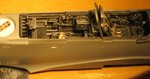
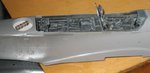
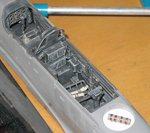
First I´v thout of makeing F 14 (which I love), but then I sow Hasegawas Ju 87 G Kanonvogel in 1/32 scale and That was it. So here is the cockpit:
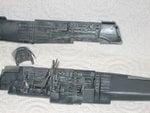
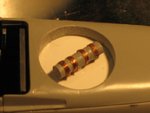
 

Attachments

  • IMG_2544.JPG
    IMG_2544.JPG
    78.2 KB · Views: 217
Ive got the same exact kit Marek sitting waiting for a Group Build... Its a phenomenal kit, I cant wait to get my hands on it...

Lookin forward to ur progress, please include alot of step by step pics, as Im gonna us this thread and ur build as a refrence...
 
Lookin forward to ur progress, please include alot of step by step pics, as Im gonna us this thread and ur build as a refrence...

Thank´s Lesofprimus, I´ll try to, but I´v so much to learn yet. So if enybody have some sugestions how things should be done, it will be wery nice to get them here. So please fill free to critisize:)
 
Thank you guys I appreciated your comments! I have painted the cockpit with RLM66 black-grey xtra color enamel and tiried to get in deep impression by drybrushing grey color on it. Then I decided to add some details; like wires,
knops and so on, but unfortunately they do not show that well on the picture.

Should I have used some different technigue to show indeep effects? Like for example washing with black enamel/silvering - what do you usually use?
I know somebody uses some oil pains - does anyone know how to apply it?

So many things to learn and so many ananswered questions...:D
 
It's looking very good so far Marek. As the inside colour is dark, you can try a very thin wash, of thinned black or a darker grey, just around the framework, switch panels and so on. When this is dry, apply a slight dry brush of a slightly lighter grey, then another of even lighter grey. If you think you have done too much, then go over those affected areas with a darker shade.
You can also use a fine pencil around some of the framework of the fuselage, lightly, which will make it stand out when the fuselage halves are joined.
Your model should look very good when it's done, looking forward to more pics.
Terry.
 
I agree with Terry here.So follow his instruction please.
And of course a great beginning here Marek.:thumbleft:I can't wait to see some more pics of the progress on the model.
 
Hello again!
Today I´v finished Stukas cockpit. Aded sam more detales, belts, rader pedales and glooed everithing together. I´v promist more pictures so here they are. Hope you will anjoi them:
 

Attachments

  • IMG_2548.JPG
    IMG_2548.JPG
    49.8 KB · Views: 162
  • IMG_2552.JPG
    IMG_2552.JPG
    74.4 KB · Views: 161
  • IMG_2553.JPG
    IMG_2553.JPG
    67.8 KB · Views: 159
  • IMG_2554.JPG
    IMG_2554.JPG
    63.6 KB · Views: 152
  • IMG_2555.JPG
    IMG_2555.JPG
    75.6 KB · Views: 142
And some more:
 

Attachments

  • IMG_2566.JPG
    IMG_2566.JPG
    66.9 KB · Views: 141
  • IMG_2565.JPG
    IMG_2565.JPG
    58.1 KB · Views: 153
  • IMG_2562.JPG
    IMG_2562.JPG
    74.1 KB · Views: 152
  • IMG_2561.JPG
    IMG_2561.JPG
    53.1 KB · Views: 150
  • IMG_2560.JPG
    IMG_2560.JPG
    50.6 KB · Views: 148
And more:
 

Attachments

  • IMG_2573.JPG
    IMG_2573.JPG
    76.2 KB · Views: 137
  • IMG_2571.JPG
    IMG_2571.JPG
    62.4 KB · Views: 158
  • IMG_2570.JPG
    IMG_2570.JPG
    45.8 KB · Views: 151
  • IMG_2569.JPG
    IMG_2569.JPG
    56.6 KB · Views: 147
  • IMG_2568.JPG
    IMG_2568.JPG
    83.8 KB · Views: 161
And I´v 3 more:
 

Attachments

  • IMG_2574.JPG
    IMG_2574.JPG
    48.6 KB · Views: 146
  • IMG_2575.JPG
    IMG_2575.JPG
    42.3 KB · Views: 156
  • IMG_2576.JPG
    IMG_2576.JPG
    53.5 KB · Views: 137

Users who are viewing this thread

Back