P-47 'Bridge Buster', 1/48th scale, 9th Air Force Diorama.

Ad: This forum contains affiliate links to products on Amazon and eBay. More information in Terms and rules

Thanks very much for the complimentary comments chaps! (sounds like something provided, free, in an hotel room !).

I've got the landing gear assembled and installed, apart from the main wheels, which will be positioned on their 'flats' and cemented in place once the gear has set in place.
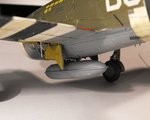
A 'flat' drop tank has been sourced from the bag of spares I got with one of the Arii kits, and has been assembled and painted, and the mounting slot altered to fit the model, and this will be fitted next, once the feed and pressure hoses, and sway braces, have been made and test fitted.
I'm in the process of altering and painting the 1,000 lb bombs, also from that bag of 'spares', and I hope to get these fitted later tonight, along with the other bits and pieces - if I don't fall asleep after my visit to the Physio Terrorist later today!
All being well, I'll post some more progress pic tonight.
 
Thanks again chaps!
I'm quite pleased with the gun tubes, and I'll be doing the same with the other P-47 kits in the stash, although I might use aluminium tube, polished and clear gloss coated, as it's much easier to cut accurately, compared to the bl**dy tough stainless steel.
The more I see that photo of the windscreen joint, the less happy I am with the result, even though, as previously mentioned, it doesn't look as bad in 'real life'. I think I might see if it can be improved, and I noticed that the lower frame, on the port side, needs attention anyway. As for the semi-matt finish of the model itself, rather than matt, there's not a lot I can do about that, without the risk of probably spoiling the model, plus, of course, yet another build-up of paint/clear coat layers.
Maybe I can convince myself that the aircraft had been waxed and polished!
Apart from some minor work on the drop tank, I haven't done anymore yet, as I'm a tad stiff after seeing the Physio Terrorist earlier today.
They should be shot, or at least banned!
I went in to have treatment for my right shoulder, which had been causing a few painful episodes, until I had the steroid injection last month. I came out with a stiff and painful left shoulder and neck!
Consequently, trying to attempt delicate detail work is not a good idea, so I think I'll sample a couple of measures of Scottish White Wine (of the Famous Grouse vintage, and purely medicinal), try to get some decent kip, and hopefully be fit enough to get the final bits of the model itself done tomorrow, before making a start on the diorama base and figures etc.
Thanks again for the kind words and general interest and, all being well, I'll have some pic to show tomorrow.
 
It'd have to be a different kitchen, in a different town then !
I saw far too many Hippocroccofrogs in town today - my eyes still hurt! And how the h*ll they manage to get pregnant, I'll never know - who would want to get that close to one of those!
 
Thanks Hugh.
The model itself is in the final stages, and I'm almost ready to start on the figures and diorama base.
I've managed to clean-up and improve that windscreen joint, although it still needs to be polished, and probably have a coat of 'Future', to smooth things out.
So, the work so far:-
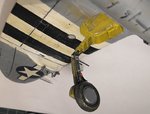
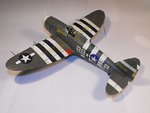
PIC 1. The modified landing gear in place. The tail wheel, shown in the final pics, has been fitted at an angle, as it would be after the aircraft turned around on the dispersal point.
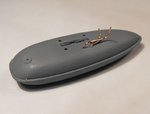
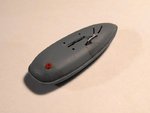
PICS 2 and 3. The 'Academy' 150 gallon 'flat' drop tank had a filler cap added, made from a sliver of plastic tube, glued in place and then sanded to shape. The fuel feed and pressure lines were added, using 0.5mm copper telephone 'jumper' wire 'superglued' into holes drilled in the top of the tank, and the tank was painted Neutral Gray, with the fuel lines in silver, with dark red/brown ends, representing the rubber unions. These fit into holes drilled into the moulded unions on the lower fuselage. A light 'wash' of spilled fuel from the feed lines and filler cap has also been applied.
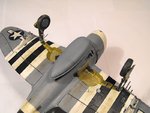
PICS 4 and 5. The tank and fuel lines fitted, along with the wheel bay doors and retraction jacks, and the IFF aerial (behind the wheel bay and landing lamp) made from stretched sprue.
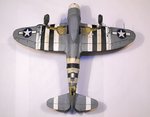
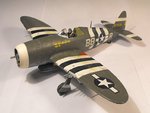
PICS 6 to 8. How the model looks to date. After some re-touching and clean-up, the canopy and prop will be fitted and, once painted, the 1,000 lb bombs will be fitted to the wing pylons.

Thanks again for your kind comments and continued interest, and I hope to post another up-date in the next day or so.
 

Attachments

  • P-47 Build 214.jpg
    P-47 Build 214.jpg
    63.1 KB · Views: 139
  • P-47 Build 212.jpg
    P-47 Build 212.jpg
    42.7 KB · Views: 117
  • P-47 Build 220.jpg
    P-47 Build 220.jpg
    53.7 KB · Views: 142
  • P-47 Build 227.jpg
    P-47 Build 227.jpg
    82.6 KB · Views: 134
  • P-47 Build 234.jpg
    P-47 Build 234.jpg
    69.2 KB · Views: 135
  • P-47 Build 229.jpg
    P-47 Build 229.jpg
    69.1 KB · Views: 130
  • P-47 Build 240.jpg
    P-47 Build 240.jpg
    69.8 KB · Views: 150
  • P-47 Build 242.jpg
    P-47 Build 242.jpg
    67.3 KB · Views: 139
Thanks very much indeed chaps, it's much appreciated.
I'll try to get some more progress pics posted tonight, and I should make some headway with the diorama elements over the weekend, all being well.
 
......and all those Hippocroccofrogs in the heat stays away!

Looking dogs sphericals old boy, the cats miaow what!

Carry on!
 

Users who are viewing this thread

Back