RCAF CF-104 'Starfighter', 1/48th scale.

Ad: This forum contains affiliate links to products on Amazon and eBay. More information in Terms and rules

Terry, thanks for the offer but I'm honestly not sure what scheme to depict at this stage. Having just hatched the idea to add this to my list of projects in the last day or two, I've not yet begun to research the subject but I will likely go with a bare metal scheme for starters. As for the seat, the kit contains parts for both so I should be OK there. The kit also contains some nice metal pitot tubes and resin housings for the actuators for the extra canard, which MIGHT come in handy if I want to add the VICON camera pod as these have a similar shape and might lend themselves, with a bit of work, to make a suitable substitute for a pricey aftermarket one. Belcher bits also offers a resin camera pod but it comes with a raft of other stuff I probably would not use.

Geo, I did look at LE but all they have is the checkerboard scheme. Cool but not my cuppa tea for this one so the choice will be either to get the Belcher Bits sheet or to take Terry up on his offer.
 
Last edited:
No problem Andy, just give me a shout if you want them.
I also have the Vicon/Vinten camera pod from the Revell kit, which I'd originally intended to use, until I established '771' was based at Zwiebrucken, whilst the recce birds were at Marville.
The kit pod is very basic, but looks reasonably accurate in outline, and could easily have the camera ports and access hatches opened and glazed, and engraved as required - the kit part just has feint outlines for the camera ports.
Again, it's yours if you want it, and I have some good pics of the real recce pod which would help when improving it.

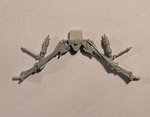
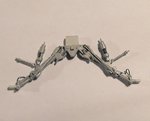
Anyway, I've managed to make a little progress, although what's shown below isn't much to look at, and took me around six hours!
Some of the problem was pain and stiffness, making work bl**dy awkward and very uncomfortable, but mainly the time was spent removing yet more ejector pin marks and some flash and moulding seams on the main landing gear.
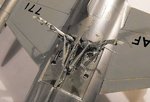
This has had all the ejector pins removed and has been 'de-seamed', and brake lines have been added using lead wire. Although it looks grey in the pics, the structure is actually a shade of dull silver, made from mixing 'Duralumin' with a spot of white, with chrome silver from a paint pen for the oleos and retraction jacks, and a thin wash to highlight the 'castings' of the main legs and the actuating rods etc.
The pics show the 'bare' main legs after the first coat of paint, then with the brake lines fitted, and the data plates and other detail painted in, then fitted to the model with the main retraction jacks in place.
The parts were a little tricky to fit, as it's very difficult to hold the model, without damaging the 'metal' finish, due to the shape, and the position of the wings and tip tanks, the latter being a pain for getting in the way.
Once it's all set, some re-touching will be required, along with a little detail painting, and some 'repair' work to small areas of the NMF, which has suffered slightly through constant handling.
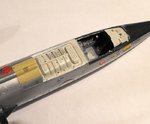
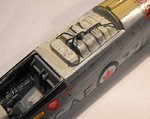
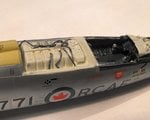
The avionics bay has had a few holes drilled, ready to accept some wiring, and the forward 'box', which is the circuit-breaker module, has also been drilled, in order to insert stubs of stretched sprue to represent the relay buttons. There should be many more, but the physical size and the limitations of using very small drill-bits, has resulted in just preparing a 'representation' of the unit, and some of the 'detail' will be augmented by careful painting - hands permitting !
Once all the wiring and other small bits are in place, and the area painted and highlighted, with the hatch cover also detailed with the addition of 'black boxes', it should look reasonably convincing, and better than a totally 'bare' area.
That's it for now, but I hope to get some more done in the next couple of days.
Thanks again for your continued interest.
 

Attachments

  • DSCF0001 (19).JPG
    DSCF0001 (19).JPG
    46.5 KB · Views: 76
  • DSCF0003 (16).JPG
    DSCF0003 (16).JPG
    36.1 KB · Views: 83
  • DSCF0006 (15).JPG
    DSCF0006 (15).JPG
    60 KB · Views: 82
  • DSCF0002 (19).JPG
    DSCF0002 (19).JPG
    61.8 KB · Views: 85
Thanks Hugh, Cory and Evan (note I got Hugh's name right this time, instead of 'ugh' in the last reply!).

A few more painful hours have been spent adding the first stage of detail to the avionics bay, and the bay cover. Unfortunately, my plan to used stretched sprue for the circuit-breaker buttons didn't quite work out.
Very fine lengths of stretched sprue were cemented into the pre-drilled holes, and then snipped off close to the cover when almost set. However, the stiff, redundant fingers on my right hand kept getting in the way when doing the snipping, although perseverance would probably have seen the job completed, if the pain was disregarded. But most of the sprue was being dissolved by the cement anyway, leading to an untidy tangle of deformed 'buttons'.
So I decided to cut my losses, and the remainder of the holes will be filled with paint - at least there'll be some sort of representation of the circuit-breaker panel. In a larger scale, this probably wouldn't have been a problem, and I might scratch-build the bay on my Hasegawa 1/32nd scale kit when I get around to that build.
Anyway, working from the limited photo references I have of this area, a terminal connection and some wiring was added, using scrap plastic, plastic rod and lead wire.Once the avionics 'cans' have been painted, the wiring and terminal will be picked out in what I hope are the correct colours, or near enough, again referring to the few pics I have, and some placards will be added to the 'cans'.
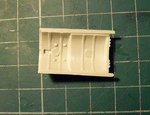
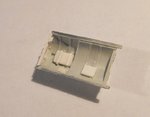
Detailing of the bay cover has been commenced, with the addition of a rear bulkhead with stiffeners, and the bracket for the support ram, along with the 'black boxes' and a bracket for relay connections. The wiring and other detail will be added tomorrow - I hope.
The pics show the state of the bay to date, plus before and after shots of the bay cover. Note the ever-present ejector pin marks on the inside of the cover, one of which has been removed, and the other covered by the larger 'black box'.
When finished, the avionics bay and cover will by no means be a truly accurate reproduction of the real thing, and in this instance certainly not my best work, but it'll be a reasonable representation, and better than the 'bare' kit portrayal.
Many thanks again for your continued interest and good wishes, and I'll try to post a further up-date soon.
 

Attachments

  • DSCF0002 (20).JPG
    DSCF0002 (20).JPG
    74.3 KB · Views: 88
  • DSCF0005 (13).JPG
    DSCF0005 (13).JPG
    63.8 KB · Views: 90
  • DSCF0002 (10).JPG
    DSCF0002 (10).JPG
    101.1 KB · Views: 82
  • DSCF0009 (5).JPG
    DSCF0009 (5).JPG
    46.5 KB · Views: 85
You're all too kind - thanks very much indeed.
I've go the wiring fitted to the hatch cover, but haven't been able to do anymore yet, due to the normal problem - bl**dy stiff hands.
Hopefully, I'll have something worthwhile to show by tomorrow.
 
Thanks Kevin. The metal finish is starting to suffer slightly, due to handling. Apart from my stiff hands not helping things, it's a darned awkward shape to hold !
I've made a little more progress, and just waiting for paint to dry (horrible Humbrol, like thick paste, needed thinning almost 90% !!). I'm not very happy with the latest results - once again my hands have made things extremely difficult - but I'm hoping I can re-touch a couple of areas, if my hands work, and if I can get the model into a position where I can access the required areas, which might improve things.
Bl**dy frustrating !
Pics later, for better or for worse !
 

Users who are viewing this thread

Back