1/32 Spitfire Mk.Vb - Defence of Britain/Atlantic. (1 Viewer)

Ad: This forum contains affiliate links to products on Amazon and eBay. More information in Terms and rules

Thanks Wayne and Karl.
Yep, the bite was giving me a bit of stick last night, so I mentioned it to the nurse this morning, and she got a Doctor over to have a look at it.
She reckoned it probably was a spider bite, and wasn't healing properly due to the effects of the first infusion of the new meds, which, because they're 'fighting' the 'B' cells in the immune system, slow down the healing process. So, rather than risk the infection spreading, possibly causing an ulcer and ultimately eating into the bone, I have a ten-day course of anti-biotics, then go back in two weeks, at the end of the course, for the second infusion.
Apart from that, everything else is as it should be, with a great improvement overall, so the first infusion is working.
 
And back to the model.
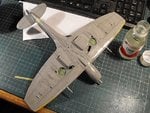
All the clean-up and re-touching work has been completed, and the first coat of Humbrol 'Clear' gloss has been brushed onto the undersides. There's not much to show, but the pic gives some idea of how the gloss coat looks - another coat, possibly two, should provide a good, hard gloss surface for the decals, particularly the roundels, which have to settle down over the lumps and bumps around the spent case ejector ports.
As nothing much more could be done until the clear coats dry, I got on with printing the serial number decals, using a RAF font I found some time ago. This is for 'solid' numbers, and Stan's aircraft carried numbers with stencil breaks, so these would need to be painted in once the decals were applied.
However, having done a test print on paper, which was fine, when I printed onto the clear decal film, the image lacked density, and was more grey than black.
This hasn't happened before, and at first I thought perhaps my printer was low on ink. But another test onto plain paper showed that the ink was OK, so I can only surmise that the decal paper has maybe 'gone off' with age, if that's possible.
On to 'Plan B', and an order placed with Hannant's for the Ventura decals, which include the stencil-break type of letters and numbers.

Now, a question to all.
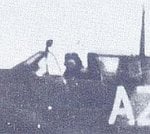
The rear-view mirror on Stan's aircraft appears to stand slightly higher than normal, but I'd welcome opinions on whether it is the 'flat', rectangular type, or the 'round', conical (racing car) type ?
I'm leaning towards the former, thinking that it's just the angle making it look possibly like the conical type, but I have doubts.
I've cropped and enlarged the area from the original photo, without going too large, when distortion and 'grain' interfere.
Opinions ?
 

Attachments

  • DSCF0003 (18).JPG
    DSCF0003 (18).JPG
    89.8 KB · Views: 50
  • A 1.jpg
    A 1.jpg
    17.6 KB · Views: 56
Thanks Andy, and I now tend to agree. I looked at more pics of other Spits with both types of mirror, and the support is rather distinctive. I'll scratch one from some shaped sprue.
BTW, that's a great pic for showing the canopy jettison wire at the top of the canopy.

EDIT:- I've just been looking at the well-known colour photo of Jan Zumbach's MkV, and this has the taller, aft-curved mirror support, but with the rectangular mirror. However, the more I look at Stan's aircraft, the more I think it's the conical type, so I'll go with that.
Just about to spray another coat of Humbrol 'Clear' onto the underside, as the brushed-on coats are a little uneven - my fault for using the wrong brush. Whilst this is drying, I'll start work on the resin cockpit door, and the canopy, windscreen and mirror etc.
Might have something to show sometime tomorrow.
 
Last edited:
Thanks Vic, it's a bit below standard in some areas, although it'll turn out fine in the end I think, but it's good to be back at the bench after such a long absence.
 
Thanks Vic, it's much appreciated.

The underside has now had two sprayed coats of the Humbrol 'Clear' gloss, over the brushed coats,and is now ready for the first of the decals, which I'll get done later today, all being well.
First thing to do though, was to mark the datum for the fuselage roundels, as CBAF-built Spitfires had these in a slightly different place, compared to Supermarine and Westland-built aircraft, and it is important to place these correctly, in order to align the code letters later.
The fuselage roundel center-point was 1,327 mm aft of the door edge, and 190 mm above the main longeron, which, converted to 1/32nd scale, is 41.46 mm and 5.937 mm respectively. After measuring the distances, pieces of tape were placed on the fuselage vertically and horizontally, with small arrows marking the lines of the center point.
The wing roundels had their center-points 38 inches/(965 mm (30 mm in 1/32nd scale) outboard from the inner edge of the ailerons, and again these points were indicated using small pieces of marked tape.
A study of photographs of other squadron's MkVs from the same period, showed that the Squadron codes on the starboard side would be aft of the roundel, with the individual letter forward, thereby reading 'AZ-X', but I had nagging doubts about this, and did a bit of searching. Sure enough, 234 Squadron aircraft carried their Squadron codes forward of the roundel on the starboard side, to read 'X-AZ', so the bit of research was well worth avoiding a serious error !
I'm off to get a few hours kip, then get down to the first decal session.
 

Attachments

  • DSCF0001 (21).JPG
    DSCF0001 (21).JPG
    46.8 KB · Views: 62
  • DSCF0003 (19).JPG
    DSCF0003 (19).JPG
    43.3 KB · Views: 58
Thanks my friend !

The first of the National markings decals have been applied, with a couple of minor, but not unexpected problems.
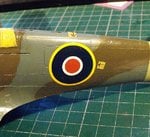
I wasn't that happy with the colours in the Hasegawa roundels; the yellow surround of the Type 'C1' fuselage roundels was rather bright, and the red center 'spots' of all the roundels, as well as the fin flash, were more suited to a pre-1942 scheme, as these colours changed to Dull Red in mid-1942.
Having experienced problems with the roundels, at least, cracking on three previous kits, I'd already decided to use 'Xtradecal' items for the fuselage and lower wings, suitable sizes of which were sourced from 1/48th scale sheets.
Unfortunately, I didn't have suitable Type 'B' roundels for the upper wings, or fin flashes, so I had to use the kit decals. As expected, these large roundels cracked once immersed in water, but with a copious application of 'Micro-Sol', and plenty of patience, they were slid into place and joined, and seem to be settling down well.
I've yet to apply the rather bright fin flashes but, given they behave, I may paint over the red sections once they've set and been sealed.
I knew I had no chance getting the Hasegawa lower wing Type 'C' roundels to conform over the gun heating outlet ducts, and other lumps around the spent case ejector ports, so once again 'Xtradecal' roundels were used. As expected, these took some time to apply, and still need some work, as explained in the photo captions below.

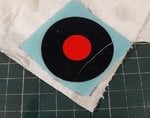
PIC 1. One of the upper wing roundels after removal from the water, and with lots of 'Micro-Sol' applied. These had to be left for around 15 minutes before they could be slid off the backing paper.
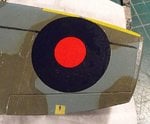
PIC 2. The first decal in place, and in the process of having the two parts aligned.
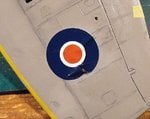
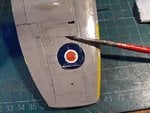
PICS 3 and 4. Applying the under wing roundels. The problems of conforming can be clearly seen, with the large outlet ducts, the smaller blisters, and the ejection ports all beneath the decals. The large ducts are particularly problematic, as they are located right at the edge of the decal, but the roundels appear to be settling reasonably well and, once set, they will be cut around the openings of the ducts, and along the ejection port slots. Any damaged areas, as well as the periphery of the blue ring, will be repaired with paint, matched to the decals.
PIC 5. The fuselage roundels, again from 'Xtradecal', were applied without problems. They are ever so slightly under size, being sourced from the nearest equivalent 1/48th scale decal sheets, but they are actually larger than the kit items, and will pass as 36 inch diameter roundels.

Next step is to try out the fin flashes from the kit, but if they don't work, then the flashes will be painted. Once that's done, the code letters can be applied, once again from 'Xtradecal', and then the various stencils, sourced from the 'HGW' Spitfire MkIX Stencils sheet - which, I have discovered, has some errors in the instructions numbers, and at least one missing decal !
Thanks again for the interest, compliments and encouragement, and I'll be back soon with a further up-date.
 

Attachments

  • DSCF0001 (22).JPG
    DSCF0001 (22).JPG
    61.3 KB · Views: 60
  • DSCF0002 (23).JPG
    DSCF0002 (23).JPG
    66.4 KB · Views: 59
  • DSCF0003 (20).JPG
    DSCF0003 (20).JPG
    67.1 KB · Views: 62
  • DSCF0004 (18).JPG
    DSCF0004 (18).JPG
    74.5 KB · Views: 60
  • DSCF0005 (21).JPG
    DSCF0005 (21).JPG
    101.1 KB · Views: 58
Thanks Wayne, and yes, it's a real pain, but I did expect it, as every Hasegawa MkV I've built over the years (as conversions to other Marks) have had the same problem, even when new (this particular kit is probably around 30 years old !). The kit decals are also quite thick, and really do not want to come off the backing paper. And as for the 303 Sqn 'Sky' code letters provided, they'd make better Luftwaffe green Gruppe codes !!
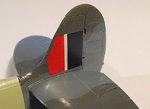
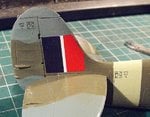
I've now got the fin flashes in place, as well as the code letters, and the under-wing roundels have settled down nicely, requiring just a little re-touching. The fin flashes don't quite fit to the leading edge of the fin, so these will also be re-touched or, if necessary, the red will be over-painted in Dull Red.
I'm about to start on some of the stencils (after a late lunch), and I'll post some pics soon.
 
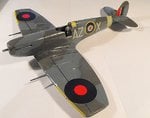
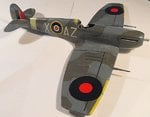
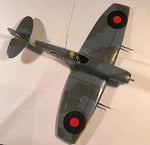
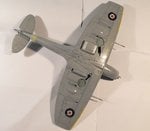
OK, here are the pics of the fin flash and code letters, an some showing how the model looks to date.
Once the decals have fully set overnight, they'll be sealed with a coat of the Humbrol 'Clear', then retouched as needed, including re-painting the red of the fin flash.
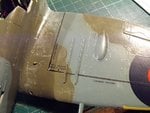
The spent case ejector ports covered by the under-wing roundels have been cut open, and the red areas will be re-touched, and the 'kinks' in the periphery of the roundels touched-in with paint. The decals settled surprisingly well over the relatively large curves of the heating outlet ducts, and over the smaller blisters.
I had intended to start on the stencils, but I noticed that a couple of small areas of the Dark Green camouflage need to be adjusted slightly, now that the code letters are in place, in order to match the pattern in the photo of Stan's aircraft. As the paint is gloss, and takes some time to dry fully, I'd rather do the re-touching first, then do the stencil decals when the paint has fully hardened.
Hopefully, I'll get to the stencils sometime tomorrow, when I'll post another up-date.
 

Attachments

  • DSCF0002 (24).JPG
    DSCF0002 (24).JPG
    41.4 KB · Views: 55
  • DSCF0003 (21).JPG
    DSCF0003 (21).JPG
    46.5 KB · Views: 60
  • DSCF0005 (22).JPG
    DSCF0005 (22).JPG
    44.2 KB · Views: 60
  • DSCF0006 (15).JPG
    DSCF0006 (15).JPG
    53.7 KB · Views: 46
  • DSCF0007 (15).JPG
    DSCF0007 (15).JPG
    40.3 KB · Views: 46
Thanks John, i'm looking forward to that stage too - I'll then be adding a little more subtle weathering, wear and staining.

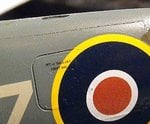
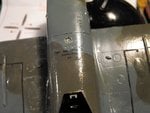
I've started on adding the stencils, using the 'HGW' sheet for the MkIX, which are basically the same as the MkV apart from one or two specific markings.
These decals are of the 'wet transfer' type, which means they are a cross between the commonly used 'water-slide' decals, and the 'press-fix' type, being applied in a similar fashion to the latter, but after first being immersed in water, like 'normal' decals.
The image is carried on the underside of a clear 'foil', and is removed from the backing paper as it releases, after a few seconds, in the (warm to hot) water, and then positioned and 'squeegeed' like a 'water-slide' decal.
After three to four hours, the 'foil' is removed, using water, and the area cleaned of any adhesive residue, leaving a printed image devoid of carrier film, so no 'silvering', and a truly 'painted on' look.
The slight disadvantage is having to wait, and then remove the clear 'foil', but this is far outweighed by the finished result - or at least I hope it is in this case, as this is the first time I've used the 'HGW' product, although I have used this type, and the 'Press-Fix' type before.
It also means planning and applying in stages, in order to remove the 'foil' at the right time, but again, this allows one to have a break from the sometimes fiddly and time-consuming process of applying lots of relatively small decals - around 30 or 35 in this case.
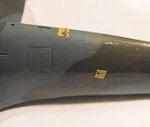
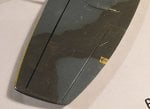
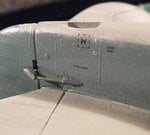
The pics below show the first few stencils in place, with the clear 'foil' very evident, and when I've finished here, I'll start on removing the foil and cleaning-up.
All being well, I should have the stencils completed sometime tomorrow, and be able to spray the first matt clear coat, but not before I drill a hole for the tail jacking point, and sort a couple of other minor additions, and probably mask, paint and add the windscreen too.
Thanks once again for your continued interest and compliments.
 

Attachments

  • DSCF0001 (24).JPG
    DSCF0001 (24).JPG
    62.7 KB · Views: 39
  • DSCF0003 (22).JPG
    DSCF0003 (22).JPG
    50.4 KB · Views: 41
  • DSCF0004 (20).JPG
    DSCF0004 (20).JPG
    78.2 KB · Views: 42
  • DSCF0005 (23).JPG
    DSCF0005 (23).JPG
    61.3 KB · Views: 41
  • DSCF0006 (16).JPG
    DSCF0006 (16).JPG
    65.8 KB · Views: 43

Users who are viewing this thread

Back