1/32 Spitfire Mk.Vb - Defence of Britain/Atlantic.

Ad: This forum contains affiliate links to products on Amazon and eBay. More information in Terms and rules

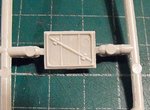
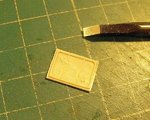
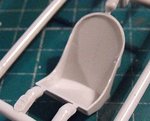
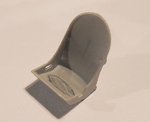
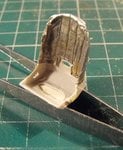
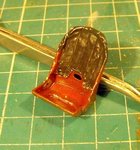
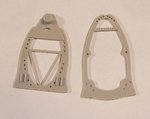
Thanks chaps. Just planning what's needed in the way of modifications to kit parts, scratch-built additions etc - might start work in a day or so.
 
I've started earlier than anticipated, as I wanted to get some of the slightly tedious modifications and corrections done to some of the cockpit parts, before starting the build proper.
Considering the age of this kit, it's not too bad overall, and quite well detailed for the period, although rather over-priced, at £30 nowadays (typical Hasegawa !), for a fairly basic kit.
Planned mods include removing some of the raised panel lines and re-engraving, as well as improvement to some of the kit's cockpit parts, and some scratch-built additions to the cockpit, radiator, oil cooler and wings. I haven't decided yet, but I might add some rather nice, turned brass cannon barrels, as the kit parts, moulded as part of the upper wing, although reasonable, lack detail around the muzzle, and are too thin to drill-out.
Anyway, first job was to prepare the cockpit entrance flap and the seat for scratch-built and aftermarket detail, the latter being the fabric Sutton harness.

PIC 1. The kit part for the entrance flap, which also has a separate locking latch and bar provided.
PIC 2. Removing the ejector pin marks and the moulded crow bar. After clean-up and a polish, the outer frame will be enhanced and corrected, a crow bar made from stretched sprue will be fitted (in bare 'steel' - the incorrect red examples seen on many models are a post-war addition, the red colour denoting emergency equipment.), then the assembly will painted, and home made decals for the warning instructions added, at the correct orientation for a CBAF-built machine, and in red, not black as seen on restored examples.
PIC 3. The seat as provided in the kit - more or less the correct shape for the later, red/brown 'composite' seat, although lacking the harness slot and parachute strap recess, as well as the depression in the base of the seat pan. It's also slightly 'angular' around the rim edges.
PIC 4. Work underway adding the required mods. A harness slot has been drilled and filed on the starboard side of the seat pan 'wall', and the recess cut on the port side, with the actual 'bulge yet to be added. This was to allow room for the rather bulky, wider, main harness strap of the seat-type parachute, to prevent 'kinking' of the rip-cord cable which was attached to this part of the harness, running around to the parachute pack itself.
The edges of the seat have also been thinned and rounded, and, as with the slot, await final sanding. The 'lozenge' -shaped depression in the seat pan has been roughly marked out, and will be cut, shaped and filed, with a piece of plastic card added underneath to provide the base of the recess. Again, this depression was a safety feature for the parachute. The pack closing flap, beneath which there were three steel cones, through which the pins of the 'rip-cord' passed, was accommodated within the recess, thereby allowing the pack itself to 'sit' on the base of the seat, without the weight of the pilot pressing down on the cones and pins and perhaps bending them, which could prove fatal if the pins jammed in the cones when the 'chute was needed.
When that's all done, the 'leather' back-padding will be added and the seat painted.

Once these two items have been completed, attention will focus on adding some scratch detail to the cockpit itself, and tackling the tedious job of drilling-out the lightening holes in the cockpit frames.
Thanks for your interest and encouragement, and I hope to post some more progress very soon.
 

Attachments

  • DSCF0002.JPG
    DSCF0002.JPG
    87.1 KB · Views: 72
  • DSCF0005.JPG
    DSCF0005.JPG
    101.4 KB · Views: 71
  • DSCF0003.JPG
    DSCF0003.JPG
    71.4 KB · Views: 74
  • DSCF0010.JPG
    DSCF0010.JPG
    35.7 KB · Views: 66
Thanks Steph.
Had a bit of a set-back whilst doing further work on the cockpit door - it cracked up the center !
No problem though - if the repair doesn't come up to standard, I'll replace it with a rather nice resin example, complete with separate crowbar, from 'Quickboost'.
All being well, I hope to have more to show sometime tomorrow.
 
Thanks chaps.
Got a bit more done on some of the cockpit parts, although the entrance door will definitely have to be replaced by the resin item mentioned previously, as the repair shows an ugly joint, and it's not worth the effort in trying to improve it. I've gone ahead and ordered the 'Quickboost' item, along with the 'Master' turned brass cannon barrels, and a sheet of stencil decals.
But back to the build to date ;

PIC 1. The seat has now had the port-side 'bulge' added, and the 'leather' back-pad, the latter made from the lead foil from the neck of a wine bottle.
PIC 2. First stage of painting, to represent the 'composite', or 'plastic' seat, which was available from May 1940. Obviously still wet in this photo, once dry, detail painting will be completed, and the 'leather' given a 'distressed' look, as, having been built at CBAF between June and July 1941, and therefore some 2 to 3 years old at the time depicted (old, for a front-line aircraft), it would have shown some wear.
PIC 3. The lightening holes in the cockpit frames have been drilled out (as have those on the seat frames, not shown), with those on the main cockpit frame being enlarged slightly, and countersunk, to give a more realistic appearance.
The second frame, located aft of the cockpit, beneath the small, rear glazing, had some of the holes drilled-out, leaving those lower down as moulded, as they'll not be seen under the glazing. The cross brace was lacking a number of holes, so additional ones have been added. However, as this piece was very thin and narrow, and started to distort when being drilled, in most cases these holes have only been drilled part way, and will be 'shadowed' with darker paint later. A 'notch' has also been cut, at the top, to accept a scratch-built horizontal brace later.
PIC 4. The port lower cockpit wall (top), and the starboard lower wall (bottom) have had some basic extra detail added, using plastic strip and rod.
The starboard wall shows the addition of the perforated frame, and the IFF destruct buttons and safety cover, whilst the port wall again has the frame, and an extension to the moulded electrical services panel. Further detail will be added once the remaining kit parts have been attached.

Thanks for your interest to date, and I'll post a further up-date very soon.
 

Attachments

  • DSCF0003 (2).JPG
    DSCF0003 (2).JPG
    56.6 KB · Views: 72
  • DSCF0018.JPG
    DSCF0018.JPG
    67 KB · Views: 70
  • DSCF0009.JPG
    DSCF0009.JPG
    31.6 KB · Views: 70
  • DSCF0010 (2).JPG
    DSCF0010 (2).JPG
    37.9 KB · Views: 62
Last edited:
Thanks, Michael and Hugh.
I'm hoping to get some more detail work done on the cockpit, and possibly the initial painting, later today - up-date when there's something to show.
 
Thanks Wojtek and Vic.
Still quite a bit to do to the seat - if the darned paint will dry ! It's still tacky even after 12 hours or more, so I'll have to get on with something else whilst I wait.
It's by no means perfect, but once it's been 'distressed' a little, and with the seat harness in place and 'buried' in the cockpit, it should be adequate.
 

Users who are viewing this thread

Back