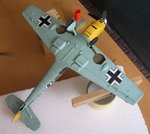
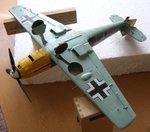
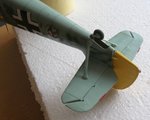
Airfix 1/24 scale Bf109E.....or a bed of thorns

Ad: This forum contains affiliate links to products on Amazon and eBay. More information in Terms and rules

Excellent job and thanks for the education! My Pinzgauer 710M has the same kind of glass on it and it over laps like the Bf 109's do. It just has that strip between the glass and thought that this could have accounted for the strange whitish line I was seeing in the photos. :)
 
I see...I might be a little bit ahead with the shot below. But for these who don't believe.......is there the strip without painting or not?
 

Attachments

  • cockpit5.jpg
    cockpit5.jpg
    76.2 KB · Views: 400
Last edited:
Been watching this build from the start, in awe of your patience, and ability to correct infractions in the kits, created by
the kit builders.... in this case Airfix. I havn't seen any shots of the bf-109 on it's gear, but I guess that's coming.

Great job, Wojtek...

Charles
 
Thank you My Friend. You are right the thread is coming to the end. I'm very glad you like my work. :D
 
It sure is ! And for those who don't know this kit, it's rather big ! It was considered ground-breaking when first introduced about 1969, but the moulds have suffered since then, and even straight from the box there's a lot of work needed. Wojtek really has turned a sow's ear into a silk purse - with gold buttons !
 
THX Gents..:D

The day I returned from work was the day of the deadline. I had had a few hours only before the model would be taken away from me. So I had to be in a hurry in order to be on time.
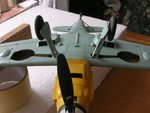
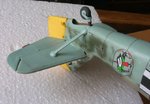
Firstly I attached the main landing gear and the tail one as well.Then I added the rudder and the prop with the spinner. Also I sticked a few small details on wing undersides and the antenna wire. The funniest thing was the Pitot tube attaching. I didn't marked where it should be added on underside of the port wing. the slot for that was covered by the German cross decal. I wasted some time looking for the small hole with a toothpick.Finally I found its entry and could attach it correctly.

BTW..for these who want to make the model. Please make a focus on the main landing gear slots.These have incorrect made holes for leg pins. Holes...I mean there are slots for these pins.Pins ( pivots) are a kind of rotary axis for legs.Unfortunately these slots cause that legs aren't set parallel to the bottom axis of the fuselage.As a result the model stands on legs going a little bit ( but noticeably ) outside when looking from the bottom or the top of the model. I corrected it by sanding these leg pins.Hopping I explained it quite clearly in my still poor English.
 

Attachments

  • cs1.jpg
    cs1.jpg
    110.3 KB · Views: 356
  • cs1a.jpg
    cs1a.jpg
    103.1 KB · Views: 336
  • cs1b.jpg
    cs1b.jpg
    91.6 KB · Views: 342
  • cs1c.jpg
    cs1c.jpg
    91.9 KB · Views: 353
  • cs1d.jpg
    cs1d.jpg
    94.7 KB · Views: 342
Last edited:
Will you have time for a few all-round views of the finished bird on its wheels?
Or does it have to go to the museum immediately?

Top job by the way Wotjek
 
I have taken a few shots of the model on its legs Colin. I'll send these soon. Nothing impressive...general only. No wonder the guy , who arrived for bringing the model away to the museum, was standing just behind me when taking these pictures.

Hesekiel I remember your attempt.Not too bad contrary to that you said above. But thank you for these kind words.
 
I see...I might be a little bit ahead with the shot below. But for these who don't believe.......is there the strip without painting or not?

You've sold me Wojetk. The 'white' strip IS just a reflection on the edge of the Plexiglas.

The finished 109 looks fantastic! all that hard work sure paid off. Looking forward to the pictures of it on it's landing gear.

What color did you use for the prop?
 

Users who are viewing this thread

Back