**** DONE: 1/48 B-25C 41-12971 345th BG 499th BS "Dirty Dora" , Heavy Hitters GB

Ad: This forum contains affiliate links to products on Amazon and eBay. More information in Terms and rules
Cheers Guys

Thanks Dan. You will note that I did qualify that by saying "completed". I'm getting better though - I tend to get distracted by the next project!

But not at the moment, although it's very tempting to crack open the P-38 box for D-Day. :lol:

Soooo....some more Dirty Dora

Some more updates tonight (well it's tonight for me, I don't know about you!).

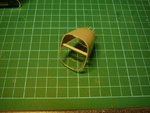
Pic 1 The nose cone required a spacer to be inserted to widen it to fit correctly. Lucky all the glass is painted and you will not see this when complete.


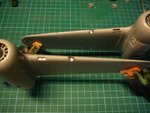
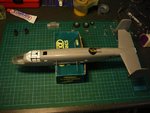
Pic 2 General view of progress. I've attached verticals and nose cone. I'm tempted to paint the fuselage and wings separately and join them up after. This could be easier to handle.


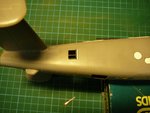
Pic 3 Attached the landing light clear panels with clear glue.


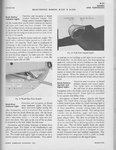
Pic 4 Page from the B-25C D Maintenance Manual that explains the tail cone signal lights.


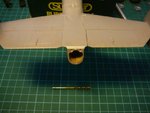
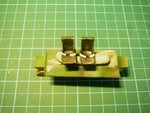
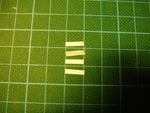
Pic 5 The kit does not have the lights, so using a drill I made two depressions in the spot were they should be.

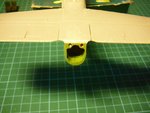
Pic 6 I painted the tail cone frame green zinc chromate, then each depression was pained MM "Chrome" and then the right one was painted with clear red to finish this detail.

End of Update.

Cheers
 

Attachments

  • nose spacer 001 - resized.jpg
    nose spacer 001 - resized.jpg
    116.8 KB · Views: 103
  • fuselage 002 - resized.jpg
    fuselage 002 - resized.jpg
    105.1 KB · Views: 102
  • landing lights 002 - resized.jpg
    landing lights 002 - resized.jpg
    101.8 KB · Views: 96
  • bomb lights 003 - resized.jpg
    bomb lights 003 - resized.jpg
    192.5 KB · Views: 122
  • bomb lights 001 - resized.jpg
    bomb lights 001 - resized.jpg
    65.4 KB · Views: 127
  • bomb lights 002 - resized.jpg
    bomb lights 002 - resized.jpg
    61 KB · Views: 117
Very nice job Peter!
I must admit, I've produced more models since joining this forum than I have in the past 12 years! I reckon it's averaging about 8 to 10 per year at the moment. Although I've 'been at it' since the '60's, I've gone through very long periods of no modelling, due to work, the Forces, moving house, and, at times, lethargy!
 
Excellent job! You're doing great. I know what you mean about getting back into the building of models. I haven't built a model for close to 20 years and now I'm only on my second model. Needless to say my skills are nowhere near as good as yours... or anyone elses for that matter. :)
 
Peter, that engine with the black water color wash looks dynamite! Did you do the base color in acrylics or enamels?

Great job on everything so far.
 
Peter, that engine with the black water color wash looks dynamite! Did you do the base color in acrylics or enamels?

Great job on everything so far.

Thanks Dwight, kind of you to say so.

The base colour was done using Model Masters "Aluminium" enamel. I'm happy with the result, although I wasn't too happy with the way the ignition harness is represented. They never seemed to fit too well with the engine case and are perhaps over scale thickness . If I had a bit more time, scratch building them from copper wire would have been the go, and looked even better.

Mini update tonight, I have just finished priming and pre-shading the wings. I have only gone over the flap and aileron joins basically with the pre-shade. The remaining panel lines I intend to highlight with artist pencils after the top coat. That's a new approach for me, so fingers crossed it will look okay.

Cheers

Peter
 

Attachments

  • wings 002- resized.jpg
    wings 002- resized.jpg
    95.4 KB · Views: 122
Thanks Dwight, kind of you to say so.

The base colour was done using Model Masters "Aluminium" enamel. I'm happy with the result, although I wasn't too happy with the way the ignition harness is represented. They never seemed to fit too well with the engine case and are perhaps over scale thickness . If I had a bit more time, scratch building them from copper wire would have been the go, and looked even better.

Mini update tonight, I have just finished priming and pre-shading the wings. I have only gone over the flap and aileron joins basically with the pre-shade. The remaining panel lines I intend to highlight with artist pencils after the top coat. That's a new approach for me, so fingers crossed it will look okay.

Cheers

Peter

Ah I thought it might be enamels. :( Was hoping that it was acrylics. I've been wanting to try that engine wash trick on a couple of kits but I know that Acrylics aren't that good for that sort of thing.
 
Ah I thought it might be enamels. :( Was hoping that it was acrylics. I've been wanting to try that engine wash trick on a couple of kits but I know that Acrylics aren't that good for that sort of thing.

Dwight, you can get the effect with Acrylics....just pic the right ones!Good hardy silver and a heavily thinned black will work, just need to get the right consitency.
I've found sometimes working in reverse gives a good result too, paint black first then apply dry brushed silver or aluminium, light and build up or silver pencil is another option too.:D

Terry,

I've usually been going the second route - black or very dark base coat then drybrushing with either silver or flat aluminum and despite what some people say you CAN drybrush with acrylics - but the washes just add a certain POP to the effect. Might try that on the next go around.

Sorry for the brief thread detour. Peter, again, it looks marvellous. :)
 
Todays update

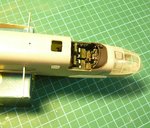
Pic 1 Finished off the seats for the pilots by adding the kit supplied seatbelt decals and some dry brushing with zinc chromate and "aluminium" .

Pic 2 Seats installed, and pilots gun-sight added to complete the cockpit.

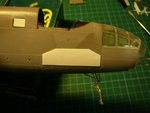
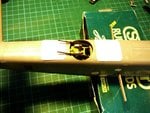
Pic 3 Dirty Dora was fitted with additional "blast plates" front and rear of the upper turret and behind the front packet guns. The idea was to protect the thin skin from the muzzle blast. The templates for the blast plates are provided in the kit instructions, and are to be made with .010 or .005 plastic card. I only had the 010 available so that's what I used. On checking references and trial fitting I found out that the templates provided were oversized, so I made them smaller and guaged them using the Eyeball Measuring Device MK1.

Pic 4 Turret blast plates installed. I used too much glue, which crinkled them a bit on the top surface. I sanded them back to remove this and make them a little bit thinner.

Pic 5 Front package gun blast plates installed. Again they crinkled a bit because I used too much glue, but a good sanding brought them into line.

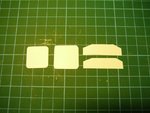
Pic 6 The instructions also call to make wind deflectors just forward of the rear windows. There were additional 0.5 guns installed in these windows. The instructions called for the plastic card again, but I had doubts that they would bend and hold shape so.... I made them from an aluminium can. They turn out much thinner too, which is good. Upper two are the ali ones.

Pic 7 The wind deflectors installed near the rear window

End of Update

Cheers

Peter
.
 

Attachments

  • blast plates 003 - resized.jpg
    blast plates 003 - resized.jpg
    51.8 KB · Views: 87
  • blast plates 002 - resized.jpg
    blast plates 002 - resized.jpg
    87.7 KB · Views: 91
  • blast plates 001 - resized.jpg
    blast plates 001 - resized.jpg
    111.2 KB · Views: 95
  • cockpit 007 - resized.jpg
    cockpit 007 - resized.jpg
    116.8 KB · Views: 107
  • cockpit 006 - resized.jpg
    cockpit 006 - resized.jpg
    109.4 KB · Views: 82
  • blast plates 004 - resized.jpg
    blast plates 004 - resized.jpg
    130.9 KB · Views: 85
  • blast plates 005 - resized.jpg
    blast plates 005 - resized.jpg
    71 KB · Views: 85

Users who are viewing this thread

Back