**** DONE: 1/48 B-25C 41-12971 345th BG 499th BS "Dirty Dora" , Heavy Hitters GB

Ad: This forum contains affiliate links to products on Amazon and eBay. More information in Terms and rules

Lookin good so far Pete and the foto was so good it looks like it was taken yesterday.Pete you need to if possible (the old goat gives up nothing) ask Wayne how he got that canopy to look like real plex in one of those shots:shock: Who Dat!!Cheers Kevin

No Goddam respect....what's this old goat sh*t!!

Kevin you are so right!

Wayne maaaate! You've been dobbed in and inquiring minds want to know. :lol::lol::lol: Cough up - how did you do it? (do you think that will work?) Cheers Peter

Christ it was 20 odd years ago.....nothing special I'm afraid, NO smoke and mirrors or tricks...just straight off the sprue, tidied up masked and painted AND simply attached....I'm not kidding!!:D:D
 
No Goddam respect....what's this old goat sh*t!! Hmmmnnn.............60,70 always prodding tring to have fun;) Kevin
 
Interesting about the E&M manual statements. The (early) B25C interior I photographed, and all other interior shots I've seen of B25's, have shown the Bronze Green and Interior Green throughout. Some of the Interior Green areas, such as the bomb bay, were in fact Zinc Chromate, in the 'true' green form, which is, more or less, the same colour anyway - it's just the surface finish and texture which look different, due to the aluminium powder in the mix - it's not as 'smooth' as I.G.
Far as I know, there was only one plant, Inglewood, producing the B25, but I'd need to double check on that.
The change from green ZC in crew occupied areas was made, to I.G. by North American as it was thought to be better on the eye, causing less strain. Being built at the same plant as the P51, it makes sense that the same surface coatings were used.
But, if the E&M manual states it, and the instructions call for it (probably based on the E&M and/or IPMS Stockholm!!), then I won't argue!!
Argue away there Terry. You are of course 100% correct. My apologies.

Doing further research on the subject, it's clear that the interior should be TINTED yellow-green primer in all areas aft of the cockpit. The translation of what tinted means is that it is zinc chromate with a touch of black and some aluminium powder, the addition of which turns it to a more green hue. Later B-25Js were painted in interior green in the same areas.

Here is the page from the Maintenance and Erection Manual that covers the interior finishes for "Early Aircraft" The manual covers the J model, but there was no change in this spec, and I've confirmed this in photos - specifically the Lake Murray B-25C recovered recently. Earlier M E for the C D do not cover the interior finishes.

There I was thinking that AM had done all my research for me and I could just concentrate on the build! Blah!:rolleyes:

Well, as it stands at the moment I've more or less completed the interior, so I'm going to stick with ZC in the interests of getting this bird done on time. Live and learn.

Cheers

Peter
 

Attachments

  • 01-60GE-2-456p.jpg
    01-60GE-2-456p.jpg
    137.1 KB · Views: 102
Nice find Peter. The tinted ZC did look very like IG, as I mentioned, and this is what was in the rear section of the B25C I photographed, although it looks darker in the pics. I was wrong about the assembly plant being Inglewood, although there was only one B35 factory - at Kansas City.
When the model is closed up, not much of the rear fuselage interior will be visible, so nothing lost really. Looking forward to the rest of the build, it's a great kit which I will get some day, to accompany a RAF Mitchell III. It's just increased in price in the UK, from around £32 to £45 - I should have got it when my local shop had it for £27 !!
 
Progress this week end.

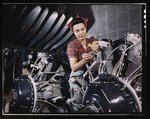
Pic 1 Reference photo for the Engine detail painting. (Source: US Library of Congress)
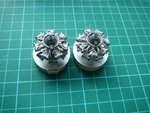
Pic 2 Engines painted and assembled. I'll add some dirt and grime to finish later.
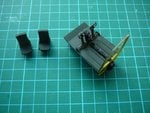
Pic 3 Navigators Station. The navigator sat on this "riding seat" which was mounted on a plywood board. It folded over to form a map table.
Pic 4 Upper Turrent gun assembled. The ammunition feeds were painted aluminum and brass and highlighted with a 0.1 fine tip pen.
Pic 5 Rear of turrent showing bicycle seat and spent case bags. I had to fill two big slots in the bags before painting.
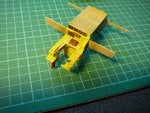
Pic 6 Work so far on pilots seats and controls. I'm doing the instrument panel separately.
Pic 7 Radio Station so far.
Pic 8 Radio operators seat.
 

Attachments

  • turrent 003 - resized.jpg
    turrent 003 - resized.jpg
    95.7 KB · Views: 131
  • turrent 002 - resized.jpg
    turrent 002 - resized.jpg
    74.8 KB · Views: 126
  • navigator 003 - resized.jpg
    navigator 003 - resized.jpg
    123.8 KB · Views: 110
  • engines 003 - resized.jpg
    engines 003 - resized.jpg
    126.1 KB · Views: 113
  • Engine assembly.jpg
    Engine assembly.jpg
    123.5 KB · Views: 114
  • cockpit 001 - resized.jpg
    cockpit 001 - resized.jpg
    120.6 KB · Views: 117
  • radio 001 - resized.jpg
    radio 001 - resized.jpg
    116.8 KB · Views: 127
  • radio 003 - resized.jpg
    radio 003 - resized.jpg
    125.5 KB · Views: 134
Superb job Peter! Here's a few pics which might be useful. Note that the instrument panel is original, with the exception of the centrally mounted Rad/Nav fit.
If you need them, I can post pics of the Instrument Panel, throttle pedestal, floor and side wall controls, from the Pilot's Notes.
 

Attachments

  • Mitchell 019.jpg
    Mitchell 019.jpg
    72.2 KB · Views: 140
  • Mitchell 018.jpg
    Mitchell 018.jpg
    66.3 KB · Views: 133
  • Mitchell 016.jpg
    Mitchell 016.jpg
    83.2 KB · Views: 137
  • Mitchell 021.jpg
    Mitchell 021.jpg
    88.7 KB · Views: 134
  • Mitchell 007.jpg
    Mitchell 007.jpg
    95.5 KB · Views: 151
  • Mitchell 020.jpg
    Mitchell 020.jpg
    51.3 KB · Views: 129
Thanks Guys

Terry, great pics and very helpful, cheers. I have the Pilot's Flight Operating Instructions Dash One together with several versions of the maintenance manual Dash Two, so I'm well covered. I just don't read them:oops::D
LOL.

Instrument panel.

No decals with the kit (and there should have been!), so....

Pic 1 The kit panel is molded in clear. Very handy. Painted the rear white.

Pic 2 The front I painted black and using a pin, scratched through the black paint to mark the dials so the white shows through.

Pic 3 Added dobs of clear to the instrument faces, some detailing in white and red, and dry brushed with silver to simulate wear and tear.

Cheers
 

Attachments

  • cockpit 003 - resized.jpg
    cockpit 003 - resized.jpg
    119.9 KB · Views: 124
  • cockpit 002 - resized.jpg
    cockpit 002 - resized.jpg
    134.2 KB · Views: 109
  • cockpit 004 - resized.jpg
    cockpit 004 - resized.jpg
    139.1 KB · Views: 126

Users who are viewing this thread

Back