Navigation
Install the app
How to install the app on iOS
Follow along with the video below to see how to install our site as a web app on your home screen.
Note: This feature may not be available in some browsers.
More options
You are using an out of date browser. It may not display this or other websites correctly.
You should upgrade or use an alternative browser.
You should upgrade or use an alternative browser.
**** DONE: 1/48 Ju 88 A-4 - Winter War / Eastern Front WWII
- Thread starter Donivanp
- Start date
Ad: This forum contains affiliate links to products on Amazon and eBay. More information in Terms and rules
More options
Who Replied?- Thread starter
- #22
Donivanp
Lieutenant Colonel
Cool thanks every one.
JKim
Senior Master Sergeant
Should be a very interesting build with all of the aftermarket goodies. Is that a vacuform canopy? I've always wondered how those are utilized... i.e. how are they cut from the backing?
- Thread starter
- #24
Donivanp
Lieutenant Colonel
Yes it is part of the CMK cockpit set, It's not super hard to work with really. there are a couple of ways to cut form the main board. first is to cut straight down and then sand the rim. That is not bad unless it is a large part. second and best (to my way of thinking) is to cut around the edge of the part at a steep (45 deg or steeper) and it save the sanding for the most part.Is that a vacuform canopy? I've always wondered how those are utilized... i.e. how are they cut from the backing?
dneid
Staff Sergeant
Looking forward to this one, Don. You just might motivate me to drag my Ju-88off the stack. And, Ii do like that bellied in dio idea (better you than me!)
- Thread starter
- #26
Donivanp
Lieutenant Colonel
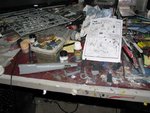
Well I have been remiss I guess. I started yesterday after getting the Kingfisher posted.
I was not sure if I wanted to use the add in cockpit from CMK, I am not a big fan of PE and it was really testing my nerve looking at all the little PE parts, The Carpet monster is calling for a sacrifice already it has gotten one. After trying out the kit cockpit and comparing it with the CMK, CMK won hands down. There simply is not comparison between the two, I doubt I will use the Vacume form canopy and nose though. There are some things the kit is better at. The guns will be from the kit for instance.
I started with step two which was to build the aft fuselage first. As I mention the carpet monster ate a small plug for the aft of the aft fuselage. I found it three times, the forth it was fully gone. First time I was crawling around and though it gone and found it stuck to my knee. Well any way, I cut a section of sprue and stuck it int he hole and be done with it. Damn near lost some small clear parts.
I attached the tail wheel mount as instructed but did not put on the tail wheel. I was trying to avoid this as I have had too many broken over the years and I don't like to attach anything hanging off till the last moment. I wanted to avolid the clear parts as well but I could not see how to avoid them, I like to paint and then put on clear if possible. The DF antenna has a clear housing and there are two antenna insulators aft of that as well as one on the bottom left side of the fuselage.
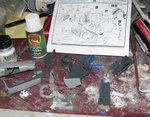
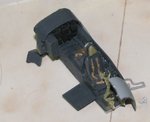
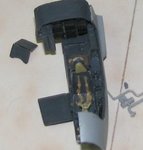
I then started the kit cockpit to see how it looked as it did not look too bad in the parts tree. Just a little showed me to be right in buying the CMK. I started by painting everything a healthy coating of RML 66 and will start to deatil from there. So here we are.
Attachments
Crimea_River
Marshal
Doin' OK.
Cool!
Lucky13
Forum Mascot
Good stuff!
- Thread starter
- #31
Donivanp
Lieutenant Colonel
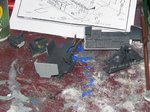
Engine controls were driving me batty! I hate tiny PE and though I thought thy looked good, between tweezers pop offs (parts flying out of the tweezers as I tried to put in place) and just plain frustration and loss of the PE. I got my DREMEL out and modified the CMK to take the kit controls.
Attachments
Crimea_River
Marshal
Coming along well though, despite the pings.
Vic Balshaw
Major General
Doing good mate and between you and me, there's a lot of model debris floating around in cyber space.
- Thread starter
- #35
Donivanp
Lieutenant Colonel
JKim
Senior Master Sergeant
Nice cockpit! I also have a horrible time with those small PE parts!
Crimea_River
Marshal
The control column and pedals would have all been RLM 66 like the rest of the pit. Otherwise good.
- Thread starter
- #39
Donivanp
Lieutenant Colonel
Thanks Andy, I had just put them in and not painted as yet, the tan is the resin color.
Vic Balshaw
Major General
Good effort Don.
Users who are viewing this thread
Total: 1 (members: 0, guests: 1)

