- Thread starter
- #61
ozhawk40
Master Sergeant
Today's Update
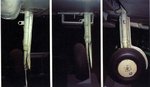
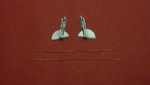
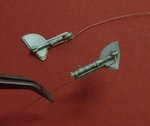
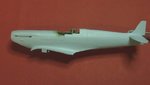
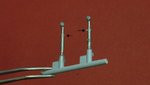
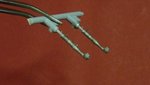
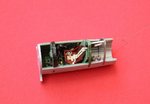
Pic 1-3
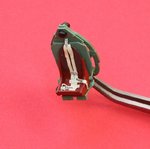
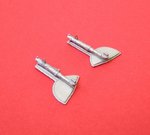
Work on the undercarriage legs continues with the addition of the oleo locking rods. These are a distinctive feature on the front face of the leg and were installed between the oil fill plug and the lower gland nut. The object was to prevent anybody removing the lower gland with the strut under pressure. Risk of death and damage I suspect. I started with adding the lower connector with brass rod, and then used copper wire and CA to install them around the front face. Pic 3 is finished strut installed on the door.
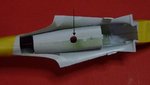
Pic 4
The lower light was painted clear amber.
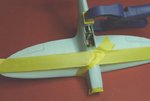
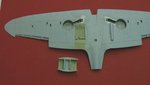
Pic 5
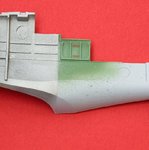
Painted the interior of the radiator scoops "Sky" prior to installation of the scoops themselves. Radiators were painted aluminium.
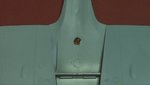
Pic 6
Airfix provide the decals for the cockpit door. Too small to read, but there ya go!
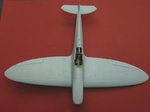
Pic 7
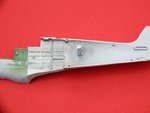
I preparation for the seatbelt wires I have added a sprue further down the fuselage.
Pic 8
This is the seat with the Sutton harness installed. These are the new type of "Superfabric" belts from Eduard installed as per their directions. The weave looks a bit over scale to be honest, but they did go in nicely. The starboard lap belt goes through a slot on the side of the seat rather than over the lip of the seat.
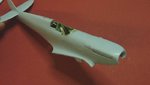
Pic 9 10
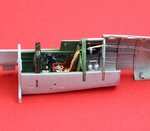
This is the seat installed into the cockpit tub. I've attached copper wire (painted) to the belts and taken those back to the sprue previously affixed inside the fuselage. I've also added the oxygen bottle, and it's basically ready for close up.
Thanks for dropping by. 8)
Cheers
Peter
Pic 1-3
Work on the undercarriage legs continues with the addition of the oleo locking rods. These are a distinctive feature on the front face of the leg and were installed between the oil fill plug and the lower gland nut. The object was to prevent anybody removing the lower gland with the strut under pressure. Risk of death and damage I suspect. I started with adding the lower connector with brass rod, and then used copper wire and CA to install them around the front face. Pic 3 is finished strut installed on the door.
Pic 4
The lower light was painted clear amber.
Pic 5
Painted the interior of the radiator scoops "Sky" prior to installation of the scoops themselves. Radiators were painted aluminium.
Pic 6
Airfix provide the decals for the cockpit door. Too small to read, but there ya go!
Pic 7
I preparation for the seatbelt wires I have added a sprue further down the fuselage.
Pic 8
This is the seat with the Sutton harness installed. These are the new type of "Superfabric" belts from Eduard installed as per their directions. The weave looks a bit over scale to be honest, but they did go in nicely. The starboard lap belt goes through a slot on the side of the seat rather than over the lip of the seat.
Pic 9 10
This is the seat installed into the cockpit tub. I've attached copper wire (painted) to the belts and taken those back to the sprue previously affixed inside the fuselage. I've also added the oxygen bottle, and it's basically ready for close up.
Thanks for dropping by. 8)
Cheers
Peter
Attachments
-
 Dscf1172.jpg73.9 KB · Views: 119
 -
 P1040458.jpg29.6 KB · Views: 133
 -
 P1040460.jpg35.7 KB · Views: 119
 -
 P1040463.jpg32.5 KB · Views: 130
 -
 P1040465.jpg32 KB · Views: 121
 -
 Dscf1185.jpg101.8 KB · Views: 112
 -
 Dscf1188.jpg61.1 KB · Views: 122
 -
 Dscf1186.jpg71.8 KB · Views: 128
 -
 Dscf1193.jpg81.3 KB · Views: 117
 -
 Dscf1178.jpg60.4 KB · Views: 112
Last edited:
") ) and get a bit more done on the Spitty.
) and get a bit more done on the Spitty.