- Thread starter
- #81
ozhawk40
Master Sergeant
Thanks Terry
It was a very interesting time in the development of radio and radar within the backdrop of the battle. It's difficult to pin it down, but I'll go through what I've found.
I've had a bit of a snoop at the collective internet wisdom on the matter and source documents weren't popping out at me, but there is a good summary on the variations on "The Spitfire Site".
http://spitfiresite.com/2010/04/spitfire-masts-and-aerials.html/2
There are four possible combinations for Battle of Britain Spitfires.
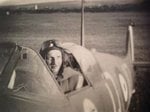
X4009 appears had the triangular prong, indicating that it was fitted with the HF TR.9D radio. N3277 AZ-H a.k.a. Dirty Dick also had the TR.9D radio (that's confirmed in the photos I've previously posted and it also did not have IFF Mk.1). This aircraft was captured four days before the arrival of X4009 at 234 Squadron, so it makes sense that they would deliver the spitfire X4009 from the MU with the radio fitment that the squadron was using at the time.
It appears from what I've read, having the TR.9D meant that the IFF Mk.1 was not fitted and confirmed by the photo. Nothing concrete on this but anecdotal evidence that the IFF Mk.1 interfered with the HF sets when installed in bomber aircraft, and besides it's noted that is was not one of the options as per the list above.
So what I get from this is that fitting IFF Mk.1 was done either in conjunction with fitting VHF sets or after wards.
Another interesting point was that the TR.9D radios were teamed with the remote contactor code named "Pip Squeak" that broadcast 15 seconds in every sixty on a set channel so that the position of the aircraft could be established by ground station triangulation (radio direction finding). It's through this system that fighter aircraft locations were tracked during the Battle of Britain and that the use of IFF Mk.1 was mostly after the battle, with the sets being incorporated into production Spitfires in December 1940 (but installed by MU's prior starting in late September/ October 1940).
For X4009 to be fitted with VHF and IFF meant that it would have needed to return to a MU, and my assumption is that this probably did not occur in the three short weeks that X4009 was with 234S, and IFF Mk.1 was not available generally until late September, after the loss of X4009.
So my decision on this is HF radios, no IFF Mk.1 as a consequence.
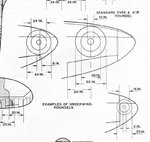
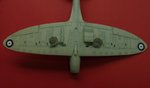
Well now, onto under wing roundels. 8)
Cheers
Peter
It was a very interesting time in the development of radio and radar within the backdrop of the battle. It's difficult to pin it down, but I'll go through what I've found.
I've had a bit of a snoop at the collective internet wisdom on the matter and source documents weren't popping out at me, but there is a good summary on the variations on "The Spitfire Site".
http://spitfiresite.com/2010/04/spitfire-masts-and-aerials.html/2
There are four possible combinations for Battle of Britain Spitfires.
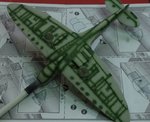
- Early rod mast, HF TR 9 radio with wire to the rudder.
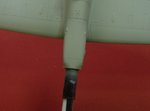
- Tapered mast with triangular prong, TR 9 radio with wire from fuselage to mast and from mast to rudder.
- Tapered mast without triangular prong, VHF TR 1133 radio, no wire although the rudder post may still be fitted.
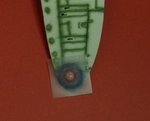
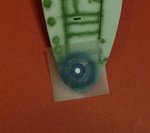
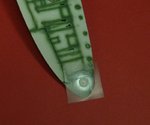
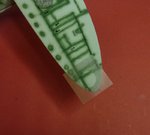
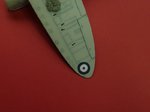
- Ditto 3; IFF fitted wires running from fuselage roundel to leading edge of tailplane tips. An insulator in the form off a small dot is visible just forward of upper part of the red centre spot.
X4009 appears had the triangular prong, indicating that it was fitted with the HF TR.9D radio. N3277 AZ-H a.k.a. Dirty Dick also had the TR.9D radio (that's confirmed in the photos I've previously posted and it also did not have IFF Mk.1). This aircraft was captured four days before the arrival of X4009 at 234 Squadron, so it makes sense that they would deliver the spitfire X4009 from the MU with the radio fitment that the squadron was using at the time.
It appears from what I've read, having the TR.9D meant that the IFF Mk.1 was not fitted and confirmed by the photo. Nothing concrete on this but anecdotal evidence that the IFF Mk.1 interfered with the HF sets when installed in bomber aircraft, and besides it's noted that is was not one of the options as per the list above.
So what I get from this is that fitting IFF Mk.1 was done either in conjunction with fitting VHF sets or after wards.
Another interesting point was that the TR.9D radios were teamed with the remote contactor code named "Pip Squeak" that broadcast 15 seconds in every sixty on a set channel so that the position of the aircraft could be established by ground station triangulation (radio direction finding). It's through this system that fighter aircraft locations were tracked during the Battle of Britain and that the use of IFF Mk.1 was mostly after the battle, with the sets being incorporated into production Spitfires in December 1940 (but installed by MU's prior starting in late September/ October 1940).
For X4009 to be fitted with VHF and IFF meant that it would have needed to return to a MU, and my assumption is that this probably did not occur in the three short weeks that X4009 was with 234S, and IFF Mk.1 was not available generally until late September, after the loss of X4009.
So my decision on this is HF radios, no IFF Mk.1 as a consequence.
Well now, onto under wing roundels. 8)
Cheers
Peter