meatloaf109
1st Lieutenant
yep, she's looking good!
Follow along with the video below to see how to install our site as a web app on your home screen.
Note: This feature may not be available in some browsers.
Ad: This forum contains affiliate links to products on Amazon and eBay. More information in Terms and rules
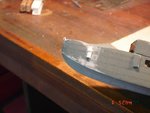
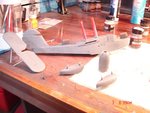
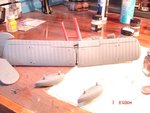
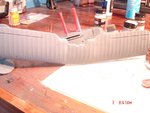
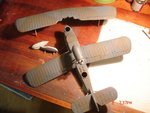
") I have been in the shop already working letting some more carpenters glue dry ATTM.I also started laying down some of the Duck egg Blue last night.It seems I will have to paint the camo first,assemble the engine nacelle,attach and rig,pontoons onto the wings and rig.attach the lower wings and then the upper last.The rigging in small places(pontoons,above engine) is going to have to be line for one has to precise on the angle of the drill to make the wire work almost impossible but I am getting close. for my vacation starts when I punch tonight @10PM and a couple of Wisers Whiskey have ensued.Cheers Fellas
I have been in the shop already working letting some more carpenters glue dry ATTM.I also started laying down some of the Duck egg Blue last night.It seems I will have to paint the camo first,assemble the engine nacelle,attach and rig,pontoons onto the wings and rig.attach the lower wings and then the upper last.The rigging in small places(pontoons,above engine) is going to have to be line for one has to precise on the angle of the drill to make the wire work almost impossible but I am getting close. for my vacation starts when I punch tonight @10PM and a couple of Wisers Whiskey have ensued.Cheers FellasIt was done in order to retain a balanced airflow over the tail surfaces. The short distance between the propeller shaft centre-line and aft fuselage top-decking led to the use of a small in diamater four-blade prop to take an adventage of the available power. The hub was thus only about ten feet from the intersection of the fin and the tailplane. Therefore the engine nacelle was angled to starboard what was more suitable solution in a low-speed aircraft than more common cambering of a fin and rudder.