**** DONE: Bf109E4 'White 6' I/JG3 BoB Group Build.

Ad: This forum contains affiliate links to products on Amazon and eBay. More information in Terms and rules
The sun came out today ! But it was only 8 degrees, and I'm bl**dy stiff and sore!
So, I tried to get on with some modelling, which took about six hours instead of around two to three! But at least I got all the filing, sanding and masking done, and the first coat of primer applied.
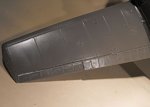
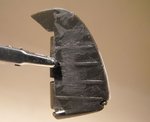
PIC 1. Shows the rudder in preparation, with the ribs being filed and sanded to reduce the heavy appearance, and the actuator control horns fitted, made from thin plastic card, cut and filed to shape. Also just visible on the trailing edge, is the fixed trim tab, often missed by modellers of the 'E' and 'F' variant, and also often omitted from scale drawings. Again, this is thin, shaped plastic card, representing the thin aluminium tab which was set by hand, and the reason for the 'Nicht Anfassen' warning stencil seen on the Emil's rudder.
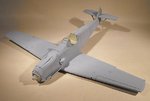
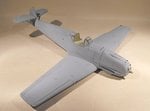
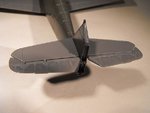
PICS 2 and 3. The elevators and ailerons have been fitted, after sanding down the heavy rib detail, and are slightly offset to correspond with the position of the control column.
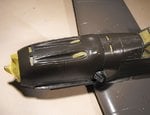
PIC 4. The apertures in the cowlings have been masked on the inside, ready for spraying. This has caused a very slight misfit with the cowlings in place, but nothing which will have any detrimental effect.
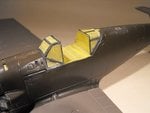
PIC 5. Slightly different from my usual masking method, the windscreen and rear glazing have been masked for spraying, with the cockpit opening sealed all around with Tamiya tape. Just visible is the small area of the lower windscreen frame which needed some careful sanding to reduce a slight lip.
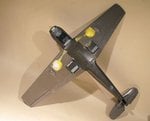
PIC 6. All the underside apertures have been sealed and masked, ready for painting. The tail wheel well has yet to be plugged with damp tissue.
PICS 7 and 8. The first primer coat has been sprayed, in order to provide an even tone overall, covering the different coloured plastics, and also to partly fill some of the relatively heavy panel and hatch detail. The engraved detail looks quite heavy at first, but even after this first thin coat, the appearance has been improved considerably. Those areas which require a little more in the way of filling, will receive another dusting, and any small gaps or blemishes will be attended to.
So, the next stage is to ensure the model is smooth and even overall, before the first step in the painting sequence, which will be the application of the RLM 65. With a bit of luck, I should get this done in the next day or so, and I'll post some more pics then. Thanks again for your interest and kind comments.
 

Attachments

  • BoB Build 2 167.jpg
    BoB Build 2 167.jpg
    36.3 KB · Views: 78
  • BoB Build 2 168.jpg
    BoB Build 2 168.jpg
    34.6 KB · Views: 75
  • BoB Build 2 174.jpg
    BoB Build 2 174.jpg
    25.2 KB · Views: 75
  • BoB Build 2 170.jpg
    BoB Build 2 170.jpg
    35.1 KB · Views: 78
  • BoB Build 2 171.jpg
    BoB Build 2 171.jpg
    39.5 KB · Views: 79
  • BoB Build 2 172.jpg
    BoB Build 2 172.jpg
    31.8 KB · Views: 77
  • BoB Build 2 177.jpg
    BoB Build 2 177.jpg
    23.7 KB · Views: 77
  • BoB Build 2 178.jpg
    BoB Build 2 178.jpg
    24.3 KB · Views: 77
Sorry to hear you're poorly agin, Terry. Nevertheless, following your build with great interest. Looking very good to date. Very interested to know how you'll treat the open canopy. Referring back to your kit review of the Matchbox 109 and your concern about the frame in the side of the canopy, I checked some old photos I took at RAF Museum, Hendon. Apologies for the camera shake, but I didn't have a flash on the day and it's very low light in the BoB hall. However, it seems that there is a painted frame visible centre canopy. What do you think? I'm hoping to get back there again pre Christmas, so I'll make sure that I get better reference shots of the 109 for my own build, although i'm sure that won't be much use to you on this build.
 

Attachments

  • Hendon Bf109.jpg
    Hendon Bf109.jpg
    67.2 KB · Views: 92
Thanks very much guys.The primer has shown up a couple of very small areas which needed a bit of attention, and that's now been done. I've also added another thin shim to the upper horizontal joint of the saddle cowling, on the port side, which has really improved things.
Gerry, I've got some good shots of the Hendon '109E, flown by Wolfgang Teumer, which I took in the late 1980s, when the lighting conditions and access were much better. It has indeed got a metal central frame, which is incorrect for the E3/E4 'square' canopy. This should have two pieces of Perspex on each side, without a central vertical frame.The forward section on each side could be slid back, rather like the windows on a Series III Land Rover. The top panel was one piece, again without a central frame. From what I remember, when Teumer's 'Emil' was restored for display at RAF St. Athan, either the canopy had gone missing over the years, or had been jettisoned and badly damaged when it force-landed at Manston, so a Bf109G canopy was substituted to at least complete the restoration.
To answer the question regarding what I'll do for the kit's canopy, I could scratch-build one, as I did with the other Matchbox kit. But, as this involved building 38 separate pieces, and a lot of time, I'll be using the central section from the Hasegawa kit on this one, posed open. If posed in the closed position, it doesn't quite match the profile of the Matchbox windscreen and rear glazing, and the Hasegawa parts for these are too narrow to fit the Matchbox cockpit, without a lot of modification to the fuselage. If you're buidling the Matchbox kit, then I'd suggest either a Squadron vac-form canopy, or the excellent Radu Briznan PE canopy set.
 
Thanks Terry. This just demonstrates how easy it is for the casual builder to be misled. I would have thought that an Air Museum would be an accurate source for reference. Just goes to show the importance of expertise and diligent research. Thanks for the heads-up, I've taken it on board.
 
Always double check as much as possible when it comes to restored aircraft - especially Luftwaffe!
As the availability of spares and parts isn't as widespread as it might be for 'allied' aircraft, there are quite often discrepancies. A very common one, shown on nearly all kits of the Bf109 and FW190, are the bare oleos. Bear in mind many kits are designed after reference to a museum restored example, and in most cases, the 'corrugated' leather or rubber 'boots' over the oleos have either rotted or were lost many years ago, leaving the shiny oleo legs visible. These are then faithfully reproduced in the kit, which, of course, is inaccurate !
Over the years, I've heard many comments regarding the Bf109E canopy design, most of which sound something like "But the RAF Museum '109 has a central frame...", and even "But the '109s in the BoB movie had a frame"!
It must be remembered that this particular '109 was restored, and very well presented, back in the late 1960s and early 1970s, when parts etc were not as easy to find as they are today, relatively speaking, and it was done in 'Service' time, and at RAF expense, as an exercise. If done 'today', there's a strong possibility that an accurate canopy would have been hand-made, at whatever fairly large cost. Things have changed considerably in the war bird restoration world over recent years,with some owner/operators going to extreme lengths to maintain accuracy wherever possible, within operational limits, but small 'niggles' still crop up, often by 'over accurate' reproduction. A common one is the inclusion of the antenna wire, from the fin, through the canopy, on a P51D painted to represent a machine of the 8th USAAF. There wasn't one! The radios had changed to the later VHF sets, with the antenna integral to the radio mast !
Bottom line is - by all means use museum exhibits for basic reference, but when it comes down to detail, then research, not only into the aircraft, but the theatre of operations and period, is essential, if accuracy is required.
 
Nice bit of modelling Terry despite the cold. Hope it warms up a bit for you though from what I see on the TV, your having an early winter this year.
 
Thanks Vic. I think you're right there, it's already colder and 'duller' than usual for this time of year, with night-time temperatures already hitting the 1 degree and zero mark. I have a feeling it's going to be a harsh one. OK, not as cold as some places on this planet, but add the damp and the wind, and it's bl**dy miserable, as you probably remember !
I really should move to a better climate, but a bit late now I guess.
 

Users who are viewing this thread

Back